NARWHAL
NARWHAL — Neoantigens Recognition Website and HLA Genotyping Tool
Start Neoantigen Start HLA typingStep-by-Step Guide
Neoantigen Identification
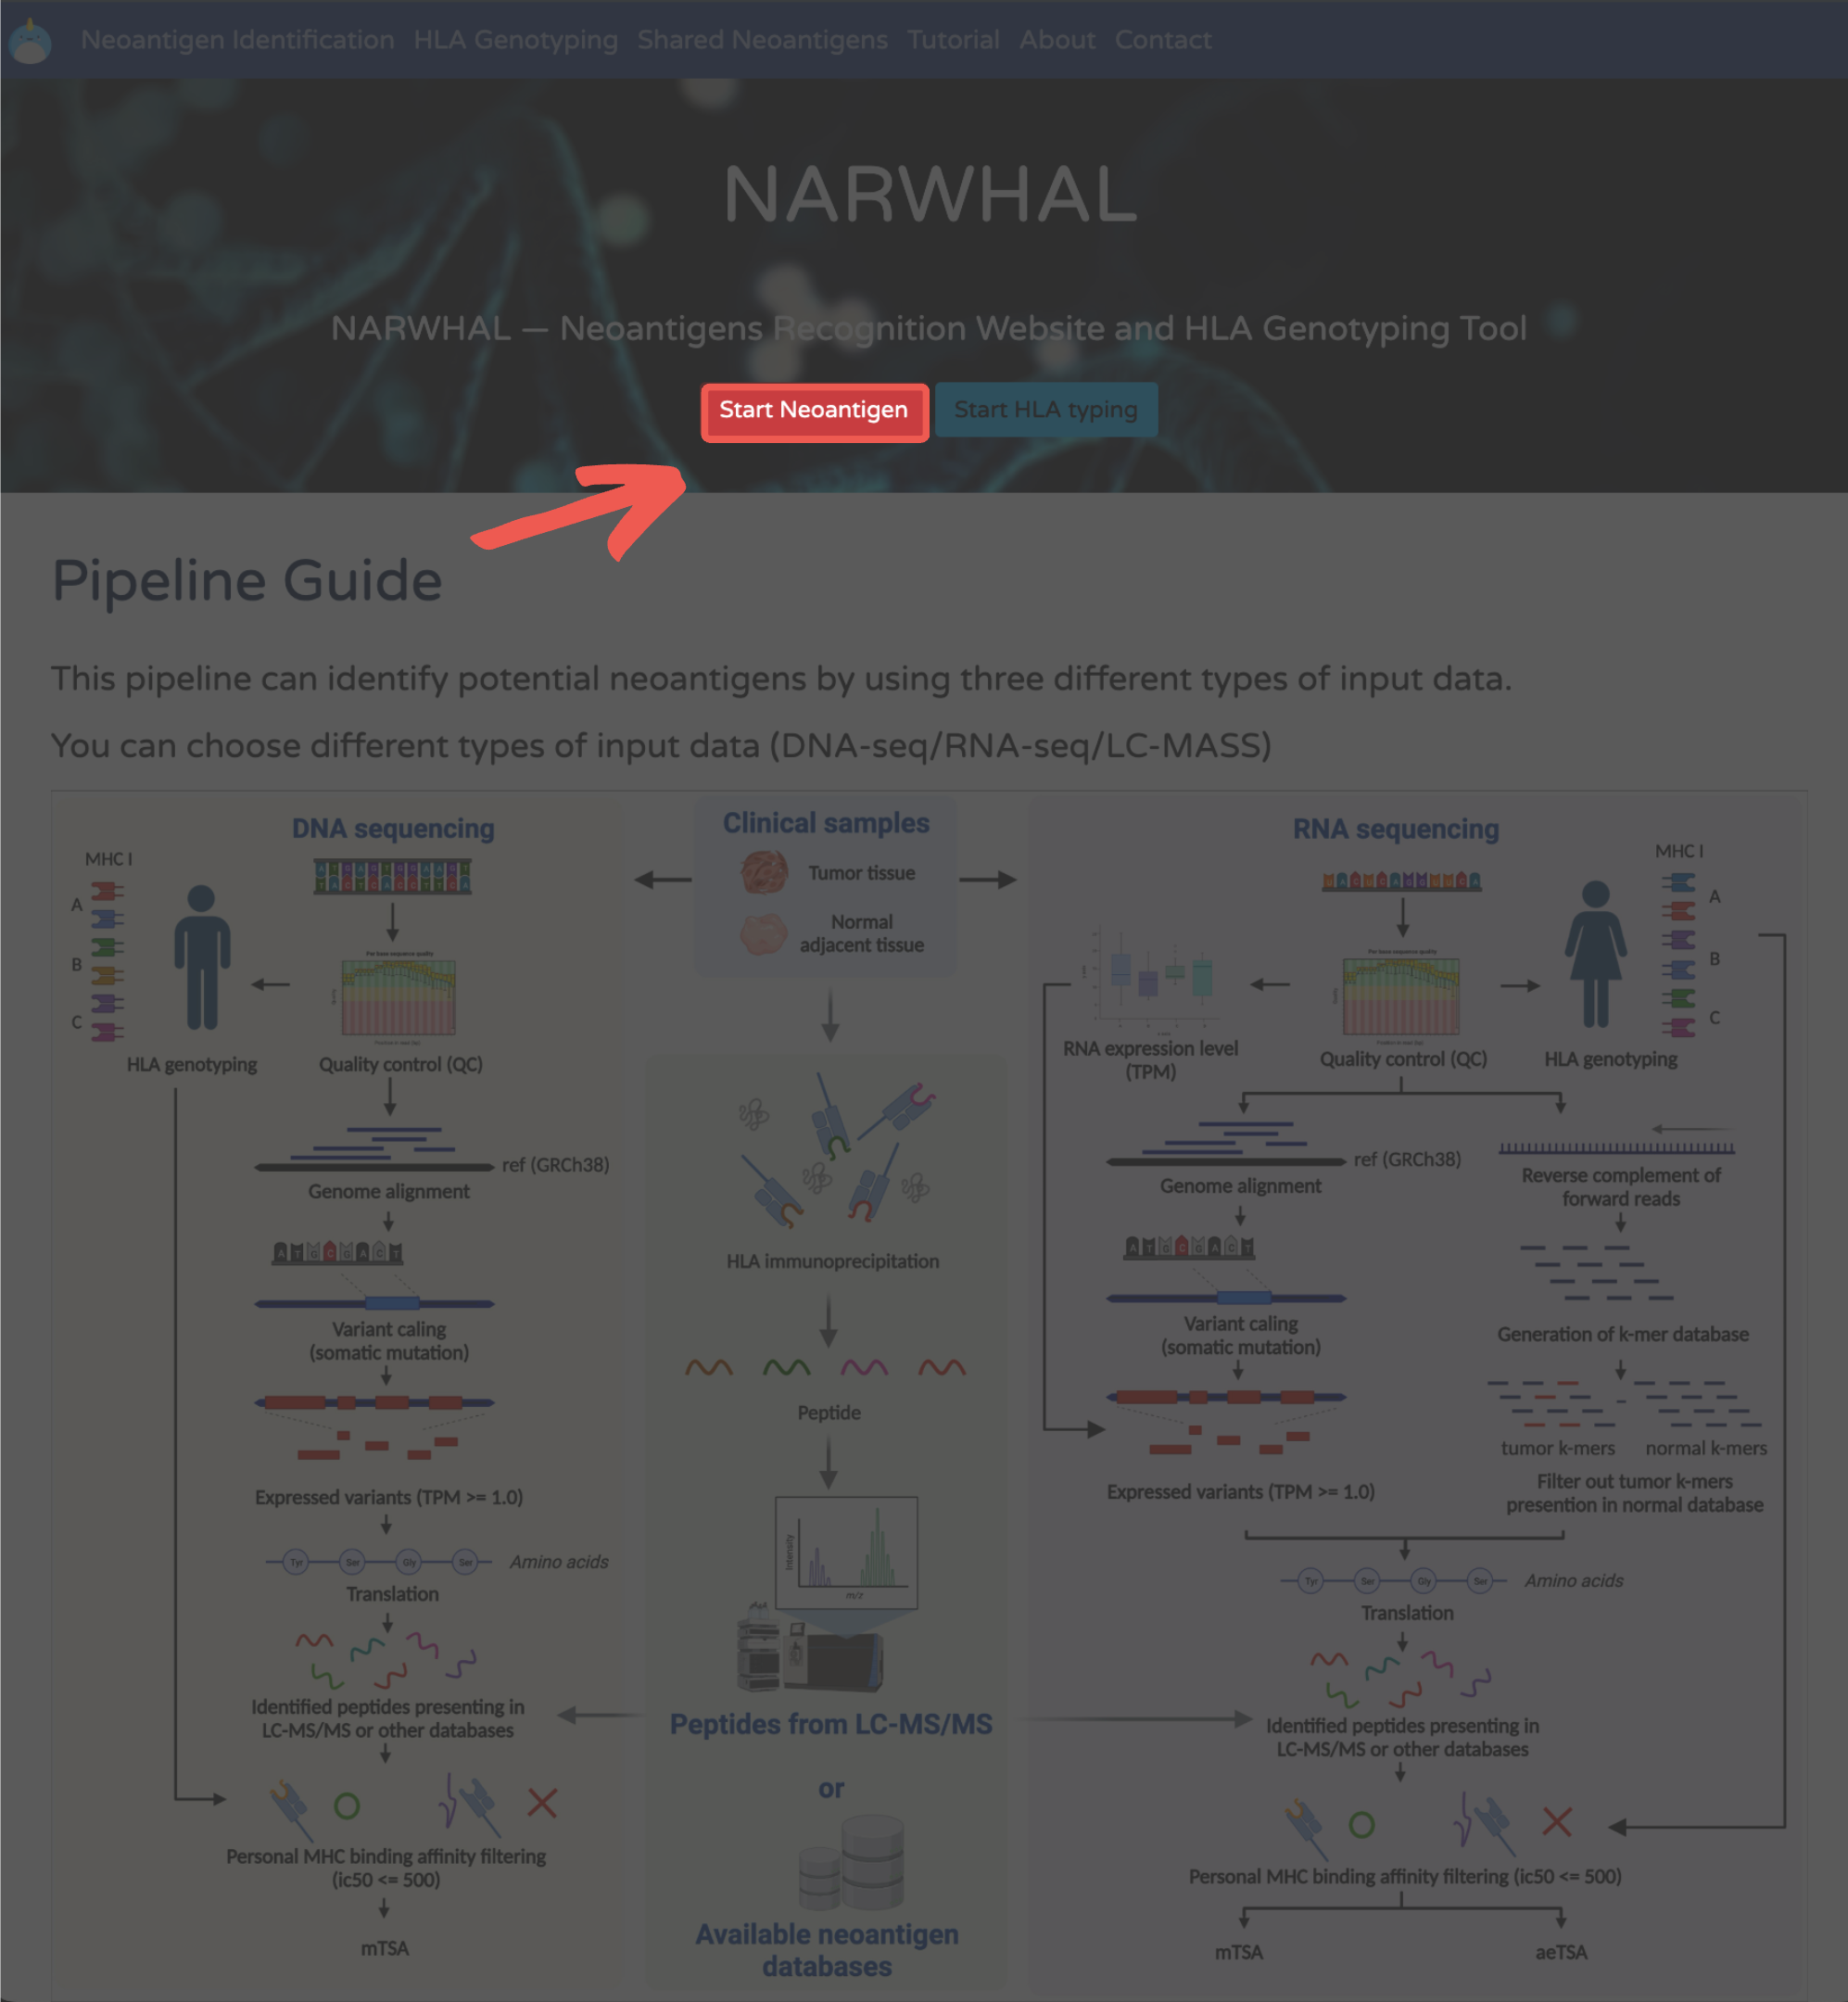
1. Enter NARWHAL: Click "Start Neoantigen".
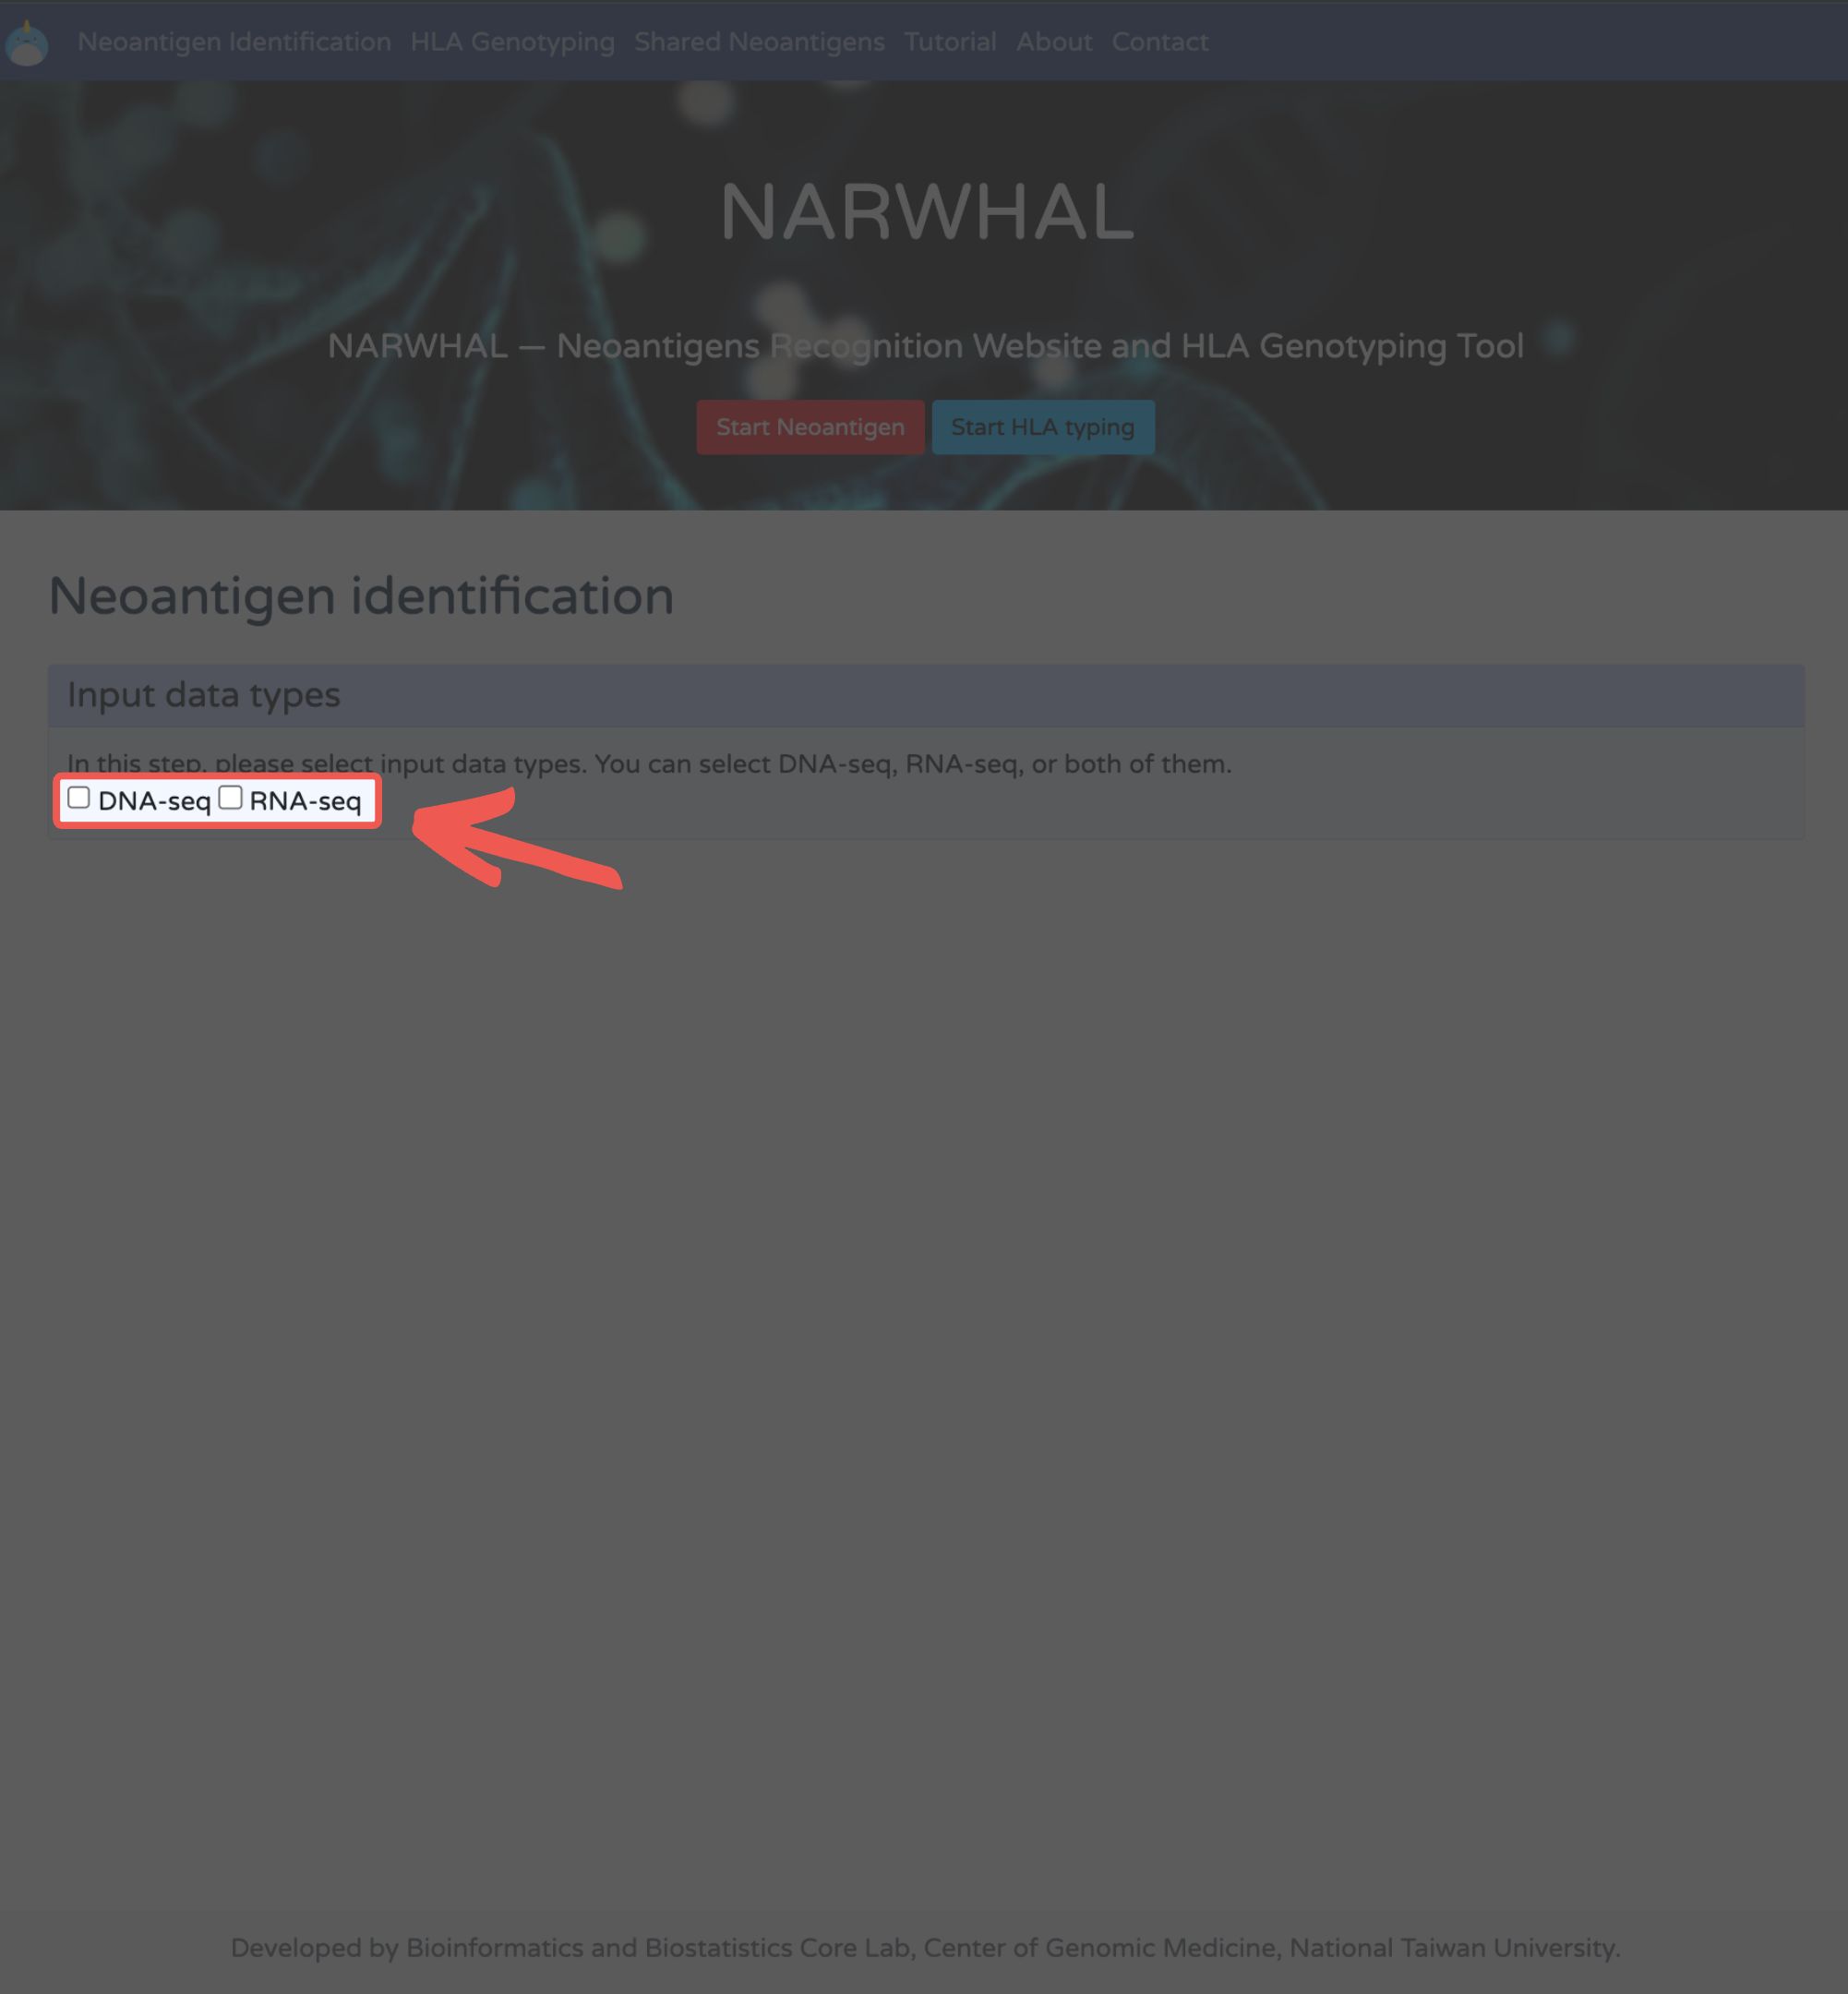
2. Choose Data Types: Select DNA-seq, RNA-seq, or both.
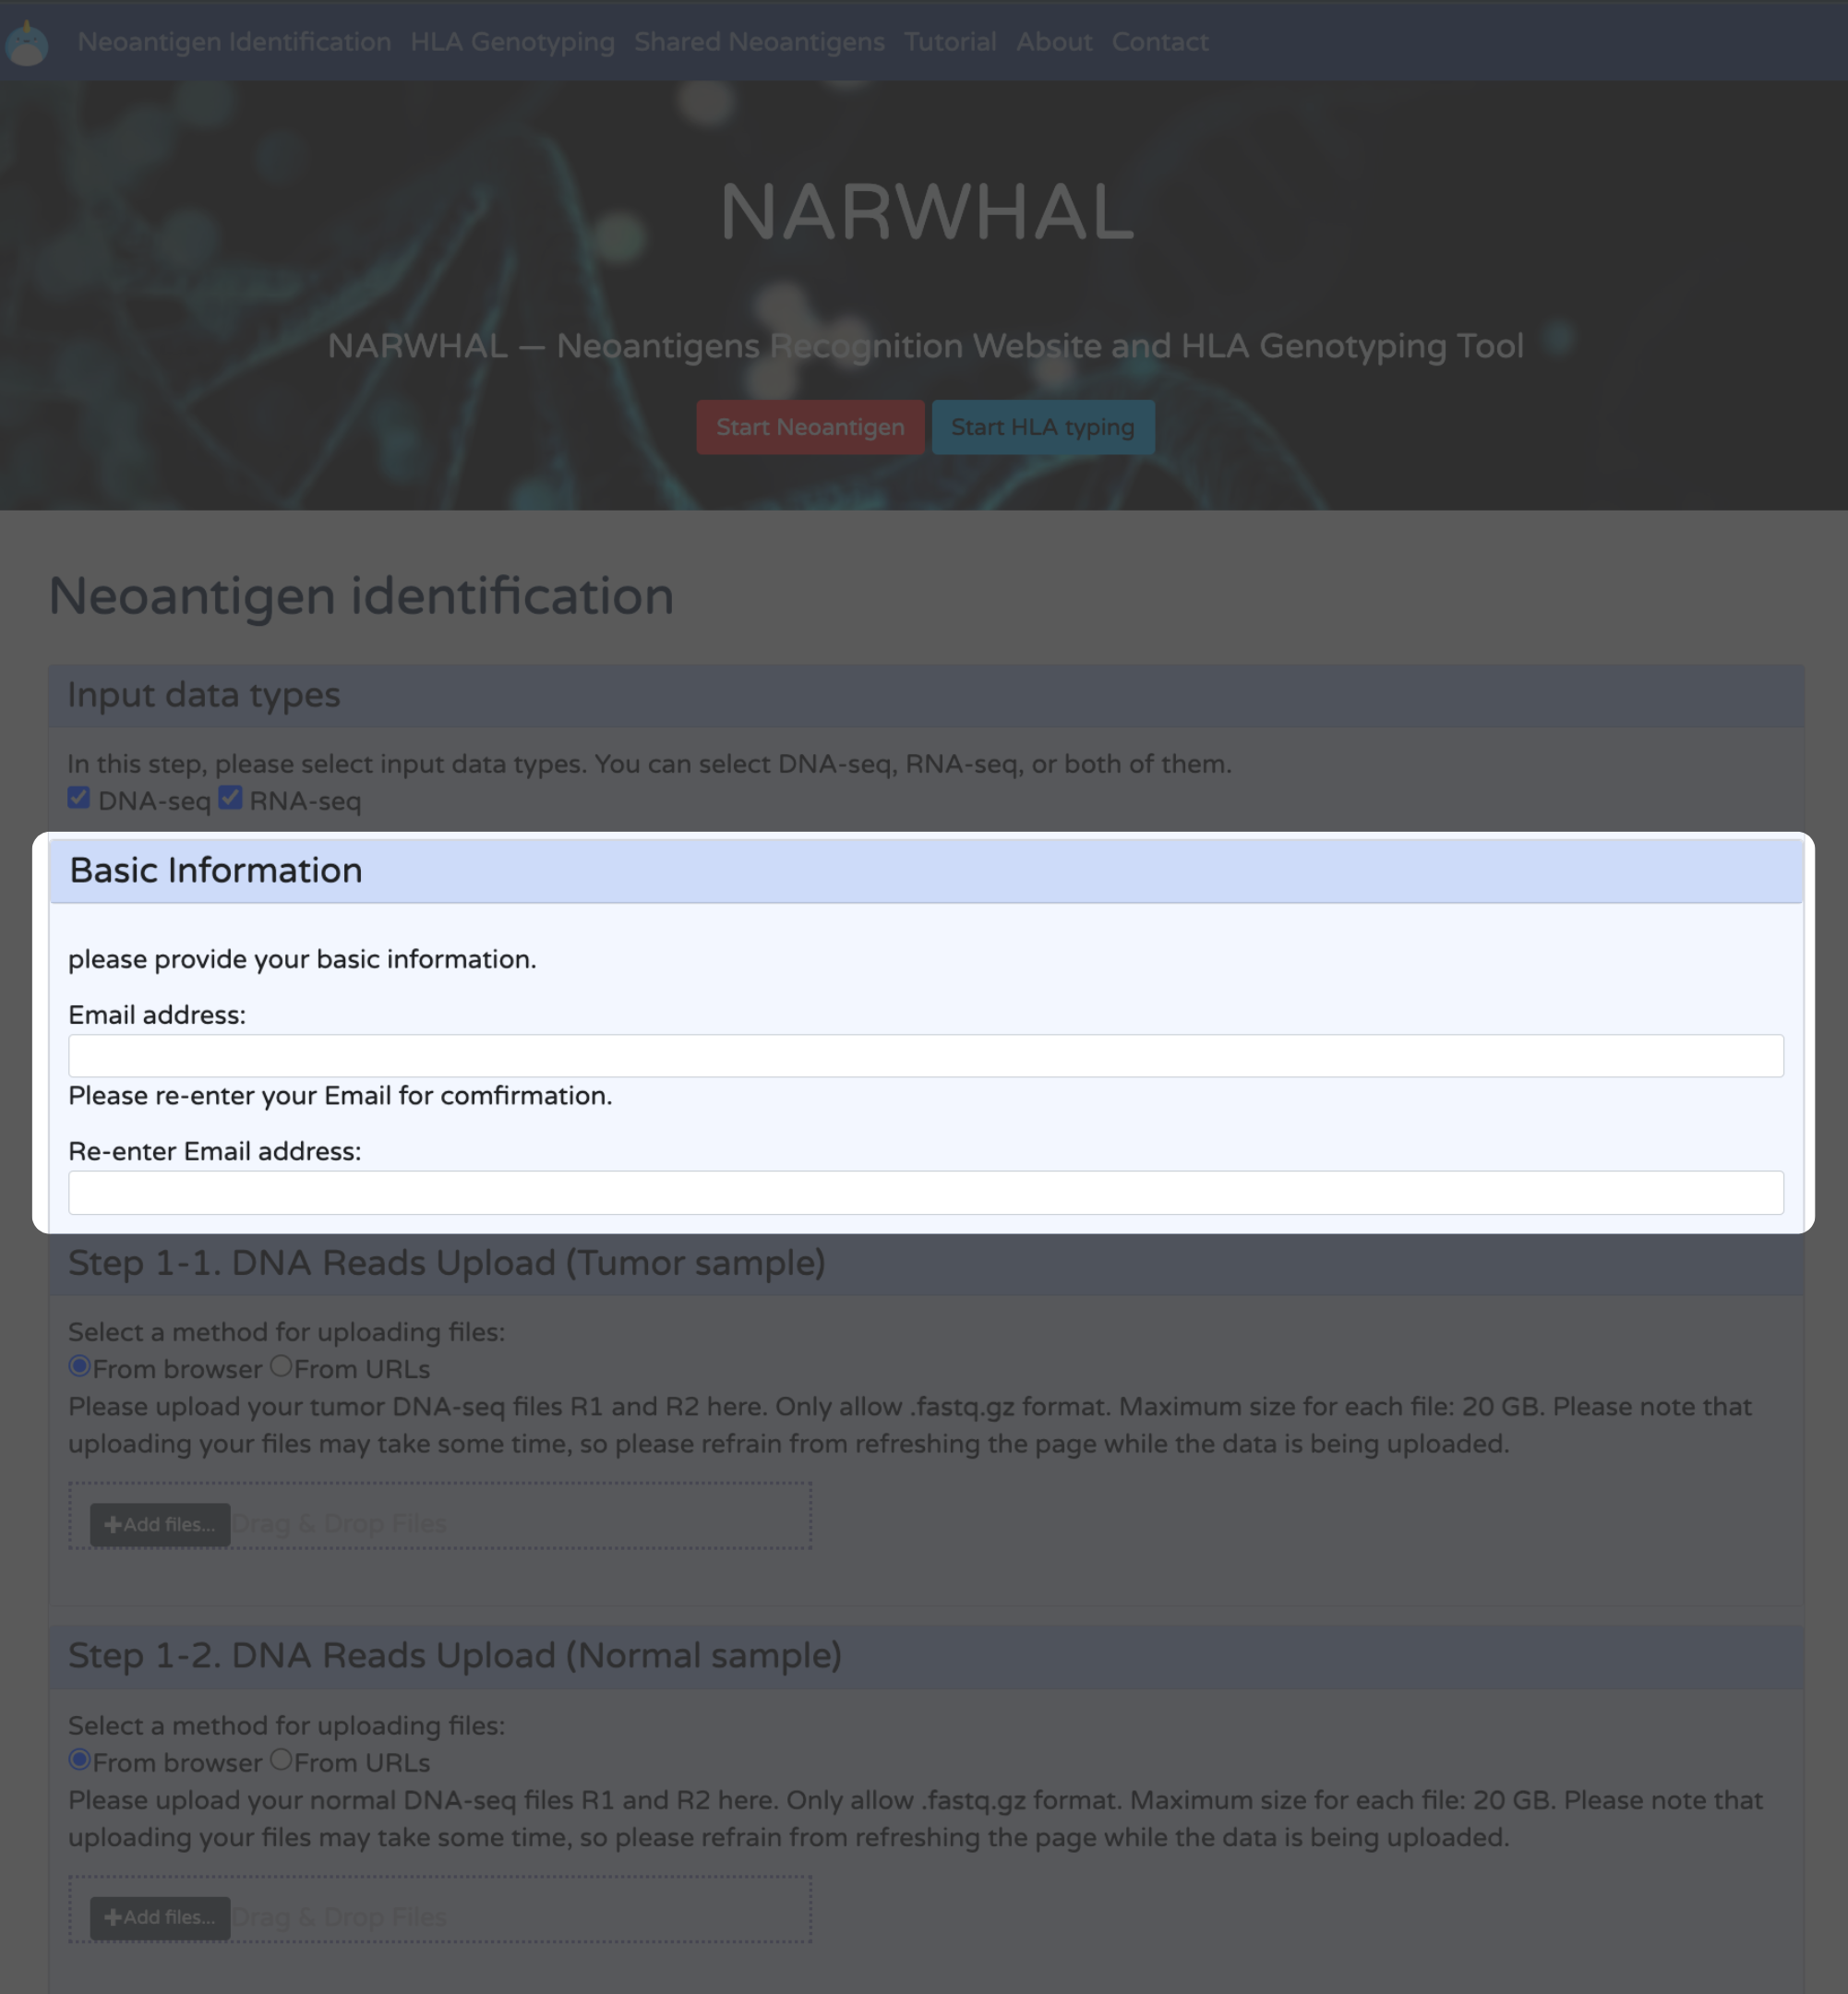
3. Enter Email: Provide your email address for notifications.
4. Upload Data: Upload all sequence data you would like to analyze.
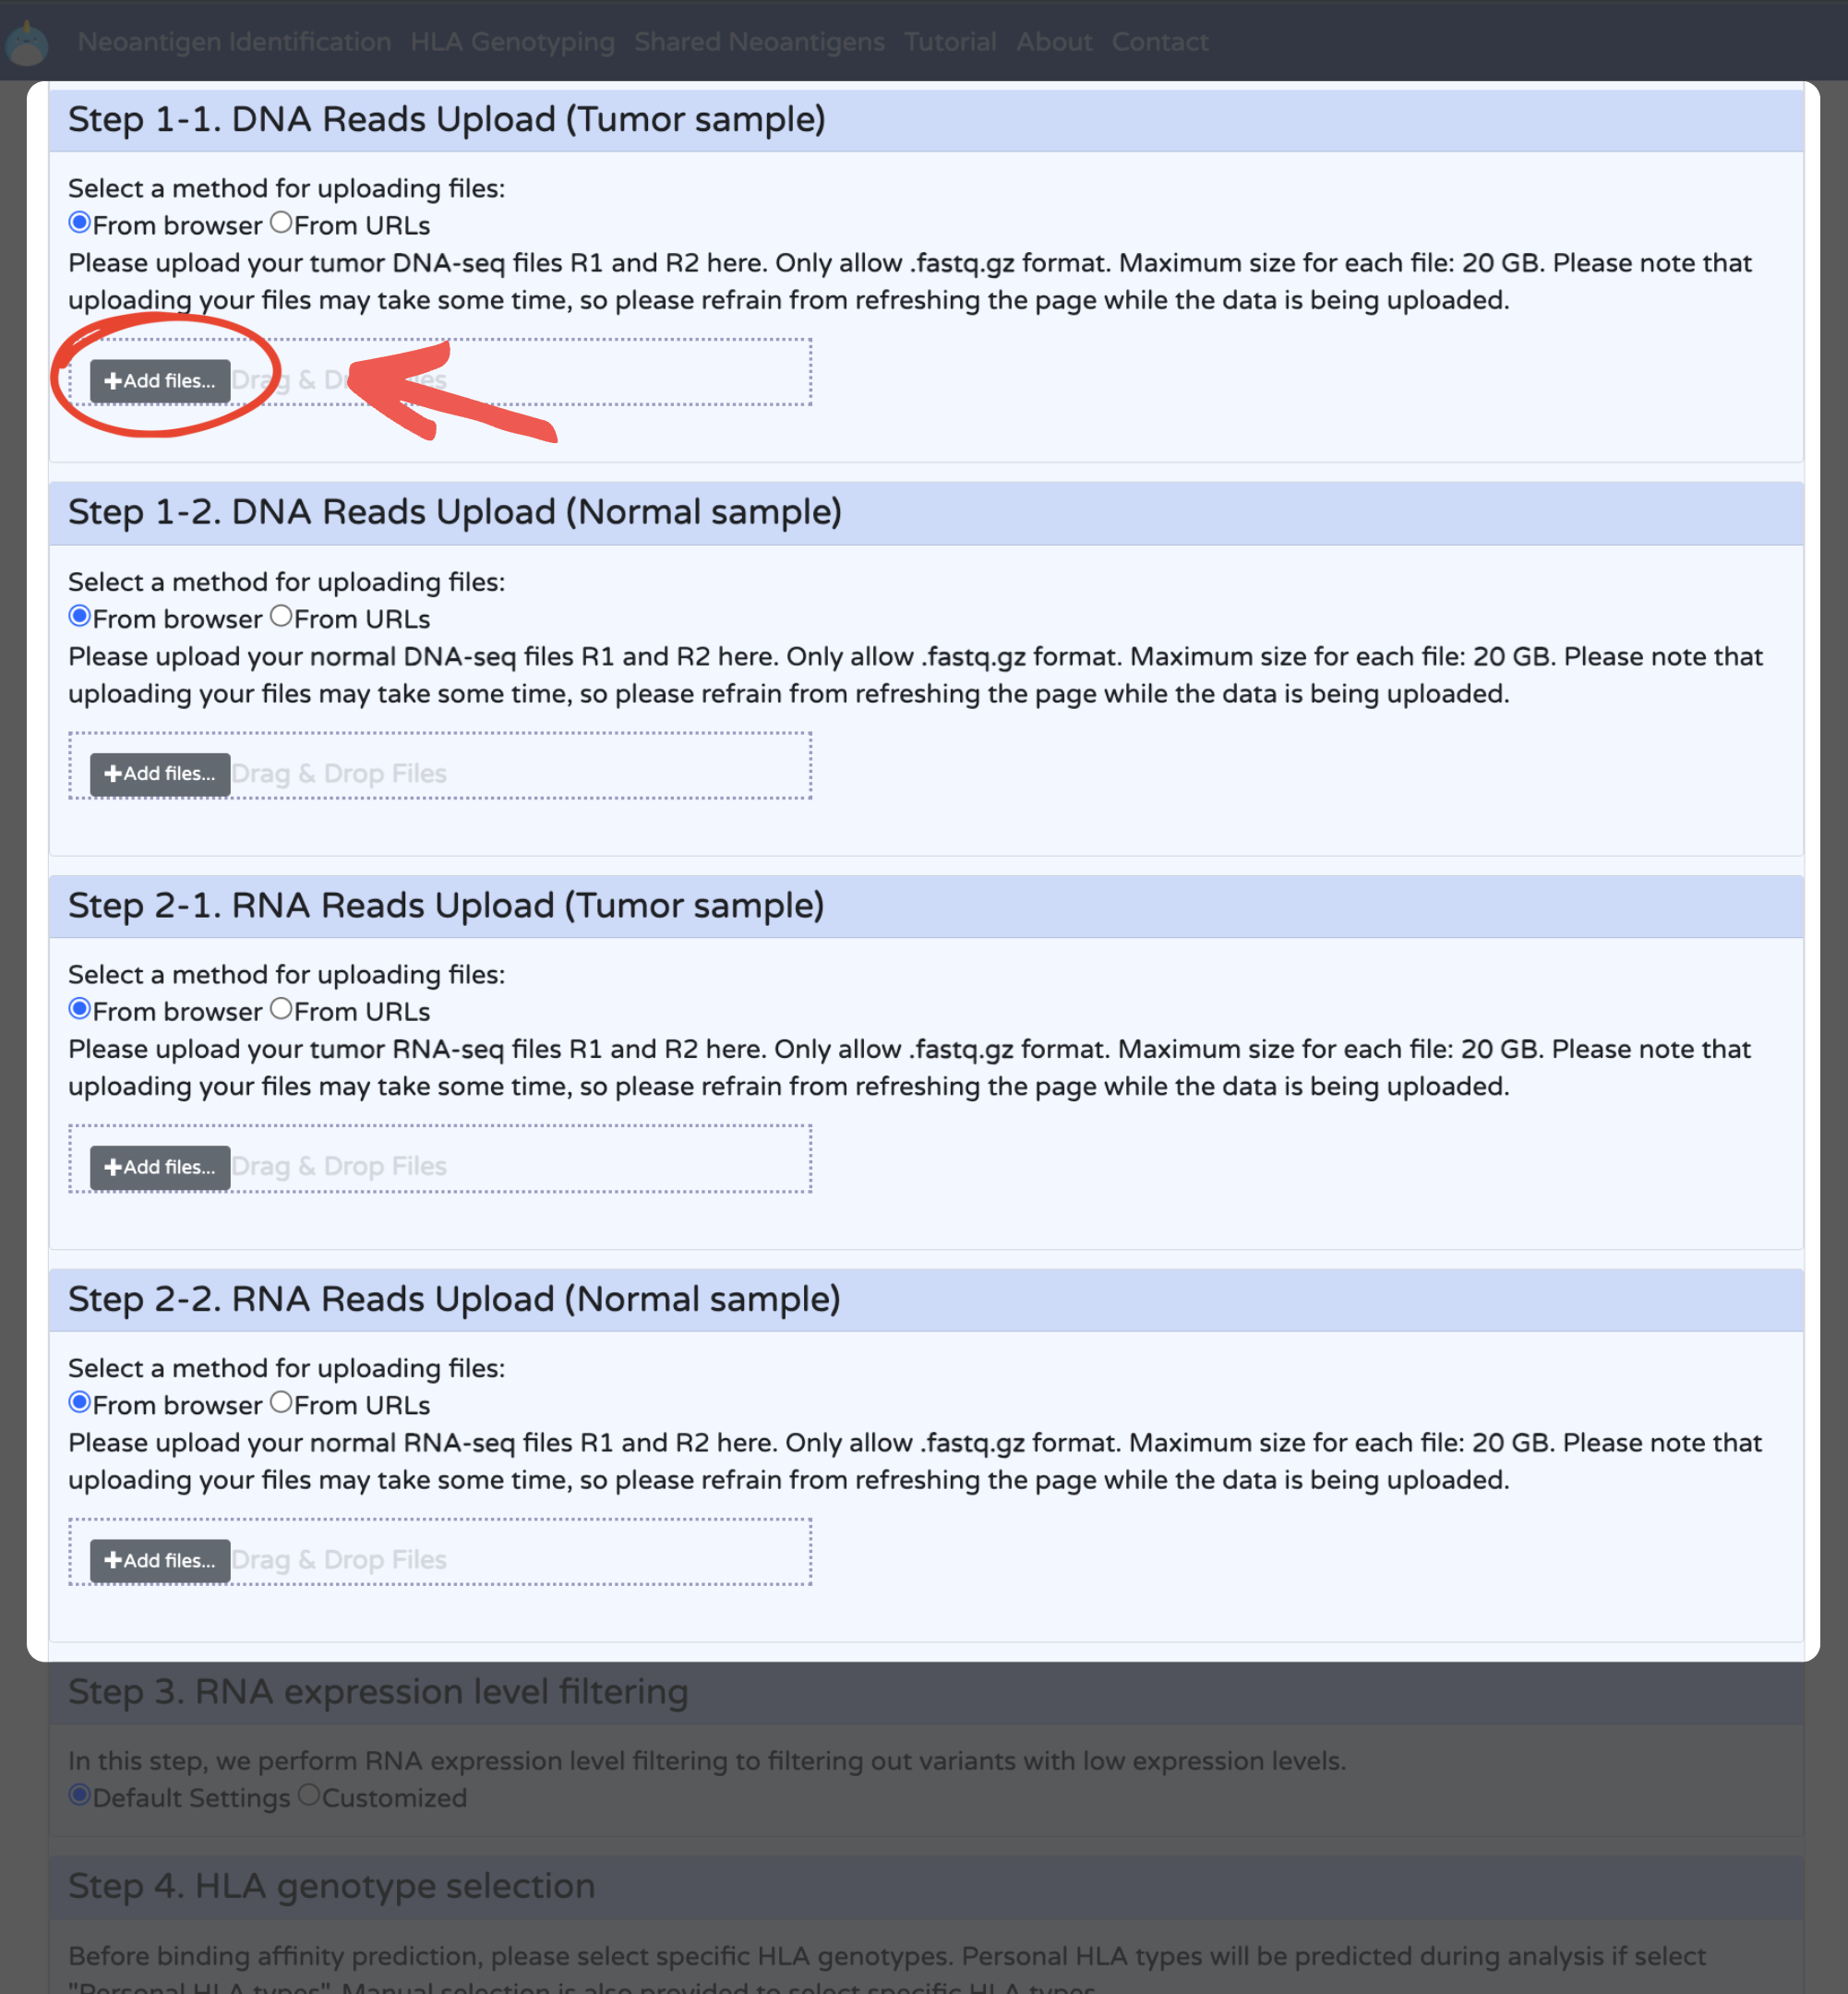
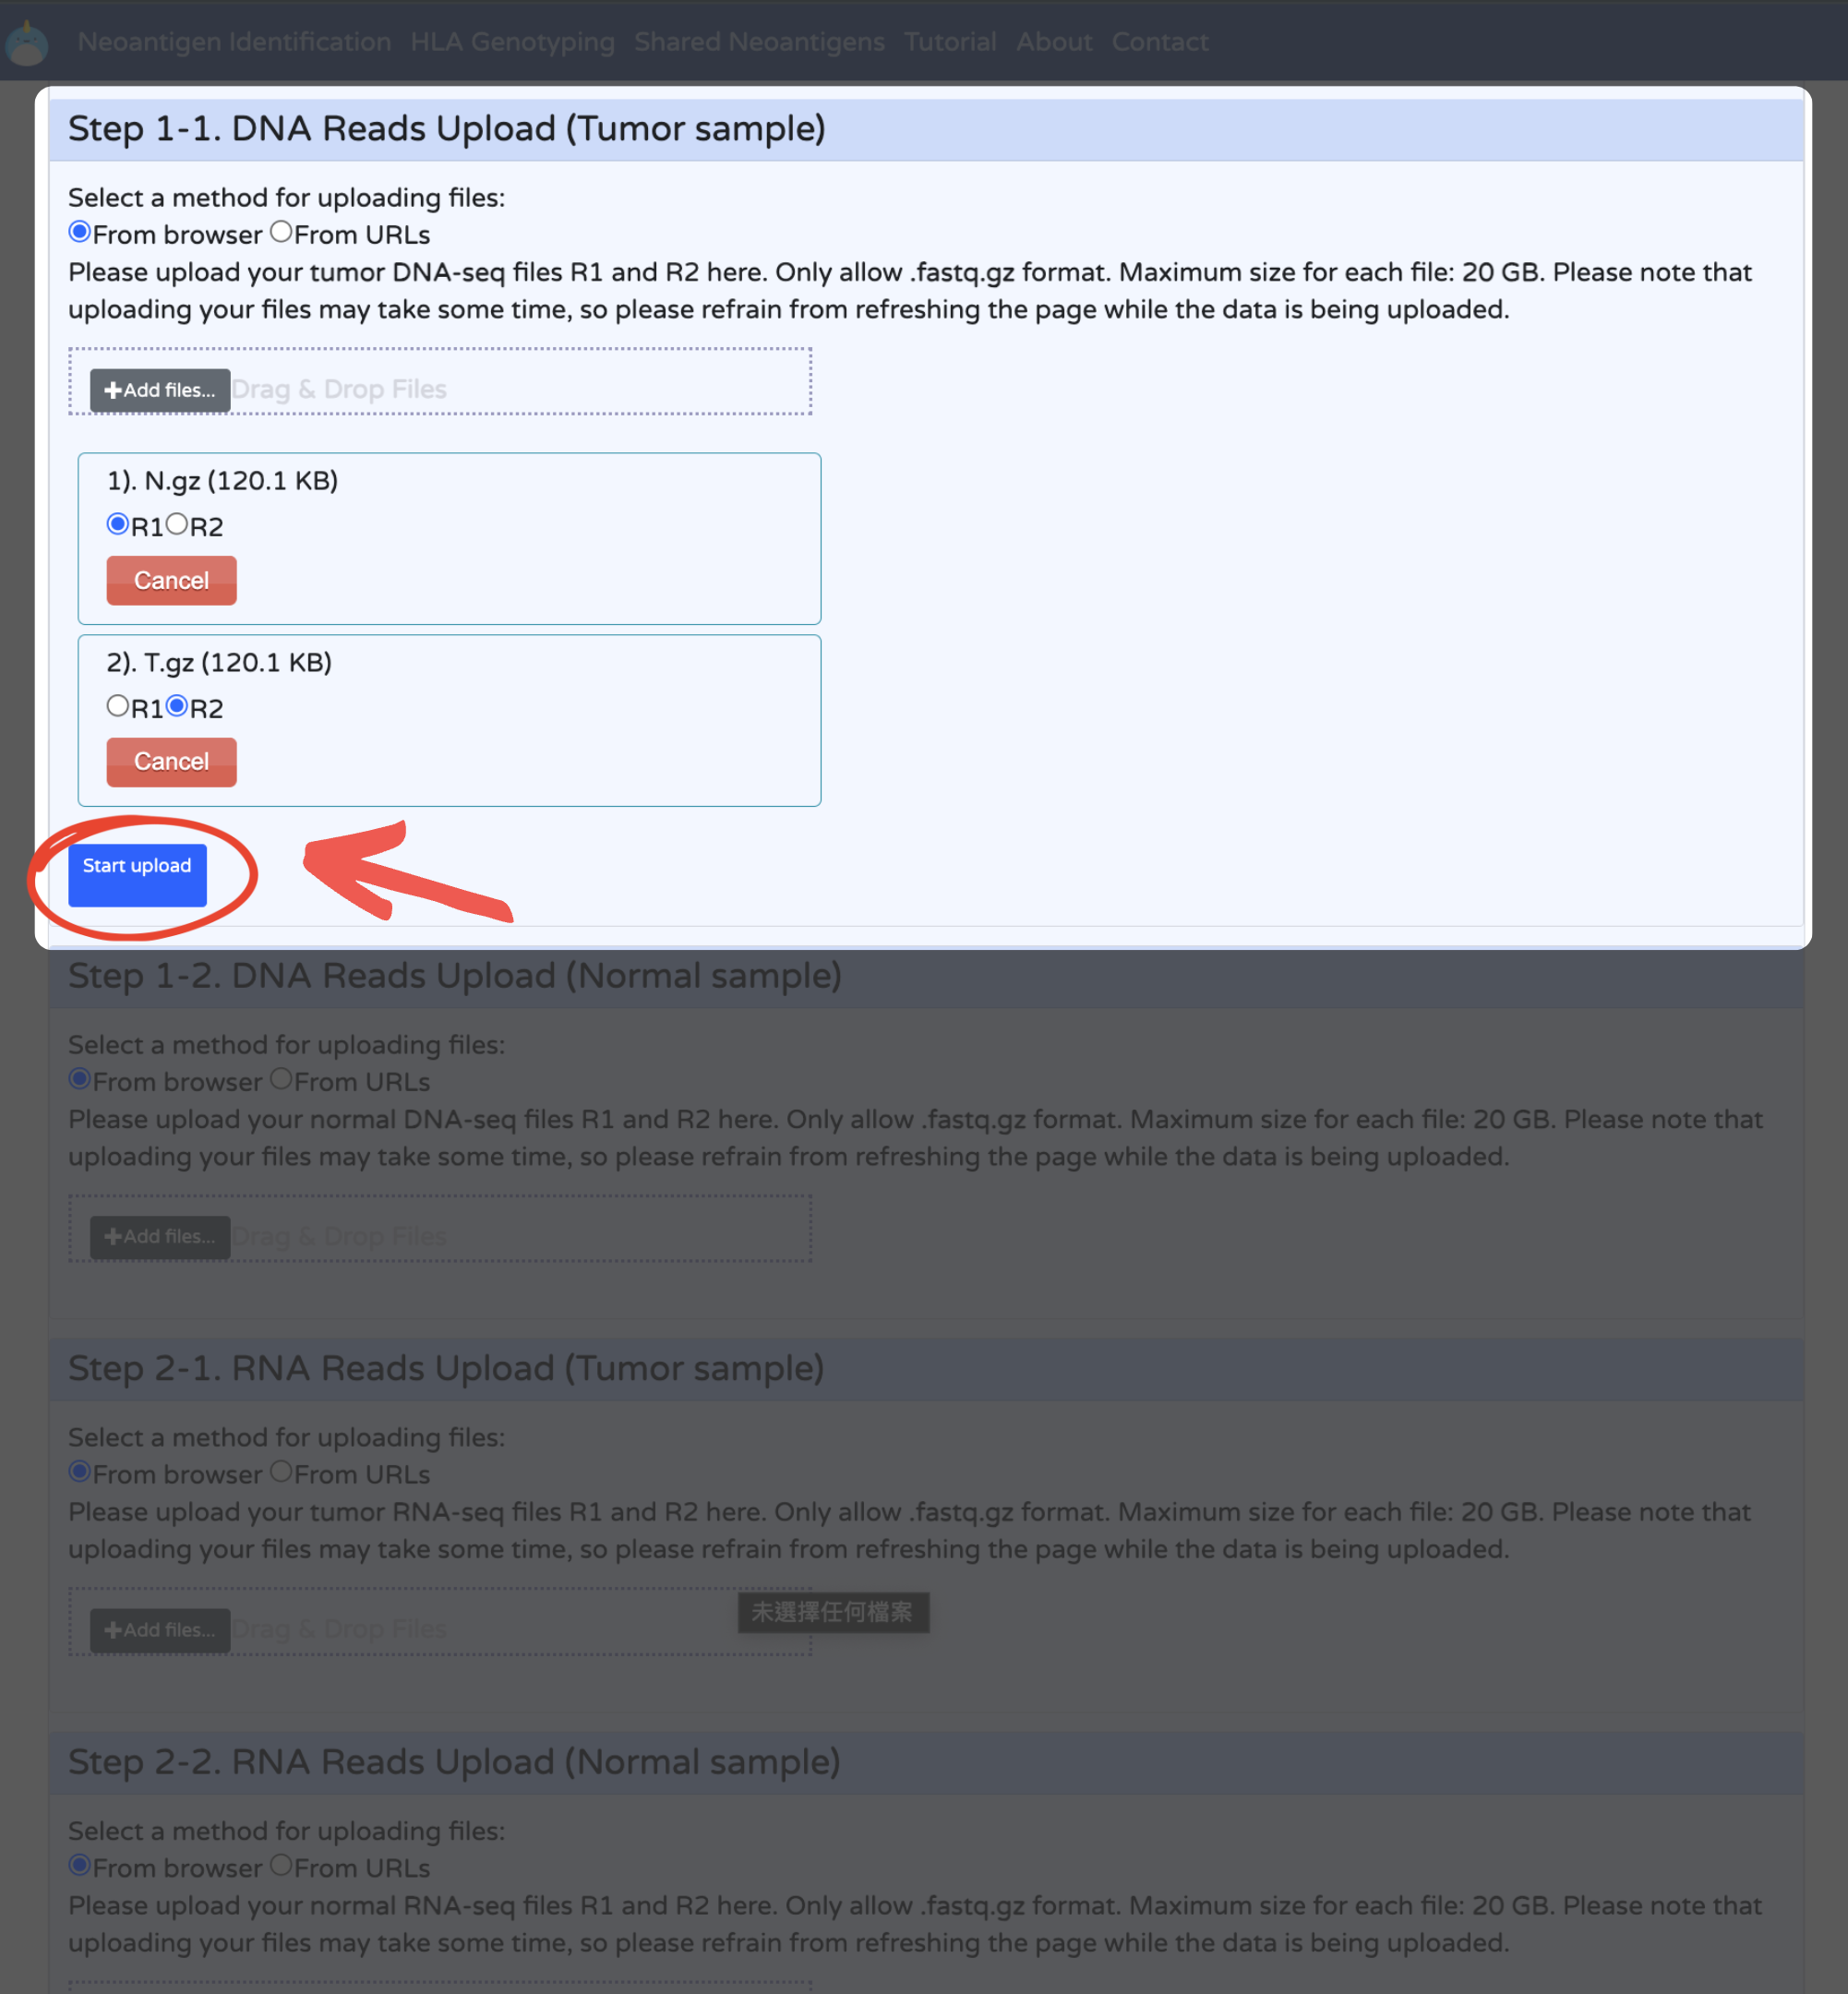
Upload Data From Browser: Choose R1 or R2 files respectively, and click "start upload" to upload your data.
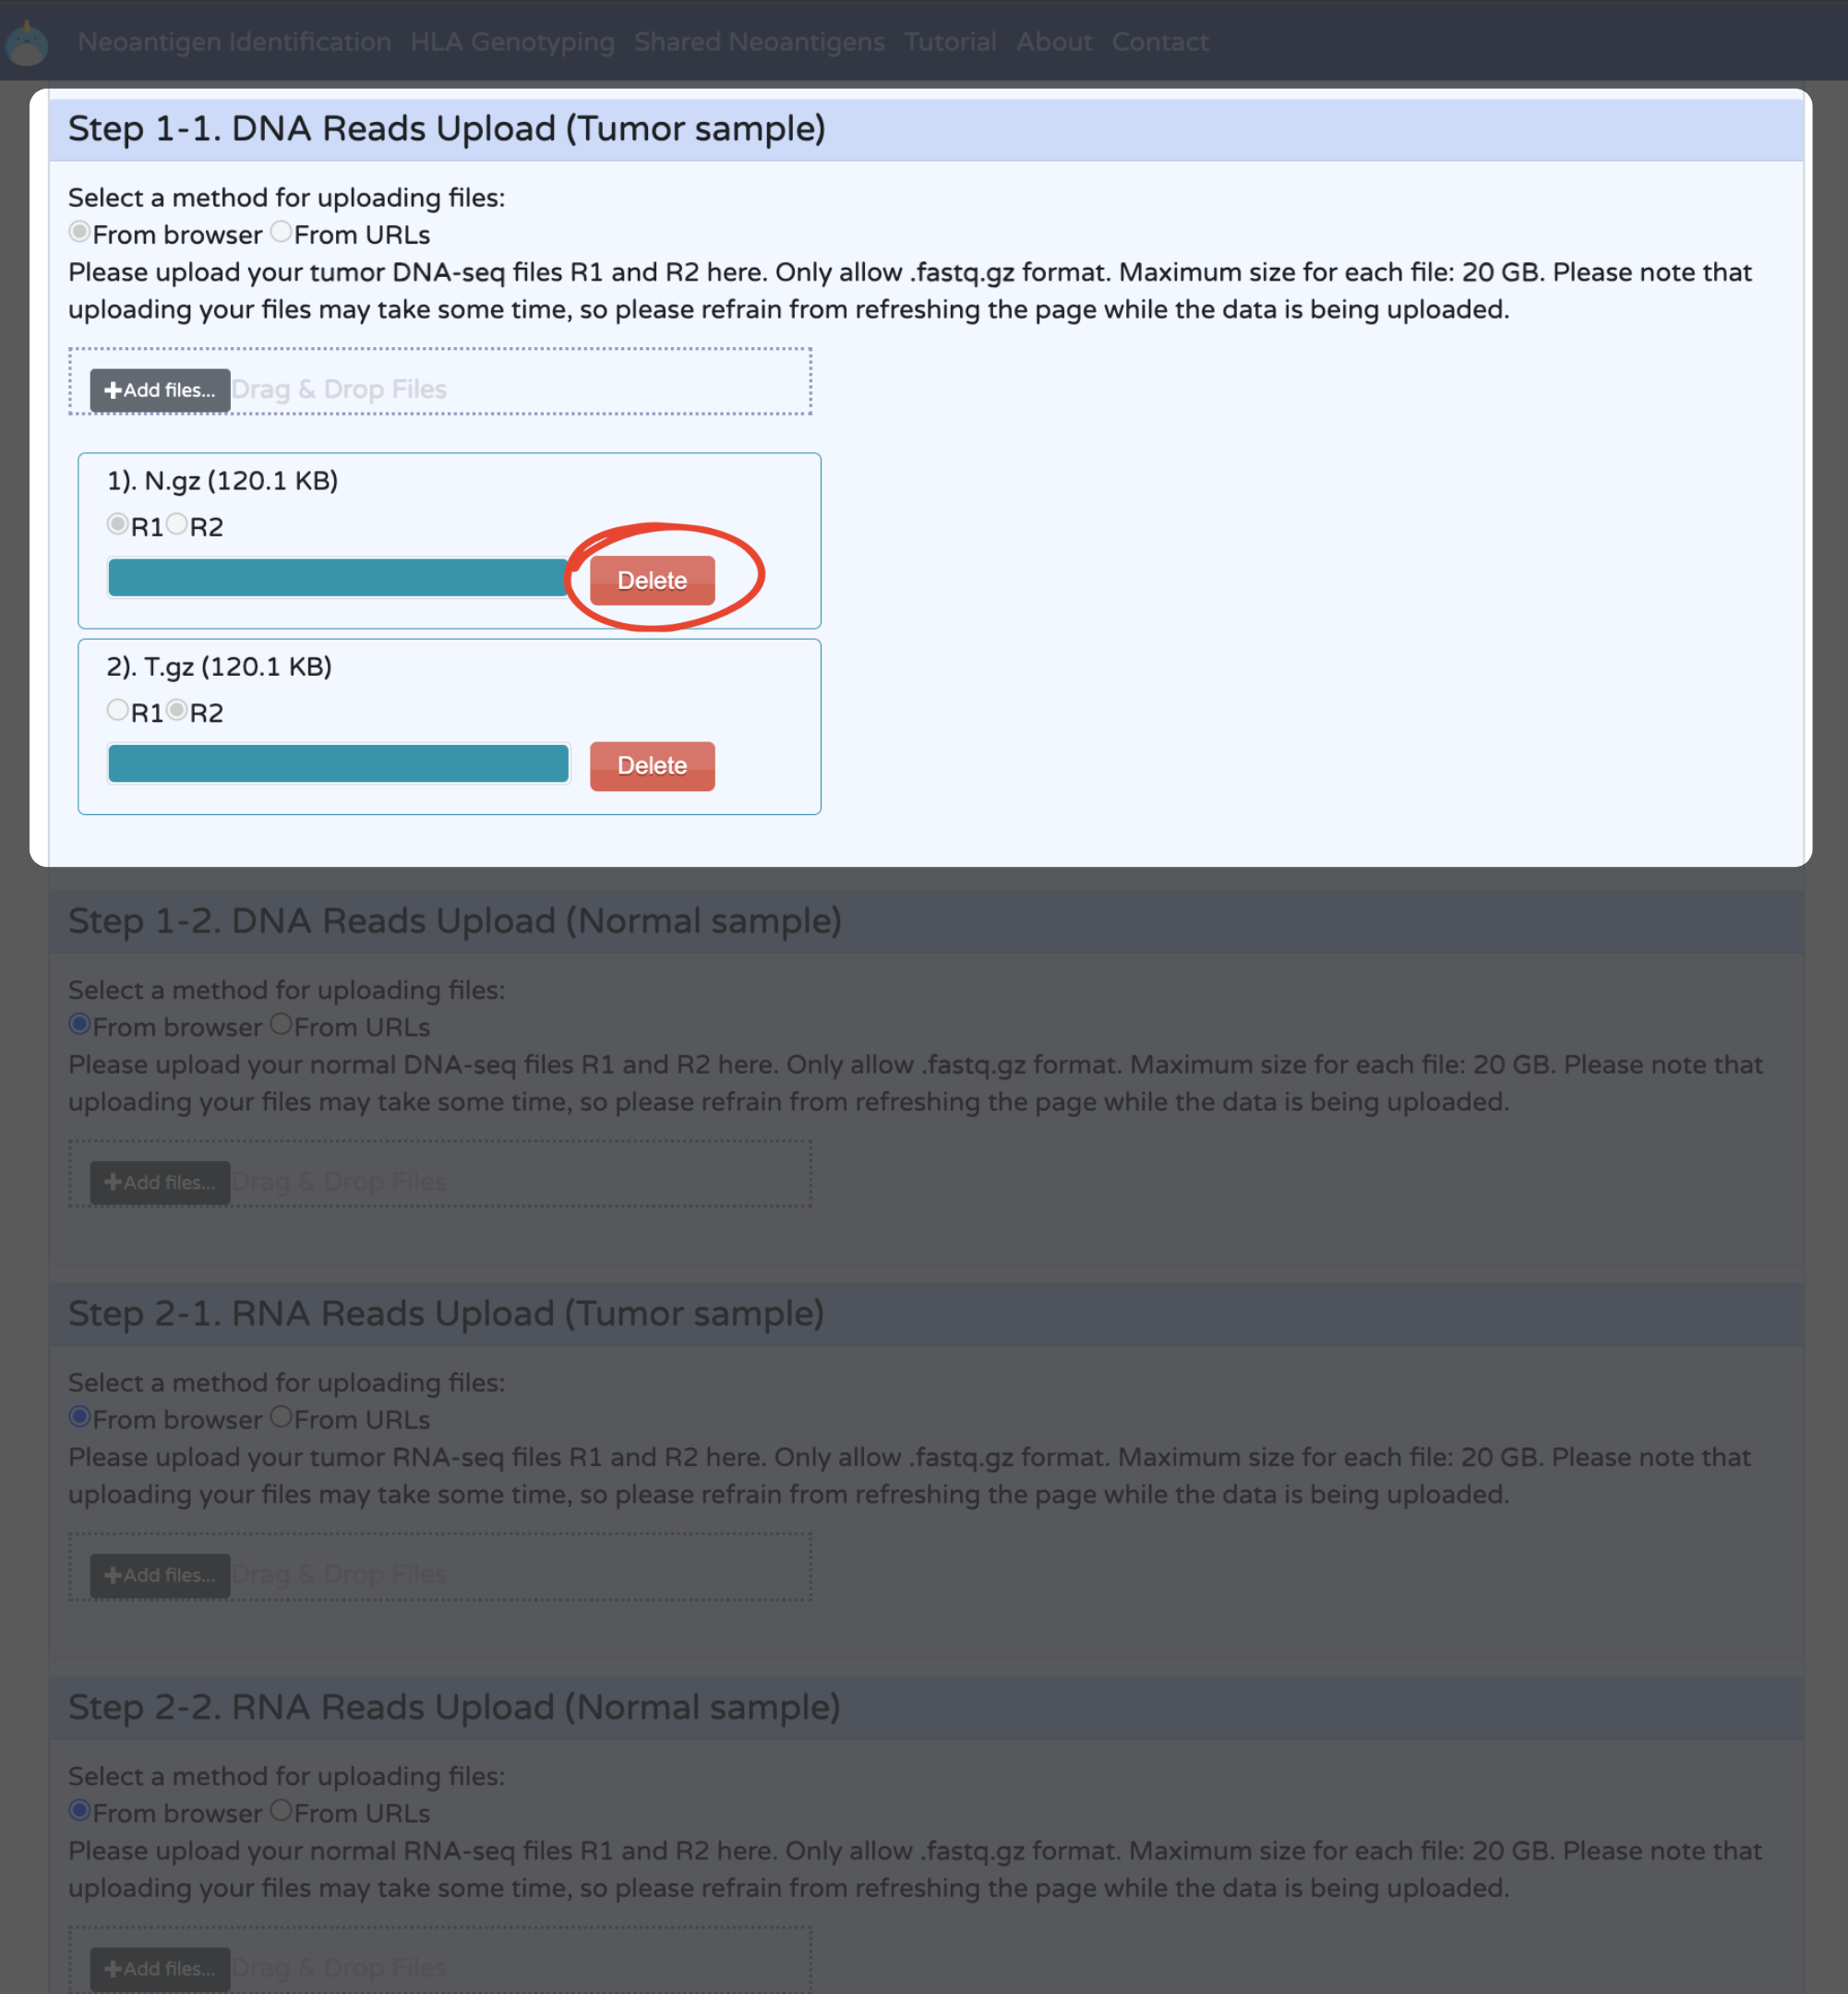
You may delete and re-upload data if necessary.
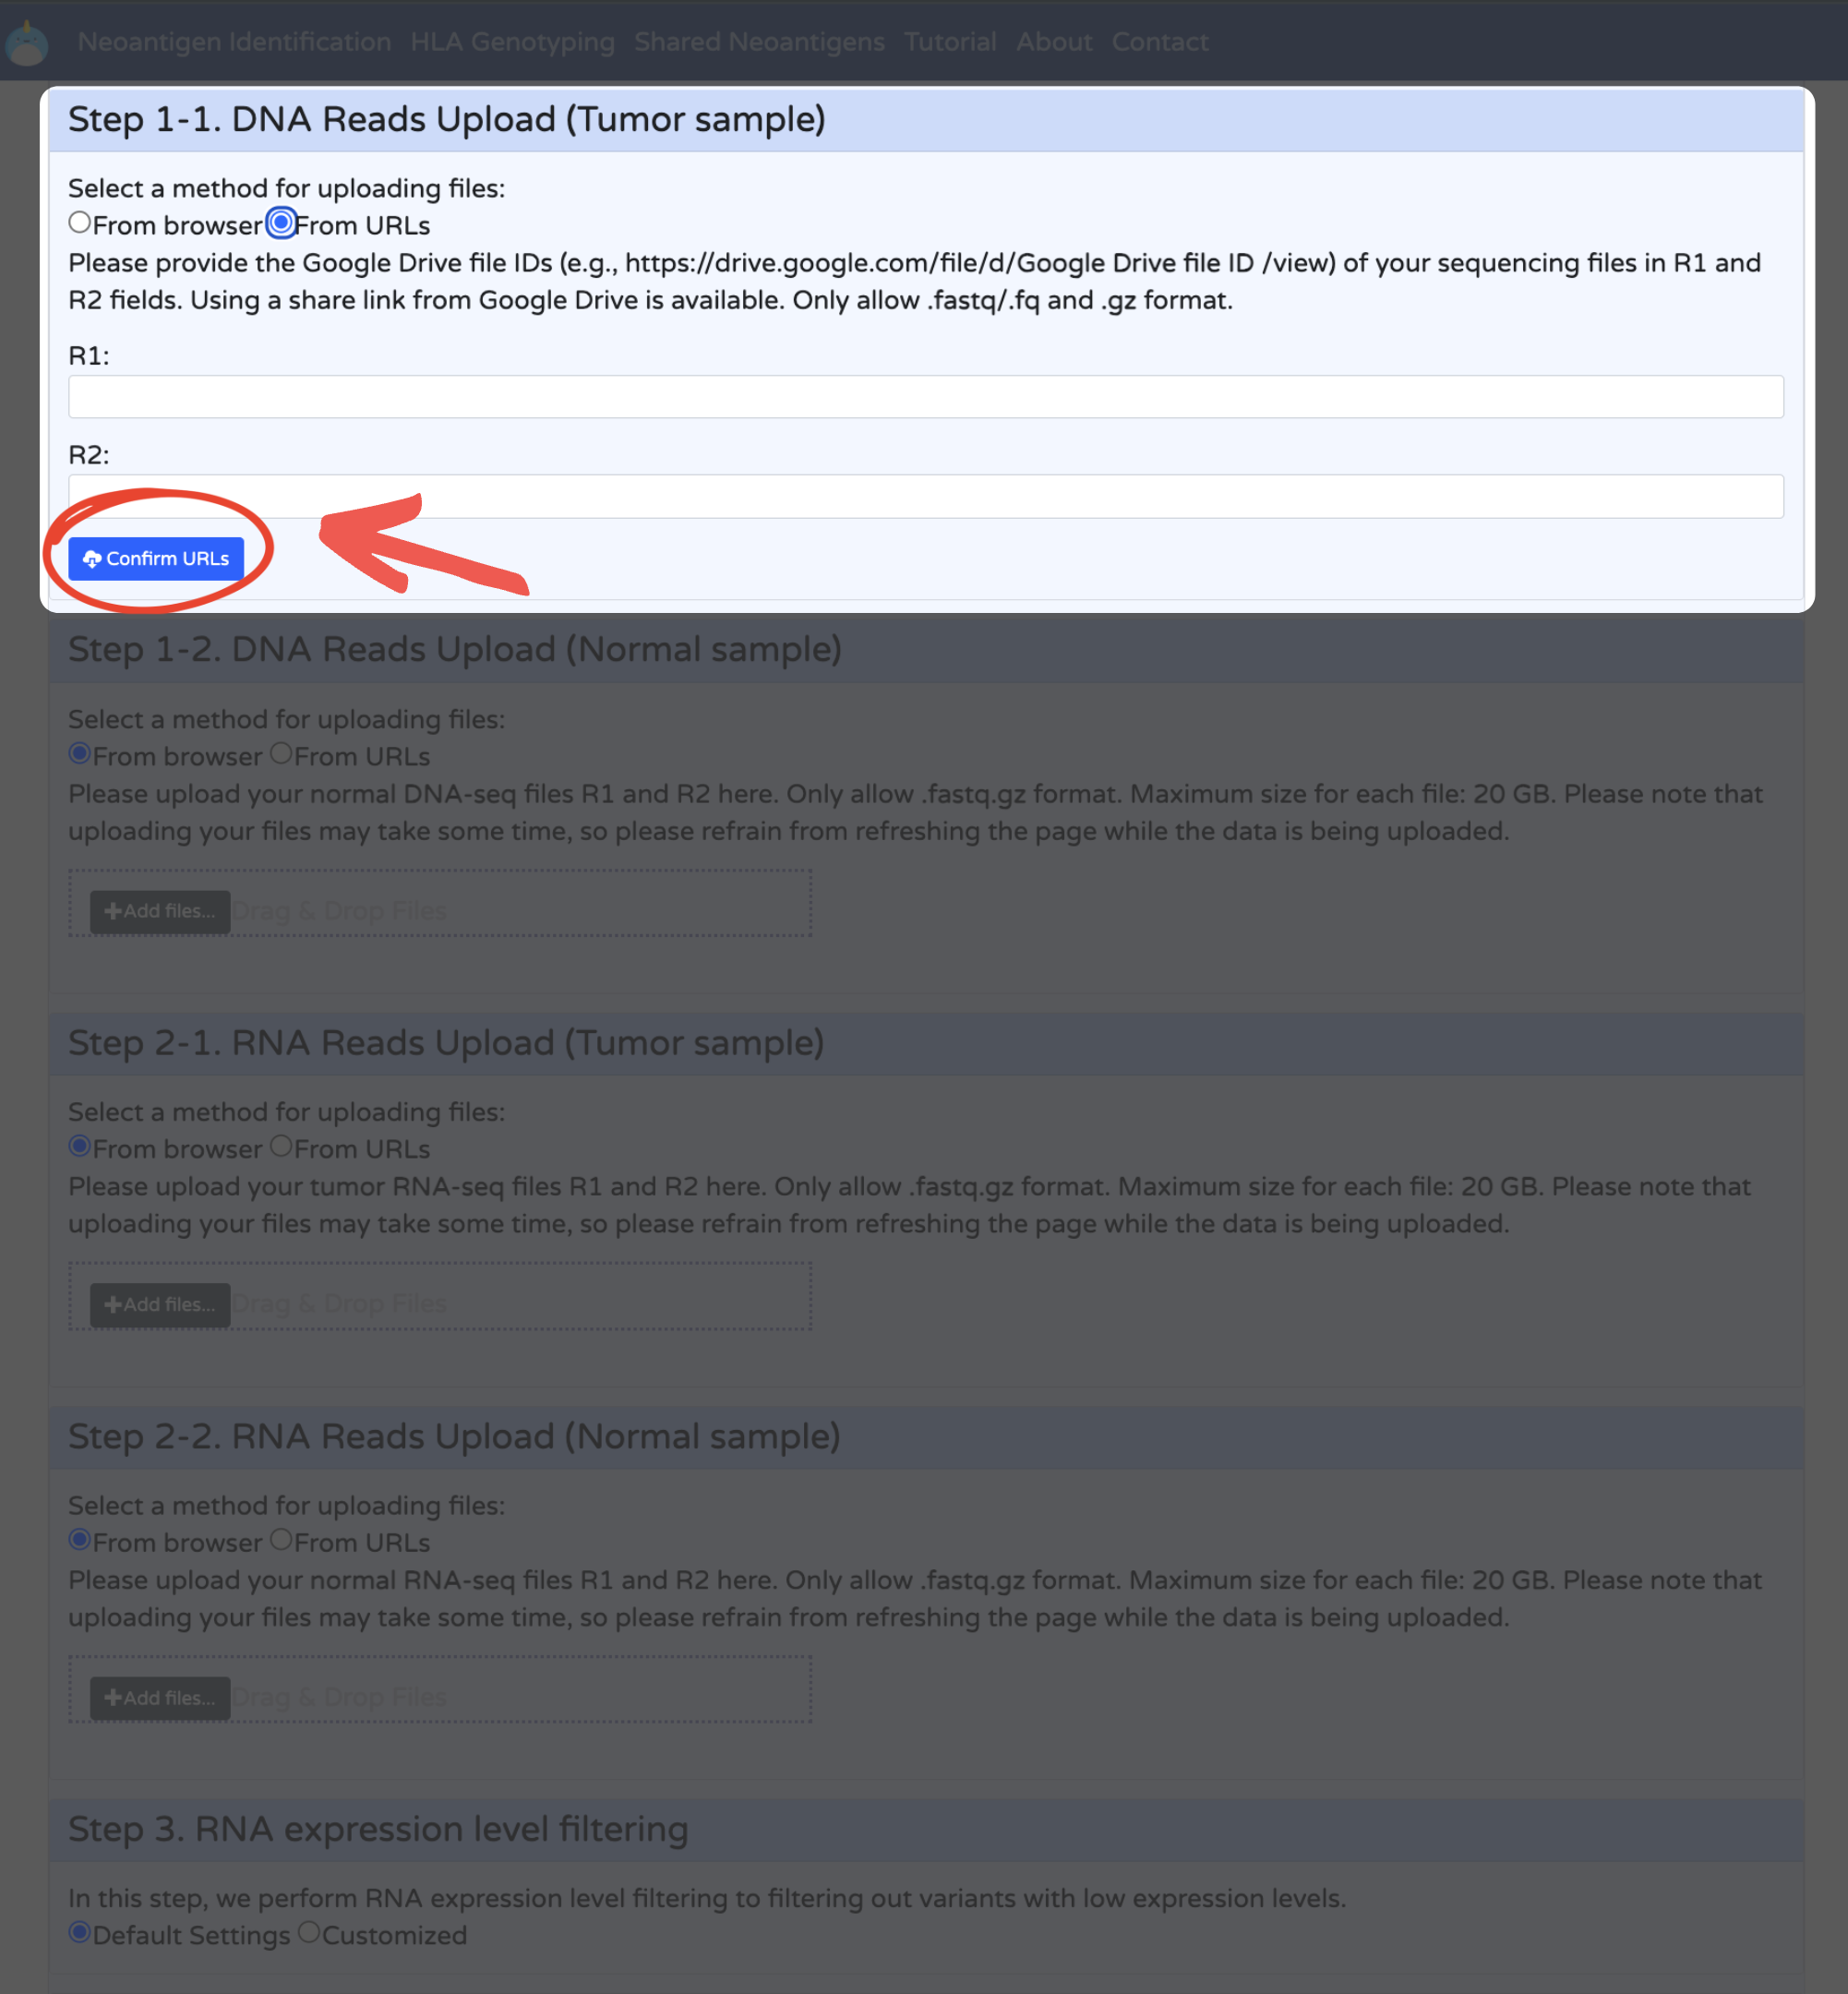
From URLs: Upload data from URLs. Using a share link from Google Drive is available.
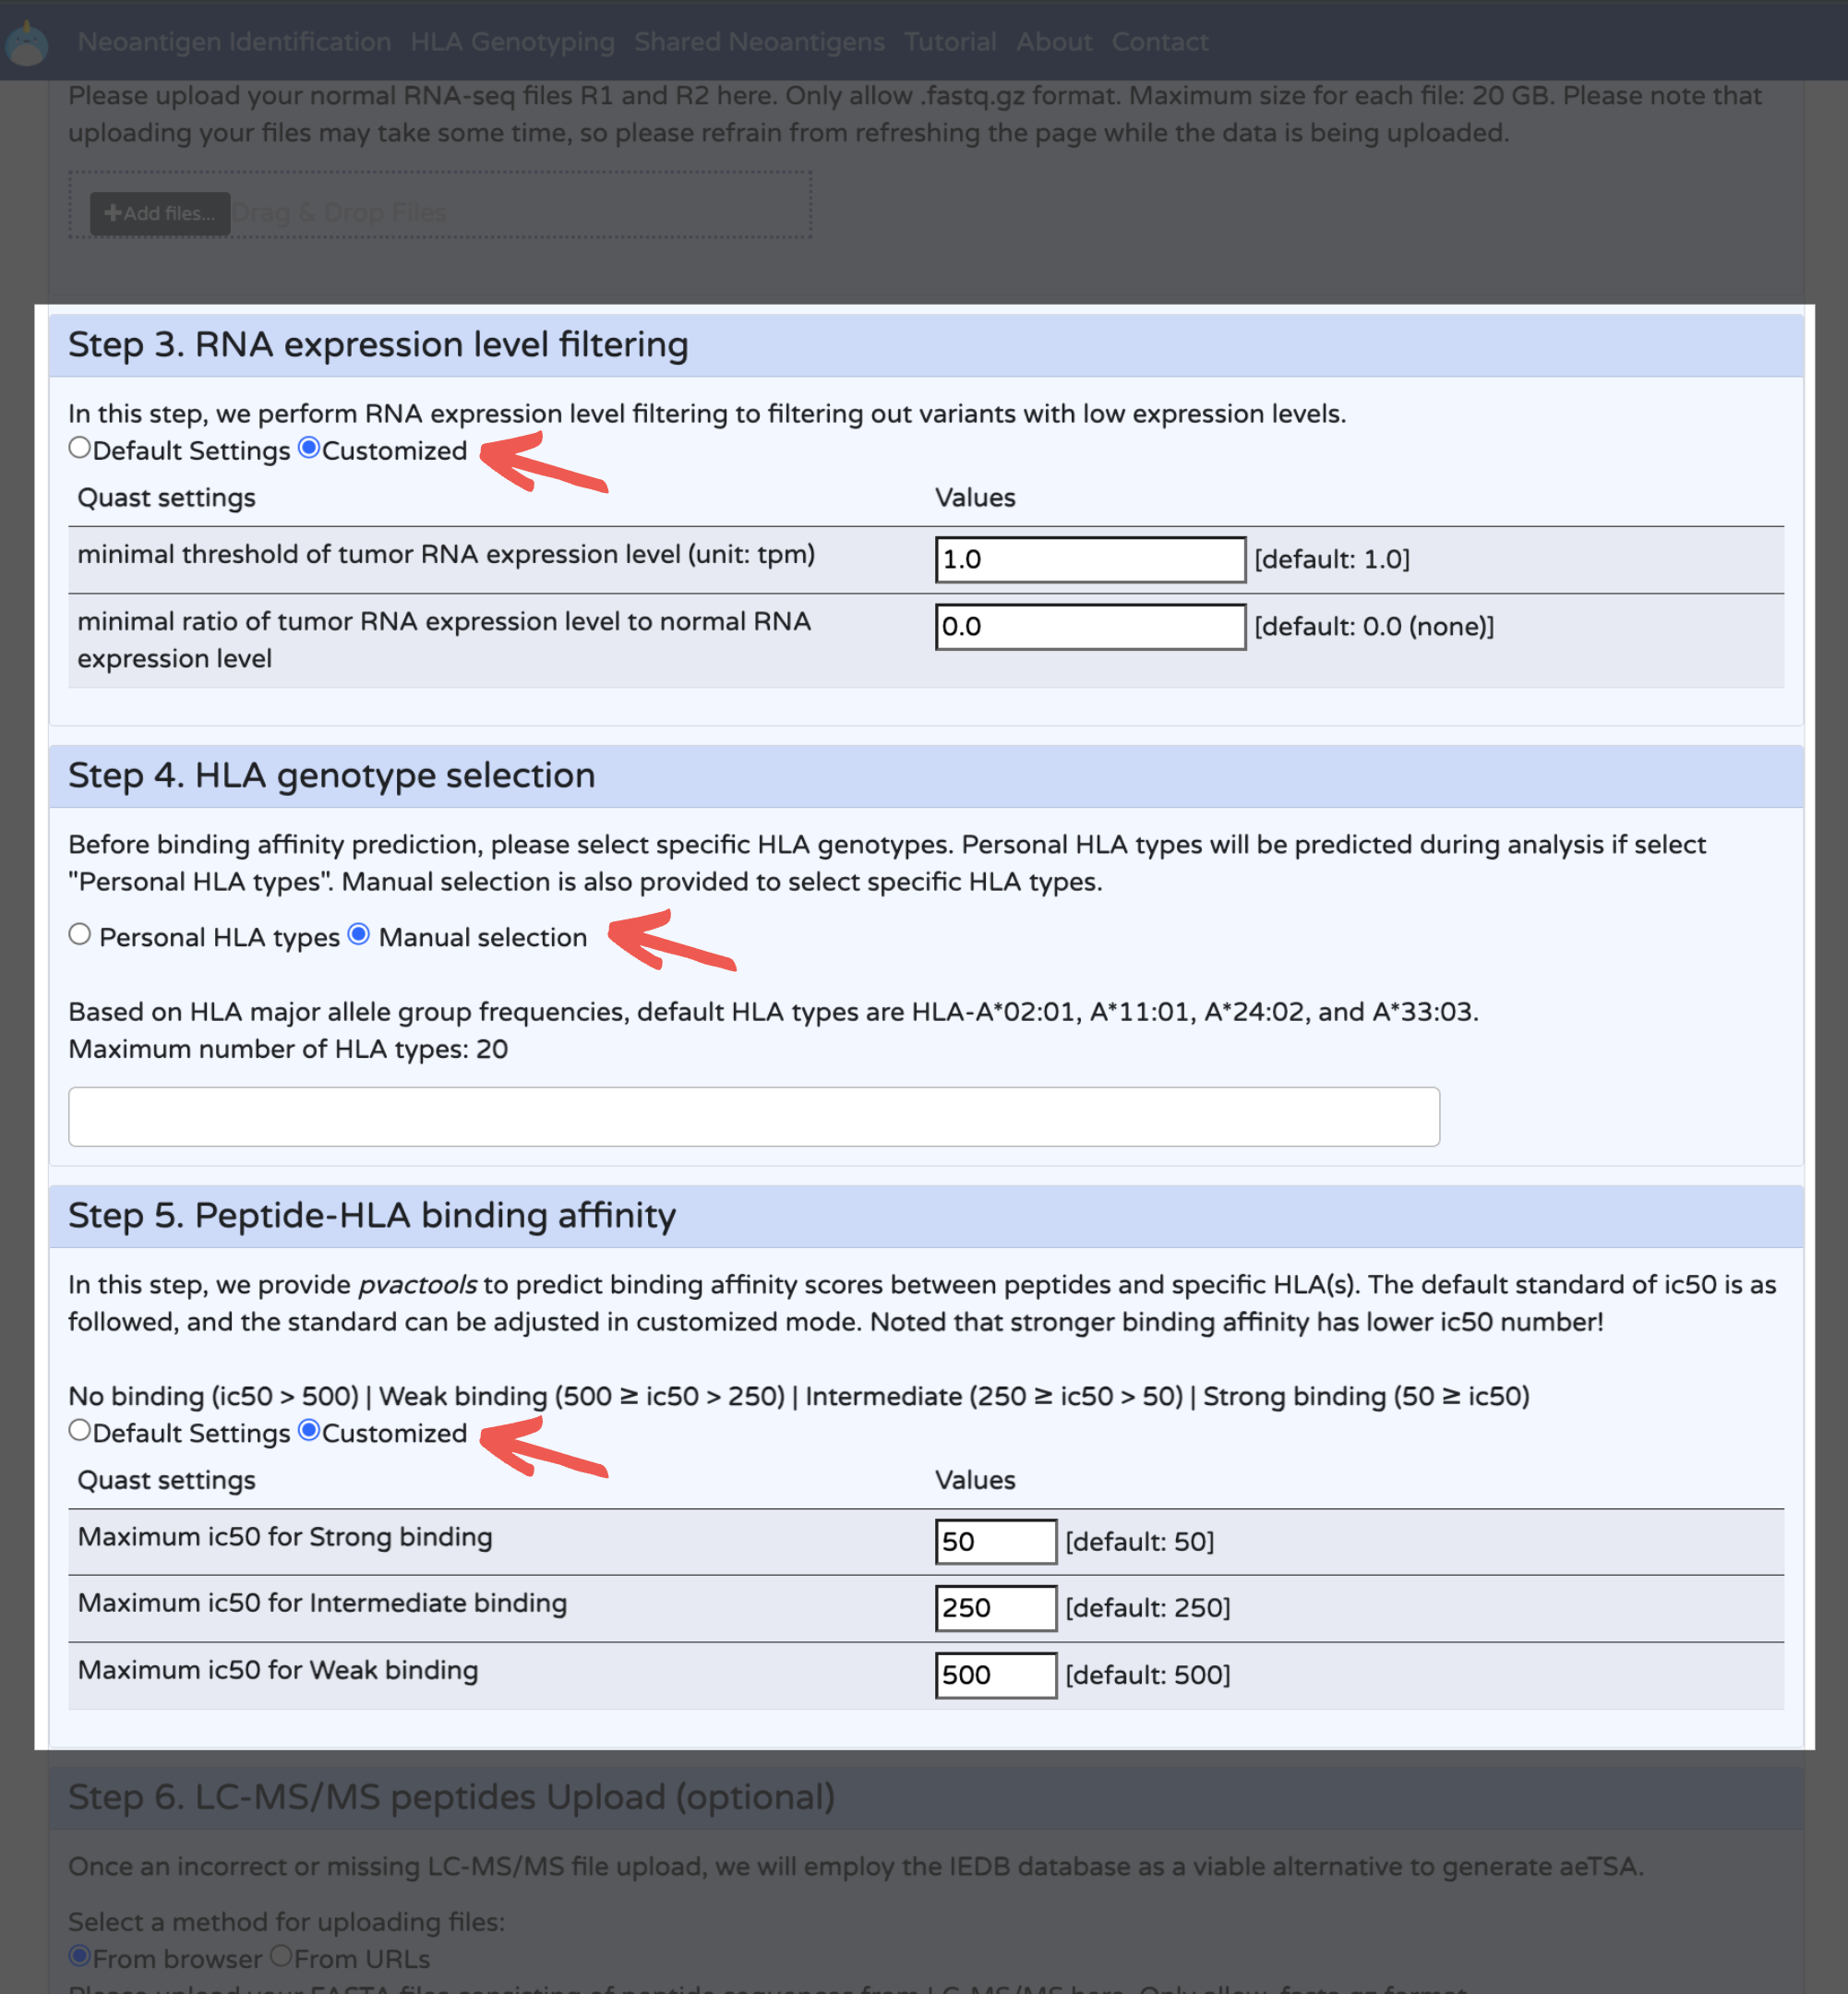
5. Set parameters: Default parameters are pre-set.
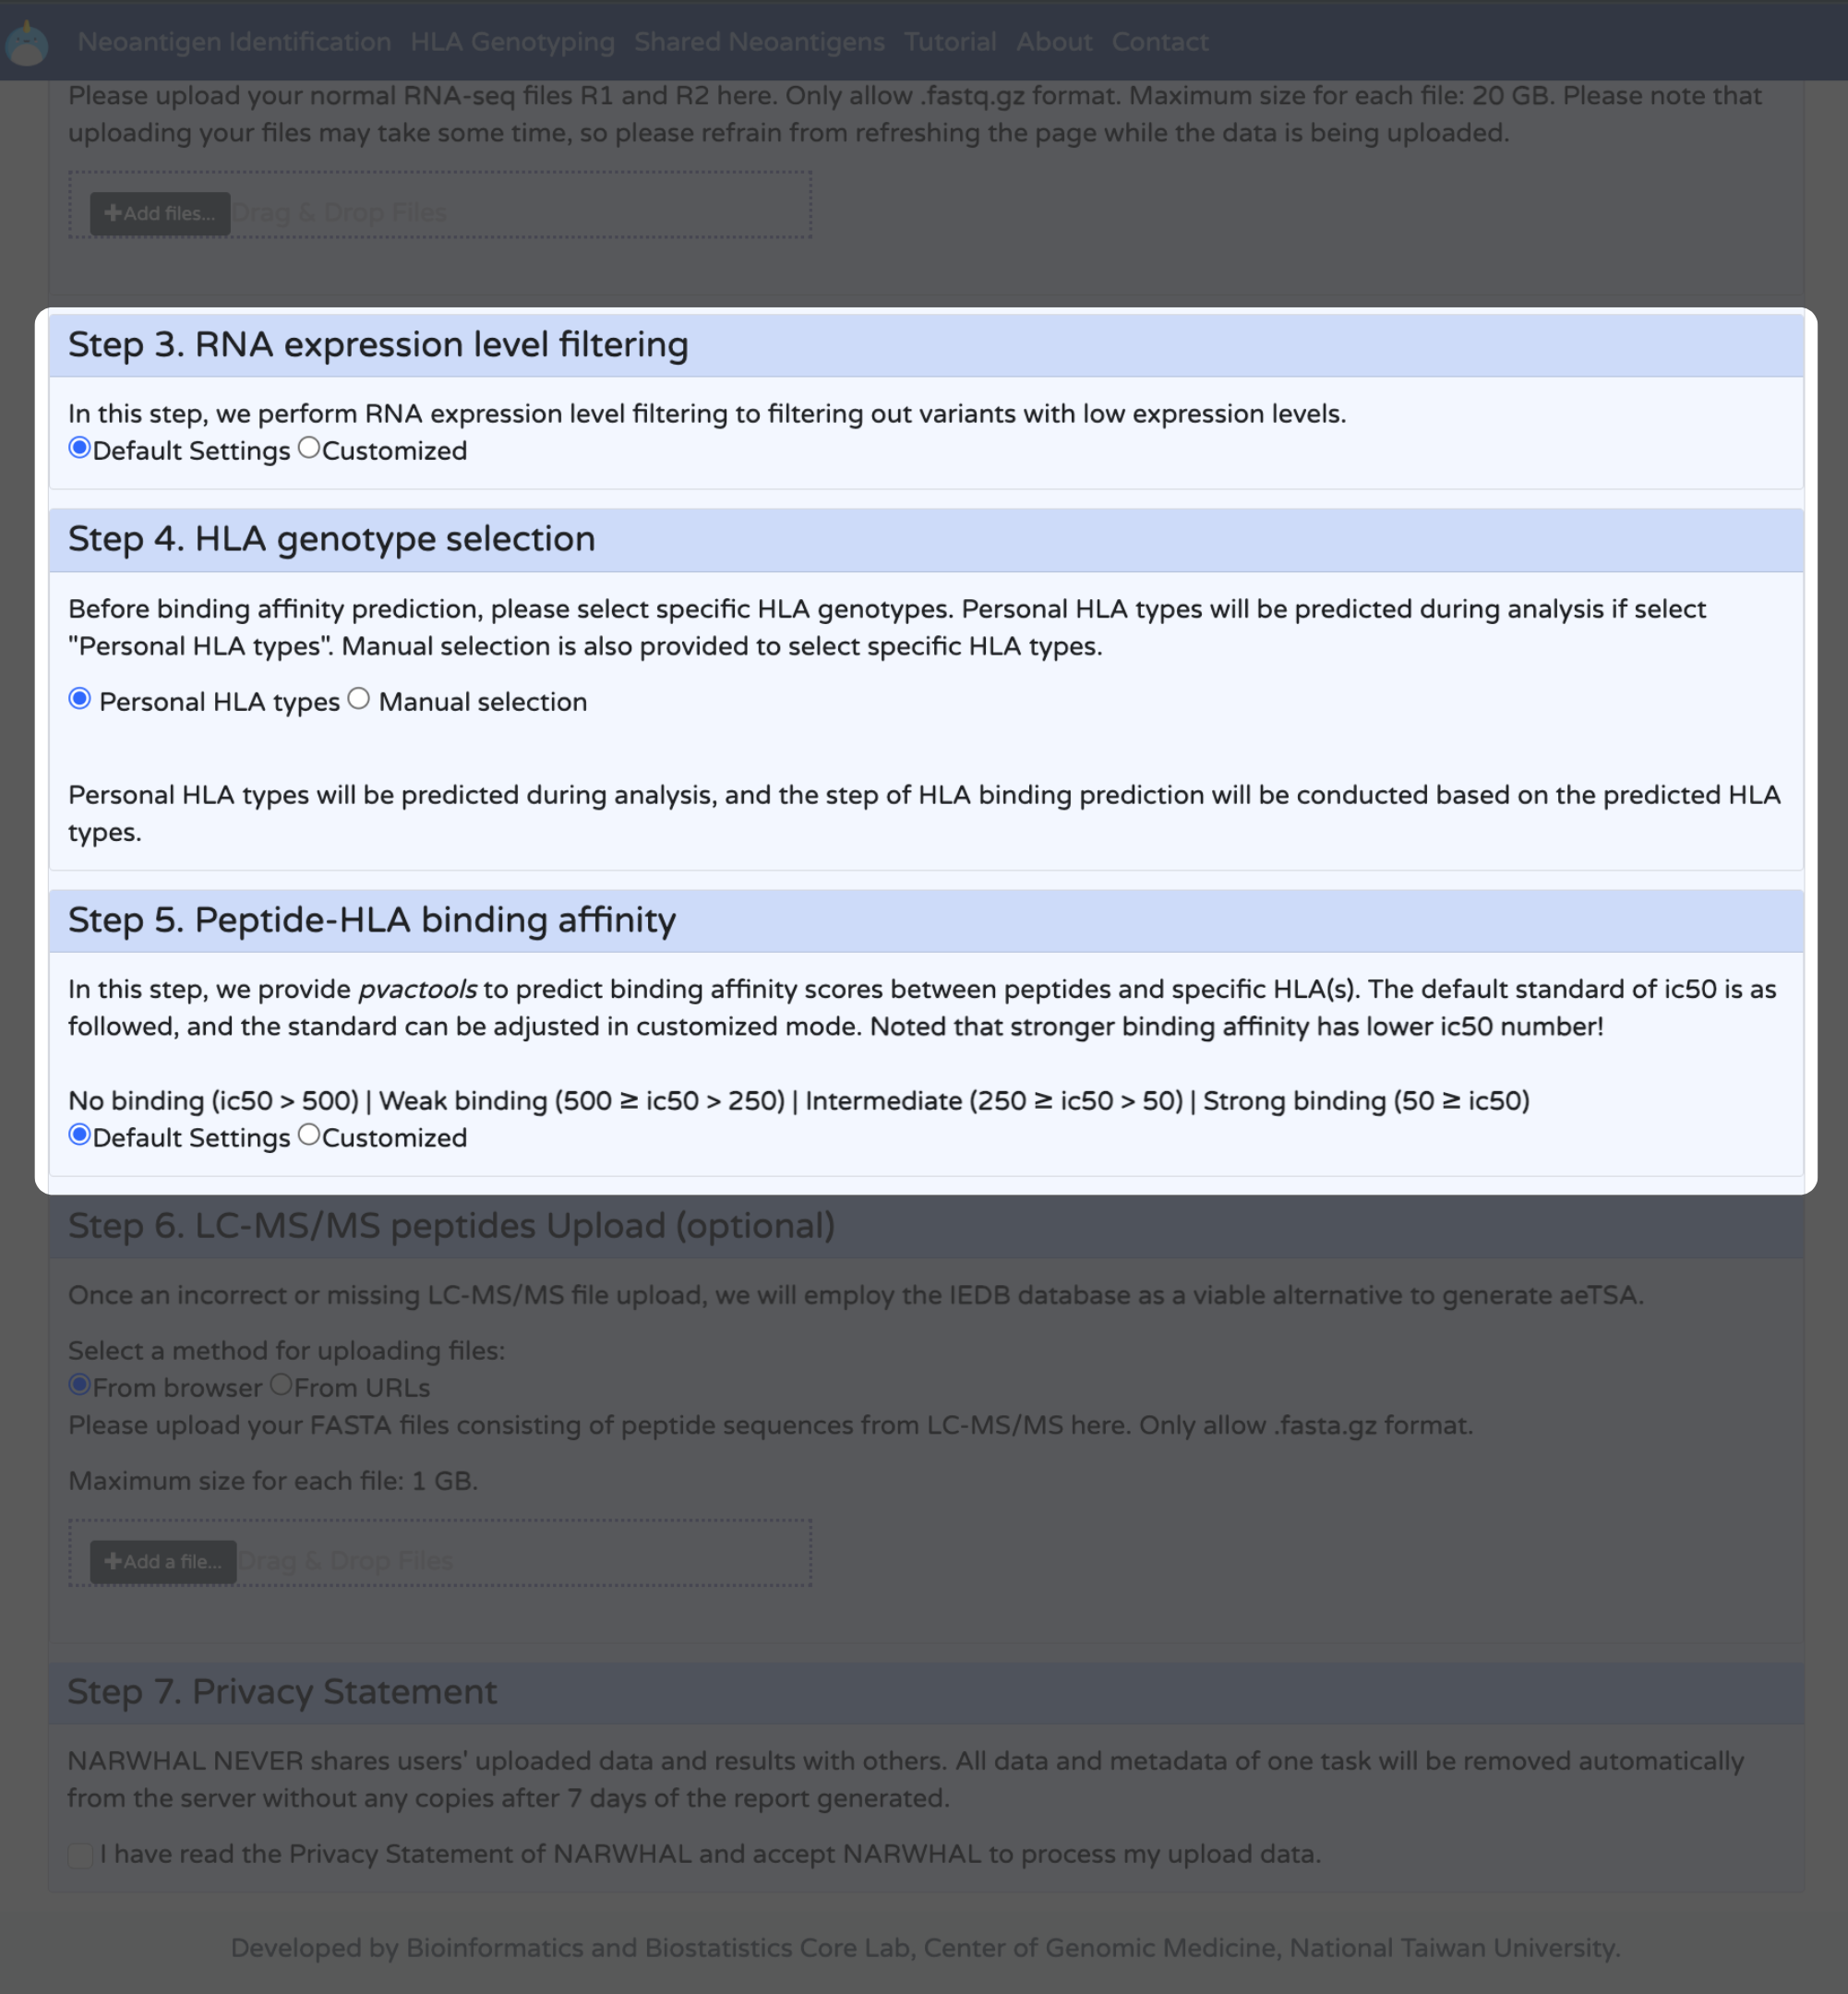
Adjust Parameters: Modify if needed.
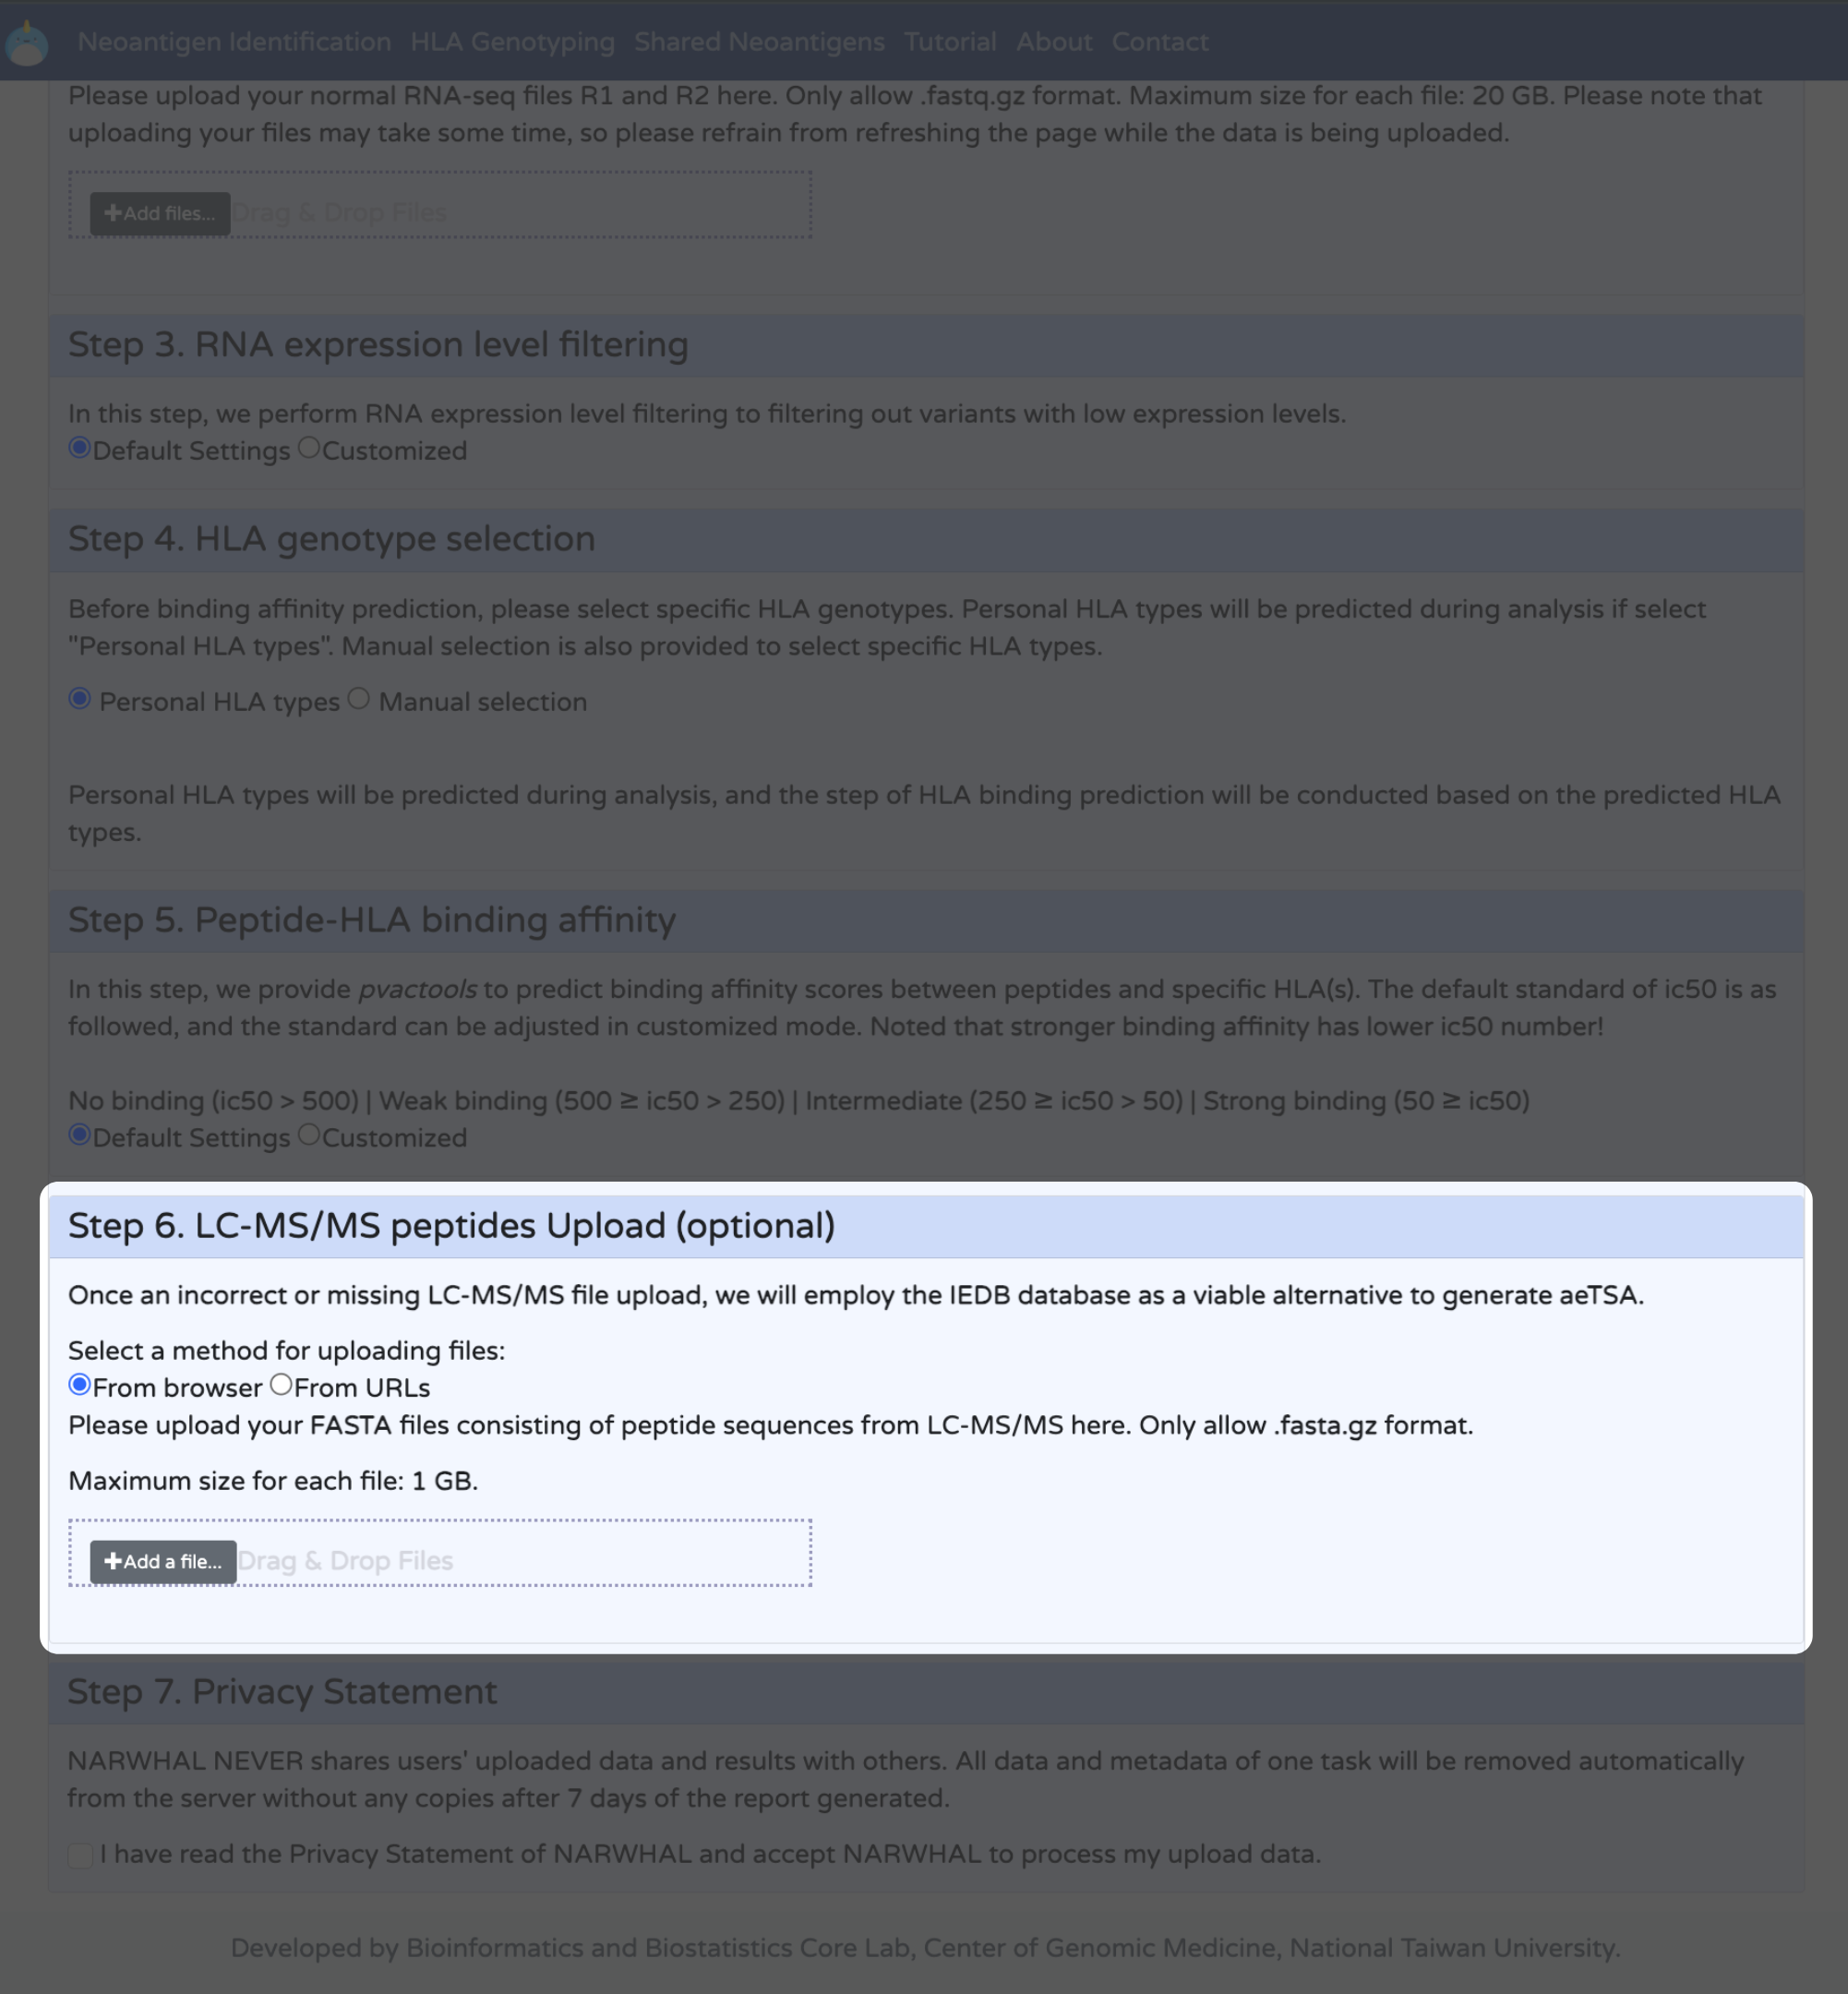
6. Upload LC-MS/MS Peptides: For validation, incorrect or missing LC-MS/MS file uploads will use the IEDB database as an alternative to generate aeTSA.
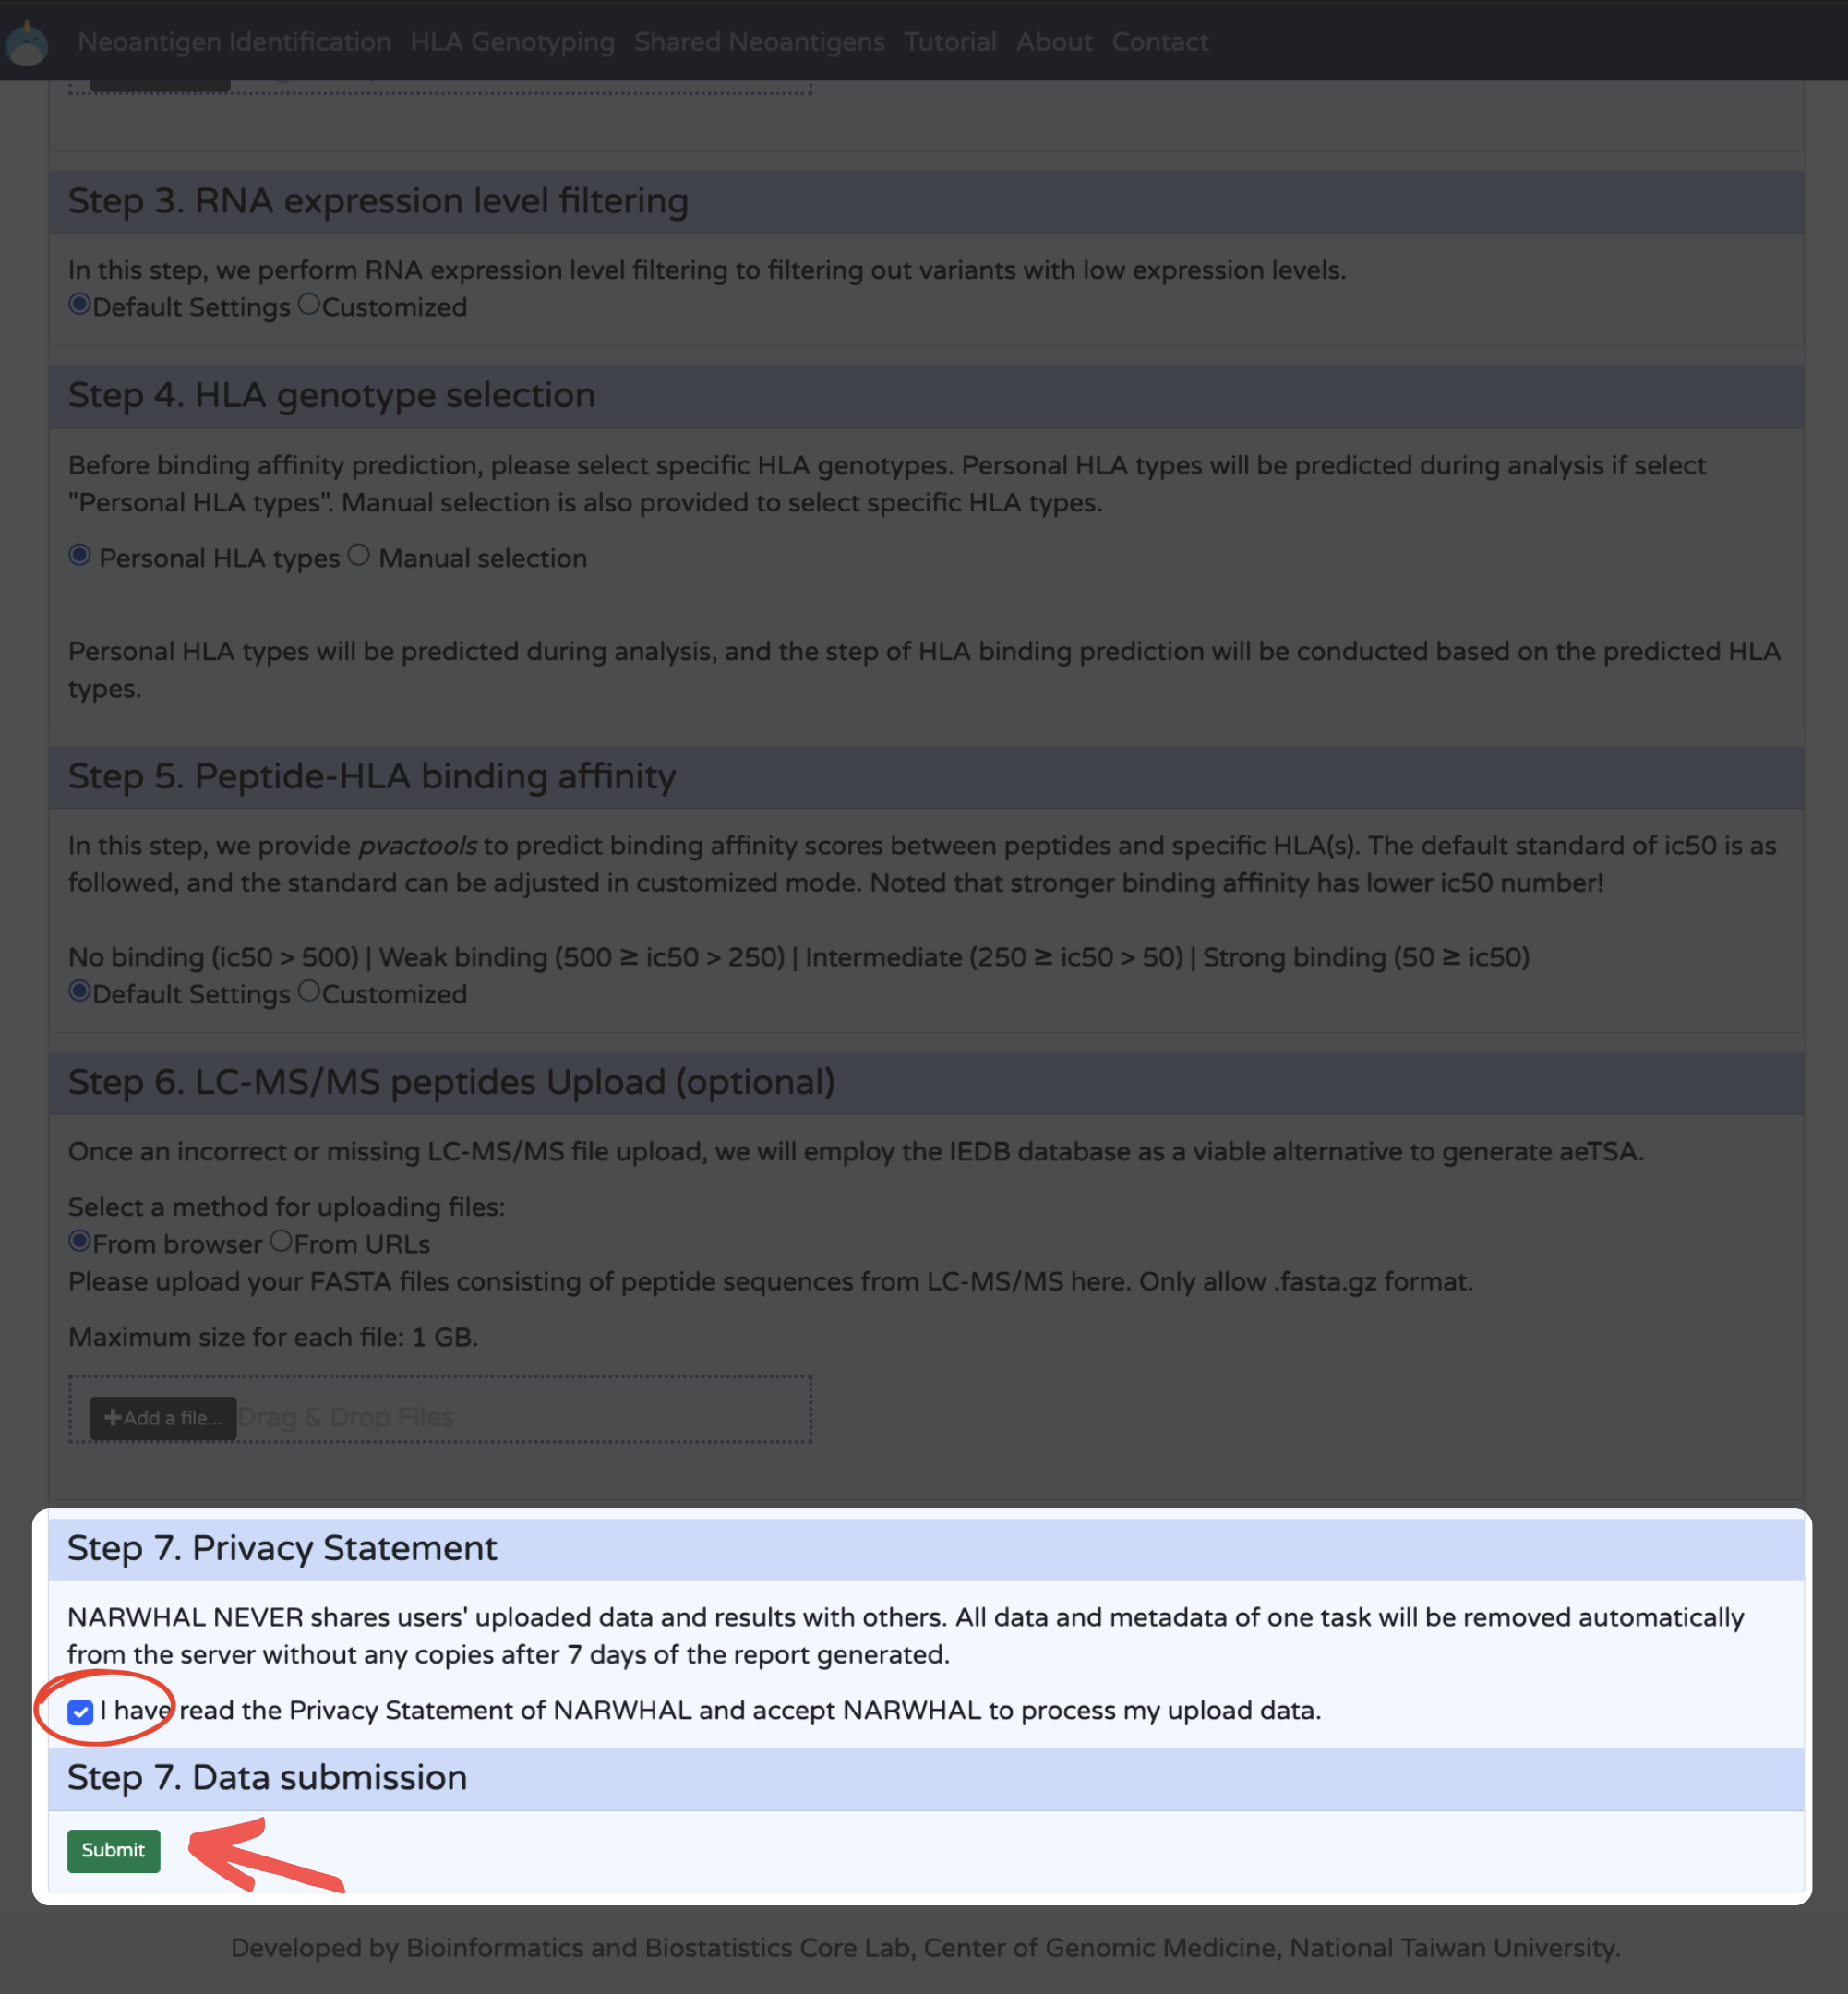
7. Agree to Privacy Statement and Submit the Task: Click "Submit" to start the analysis.
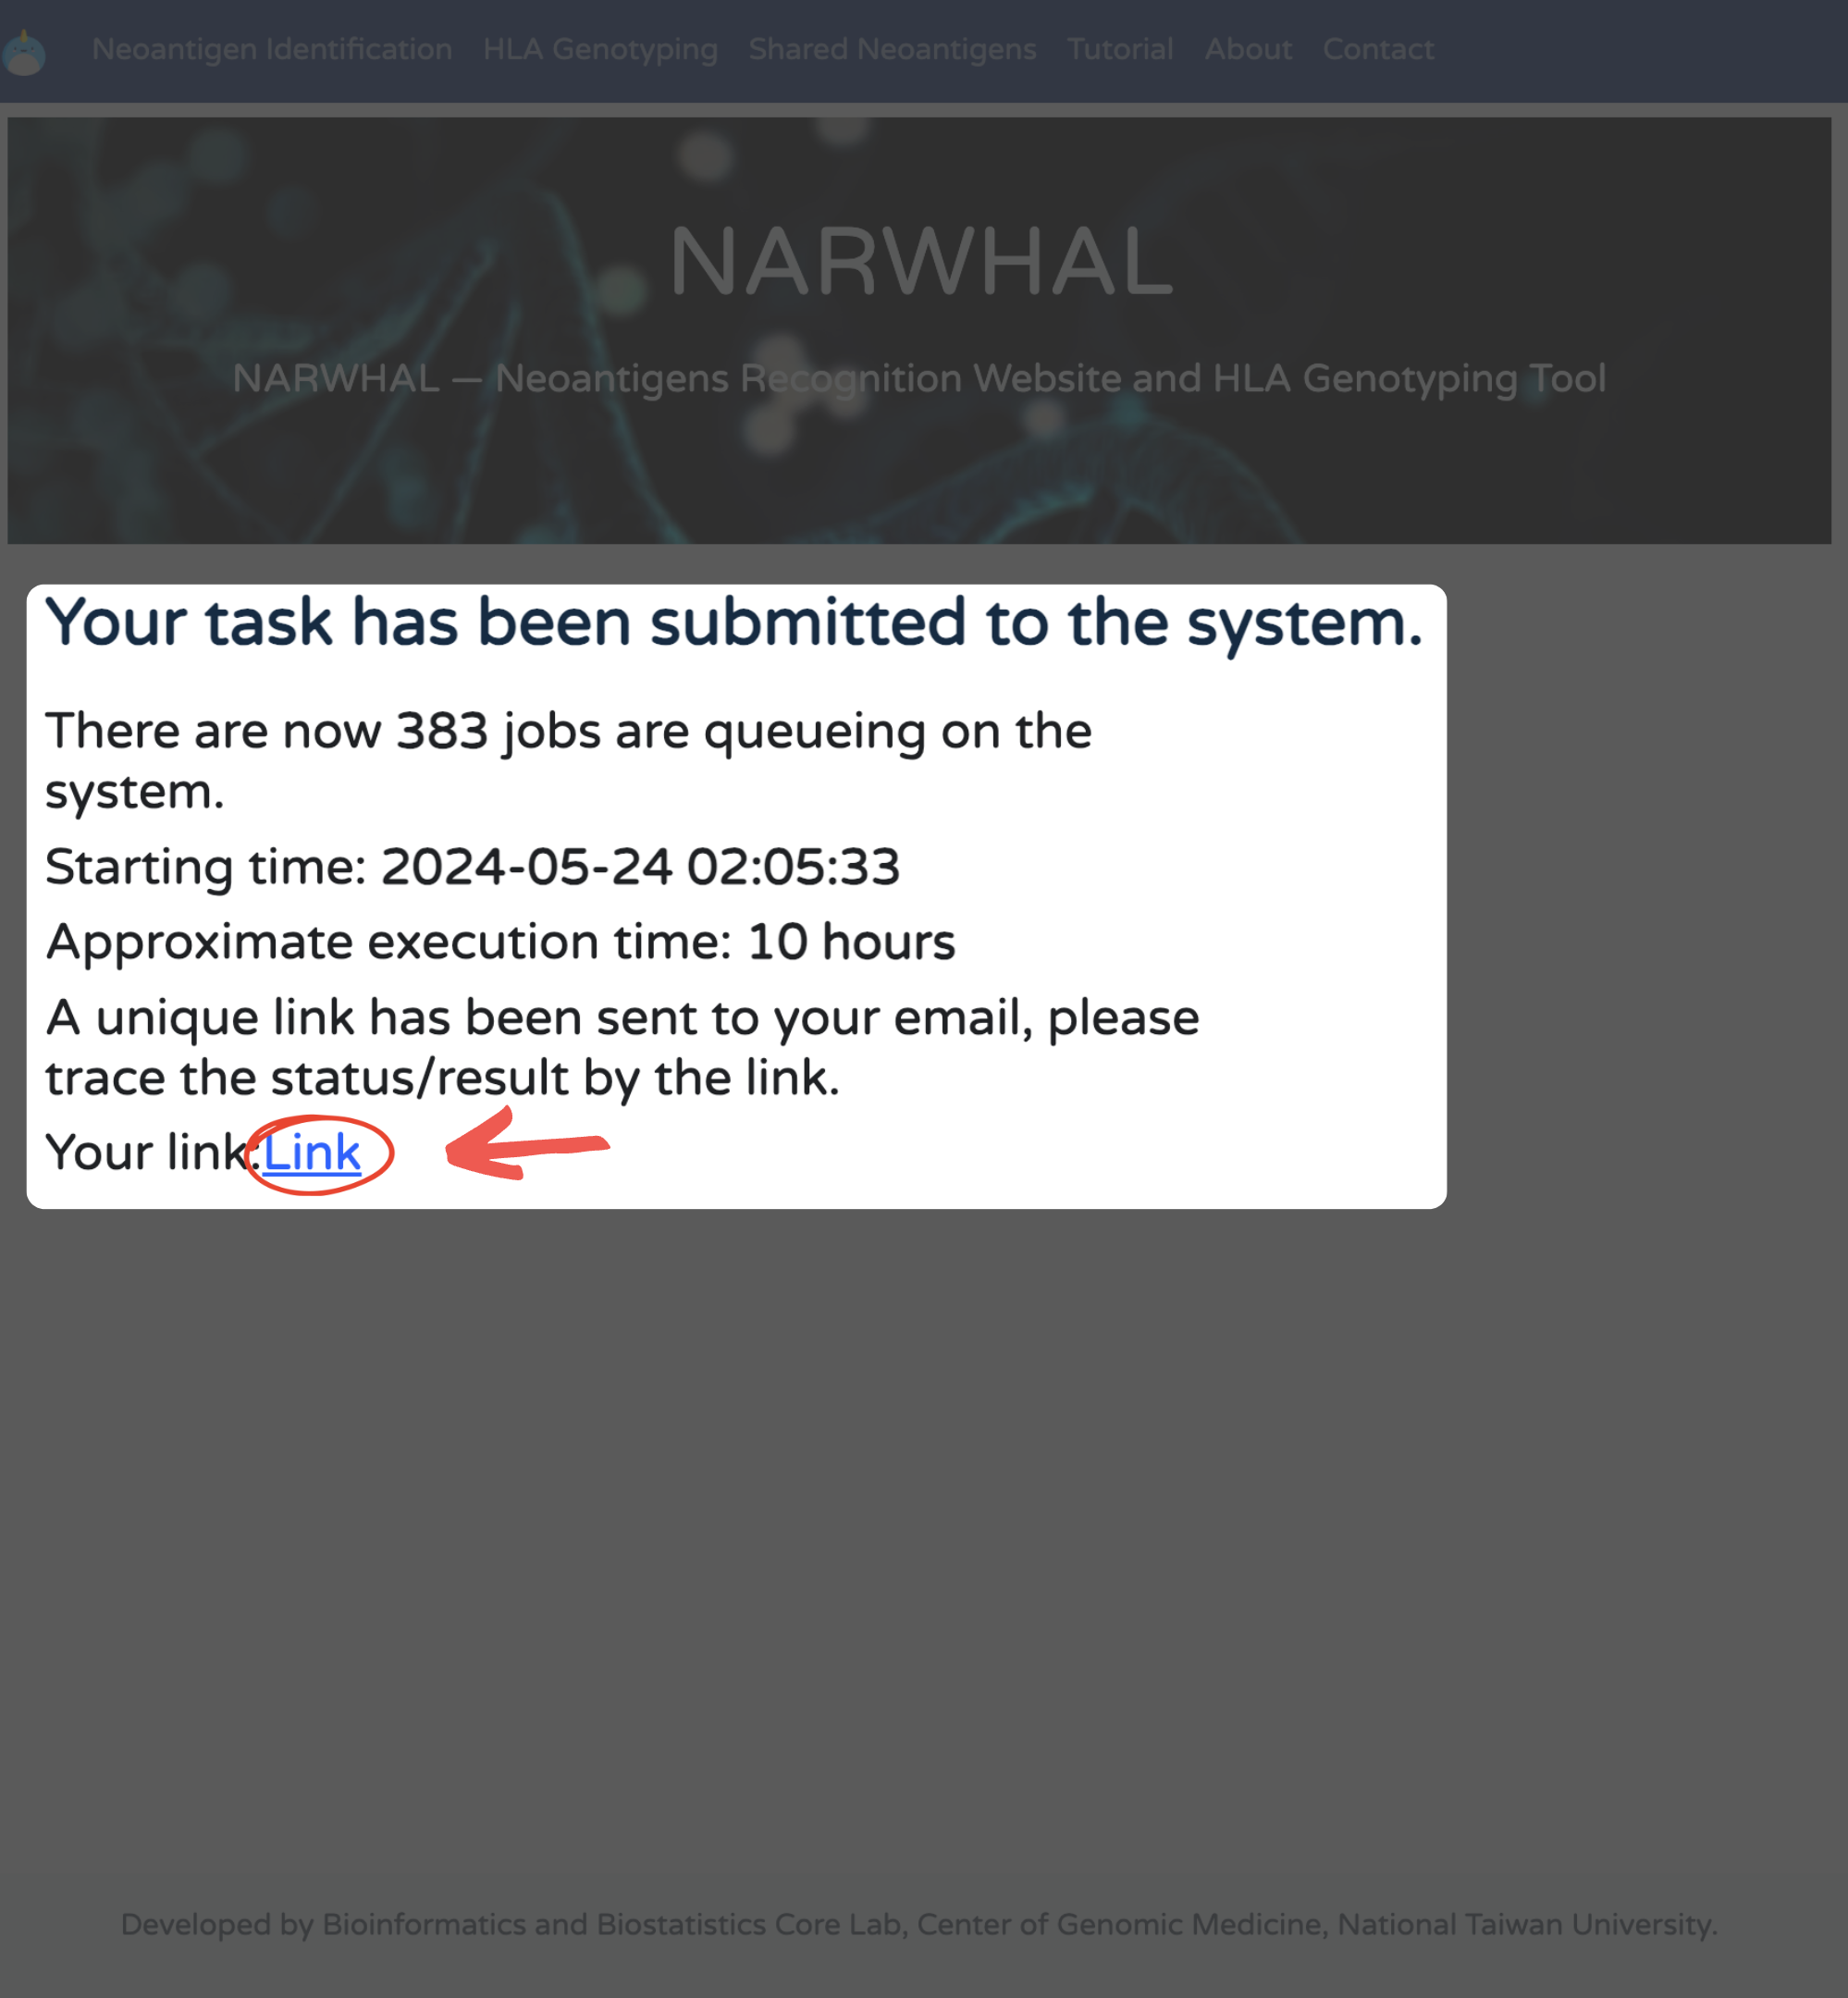
8. Task Submitted Successfully: Your task has been submitted.
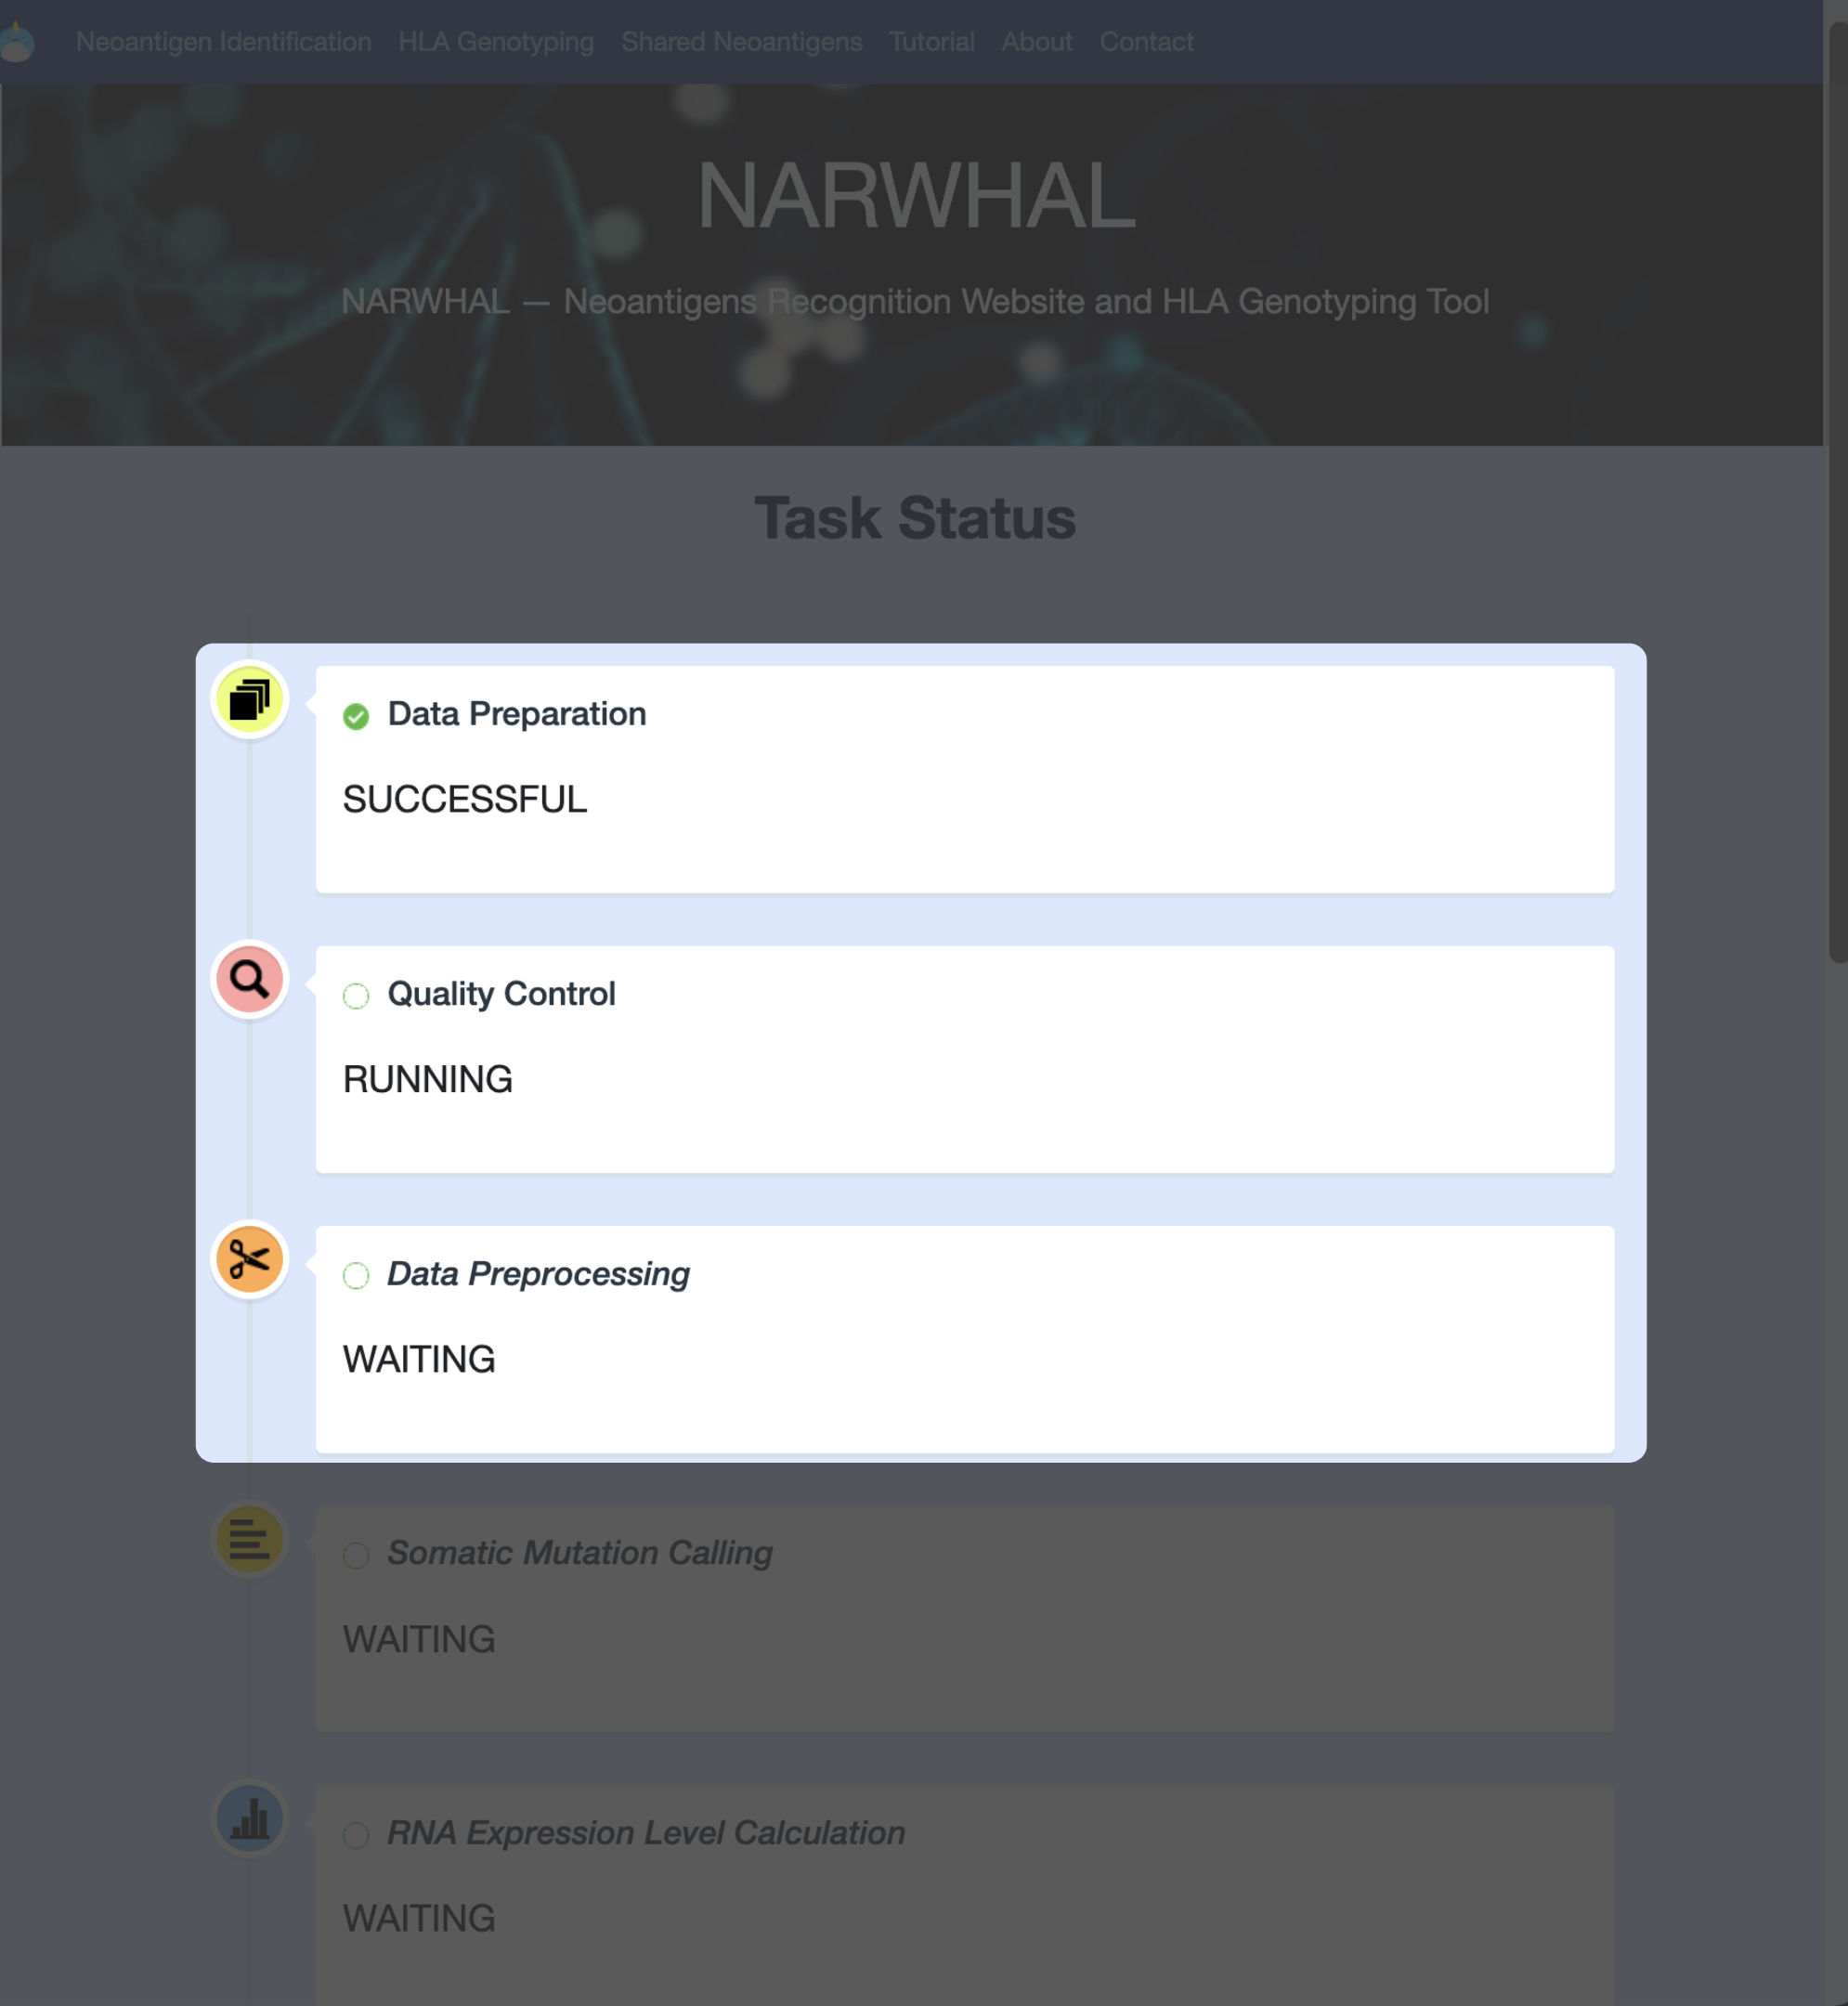
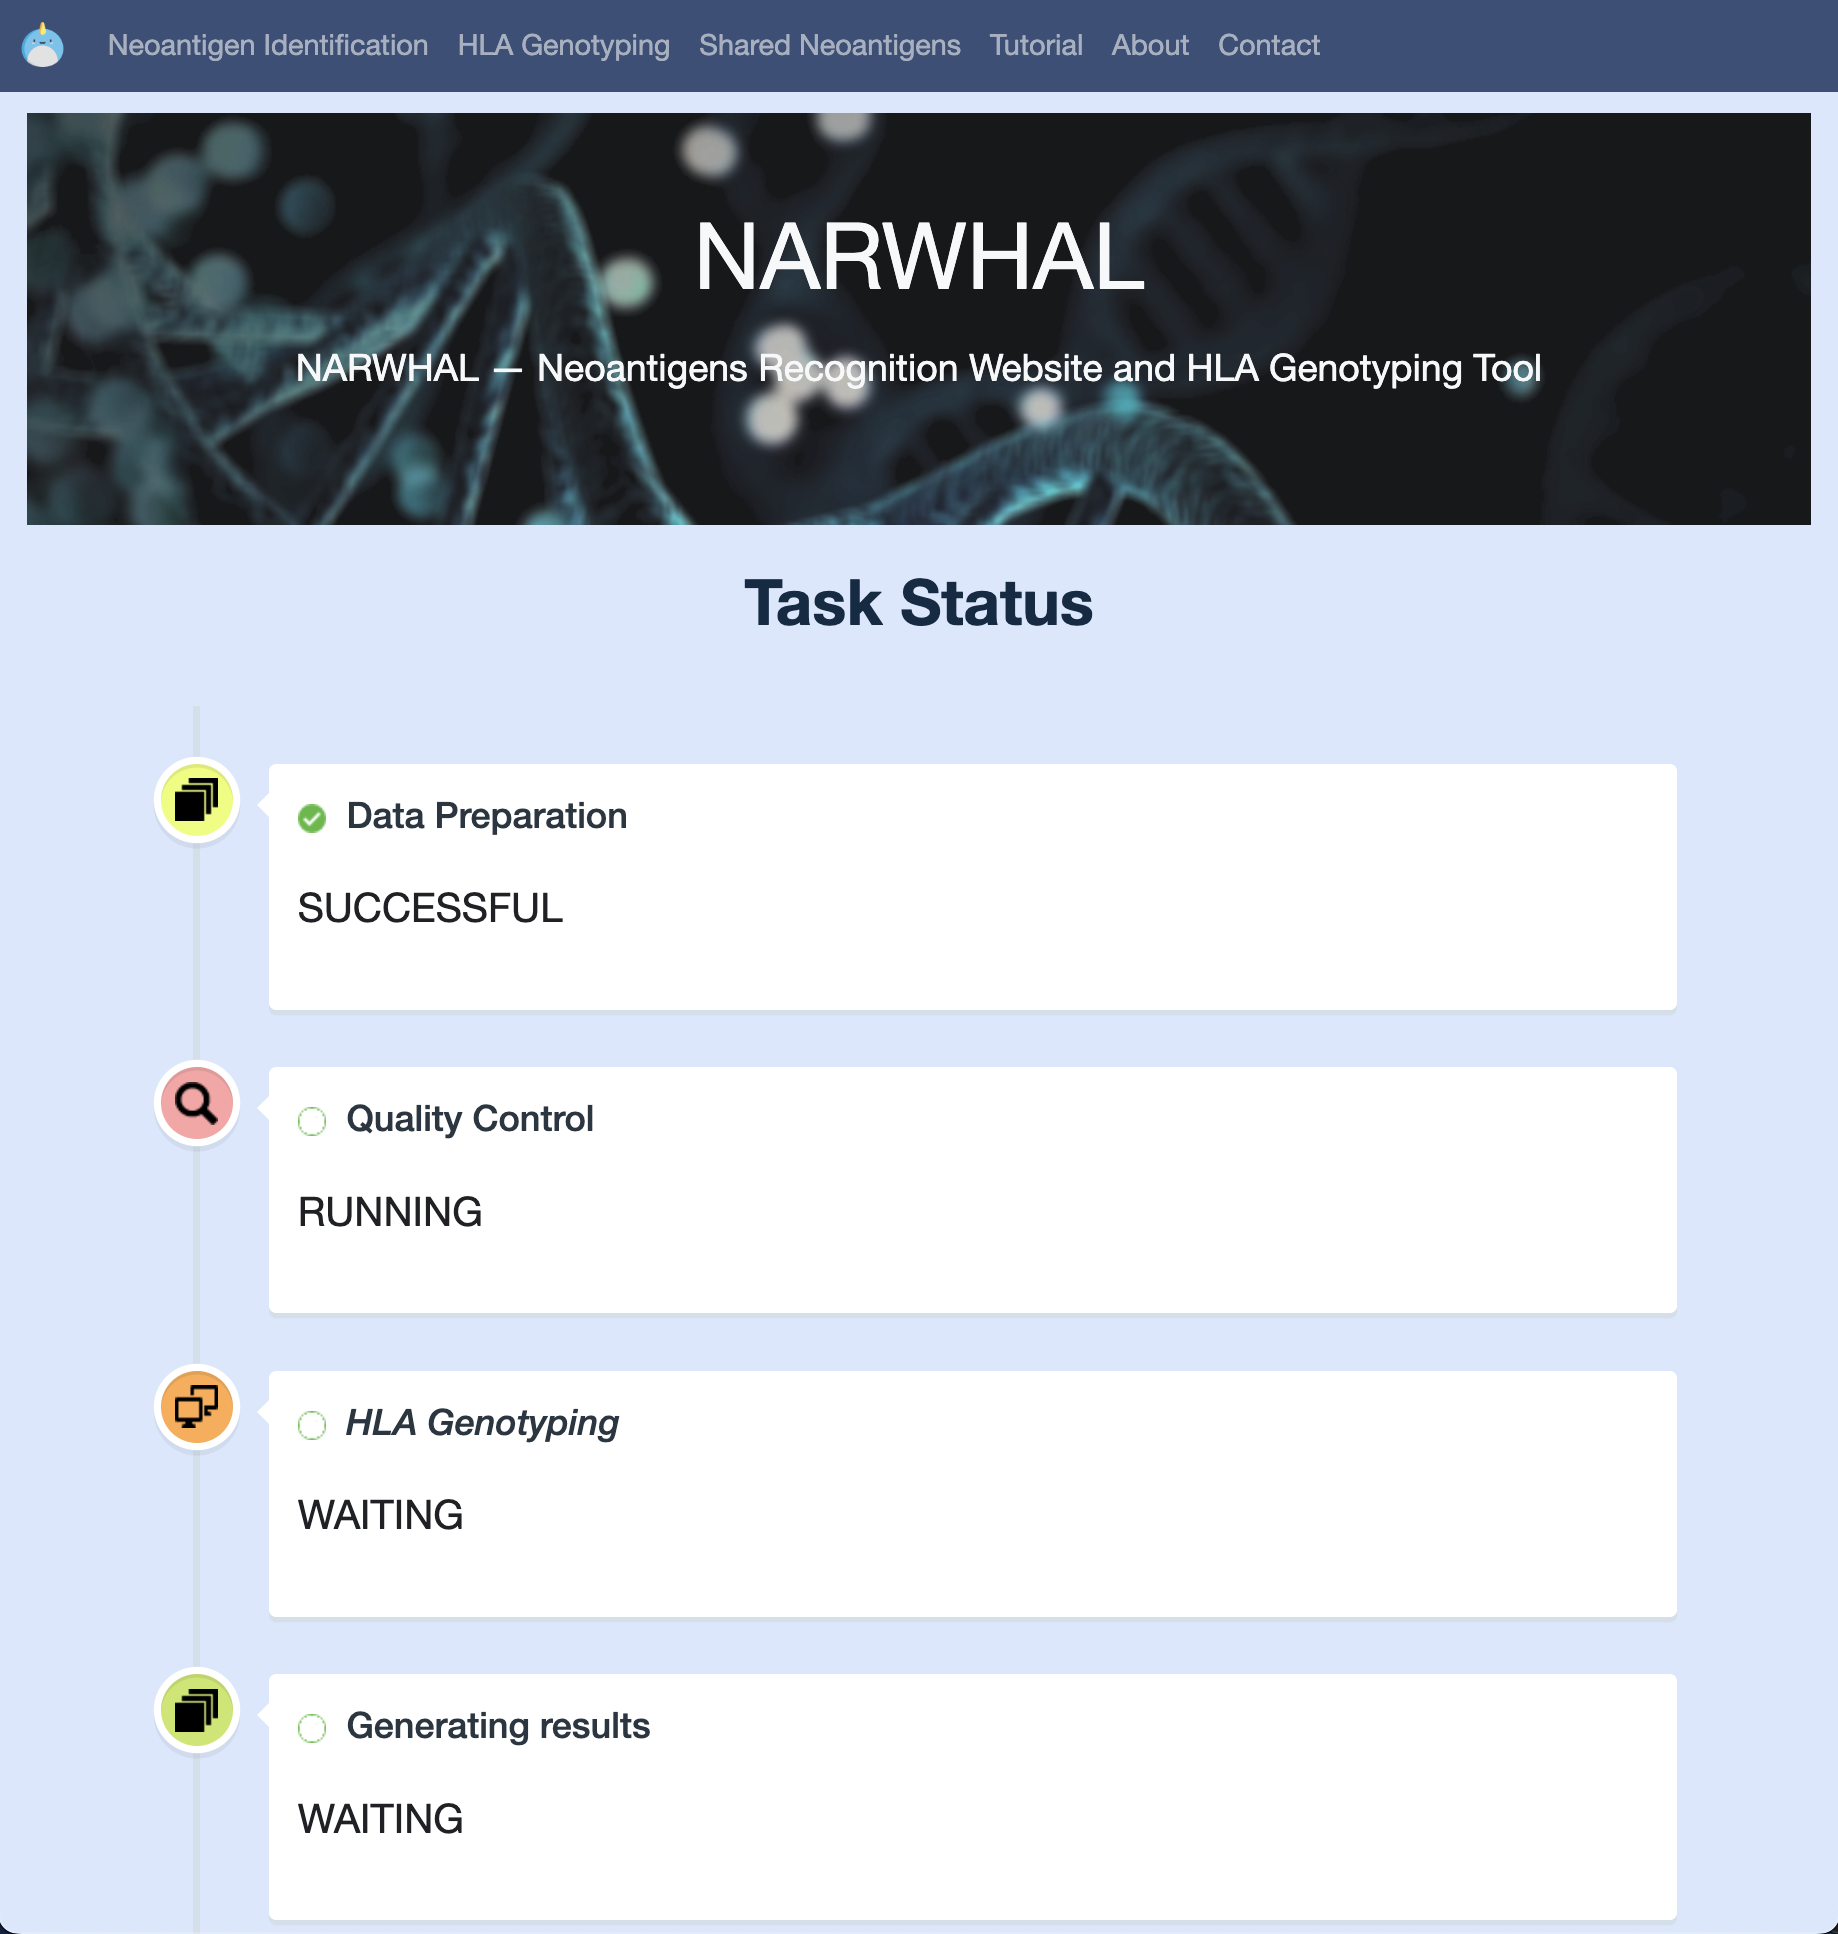
9. Progress Tracking: Monitor the progress of your task.
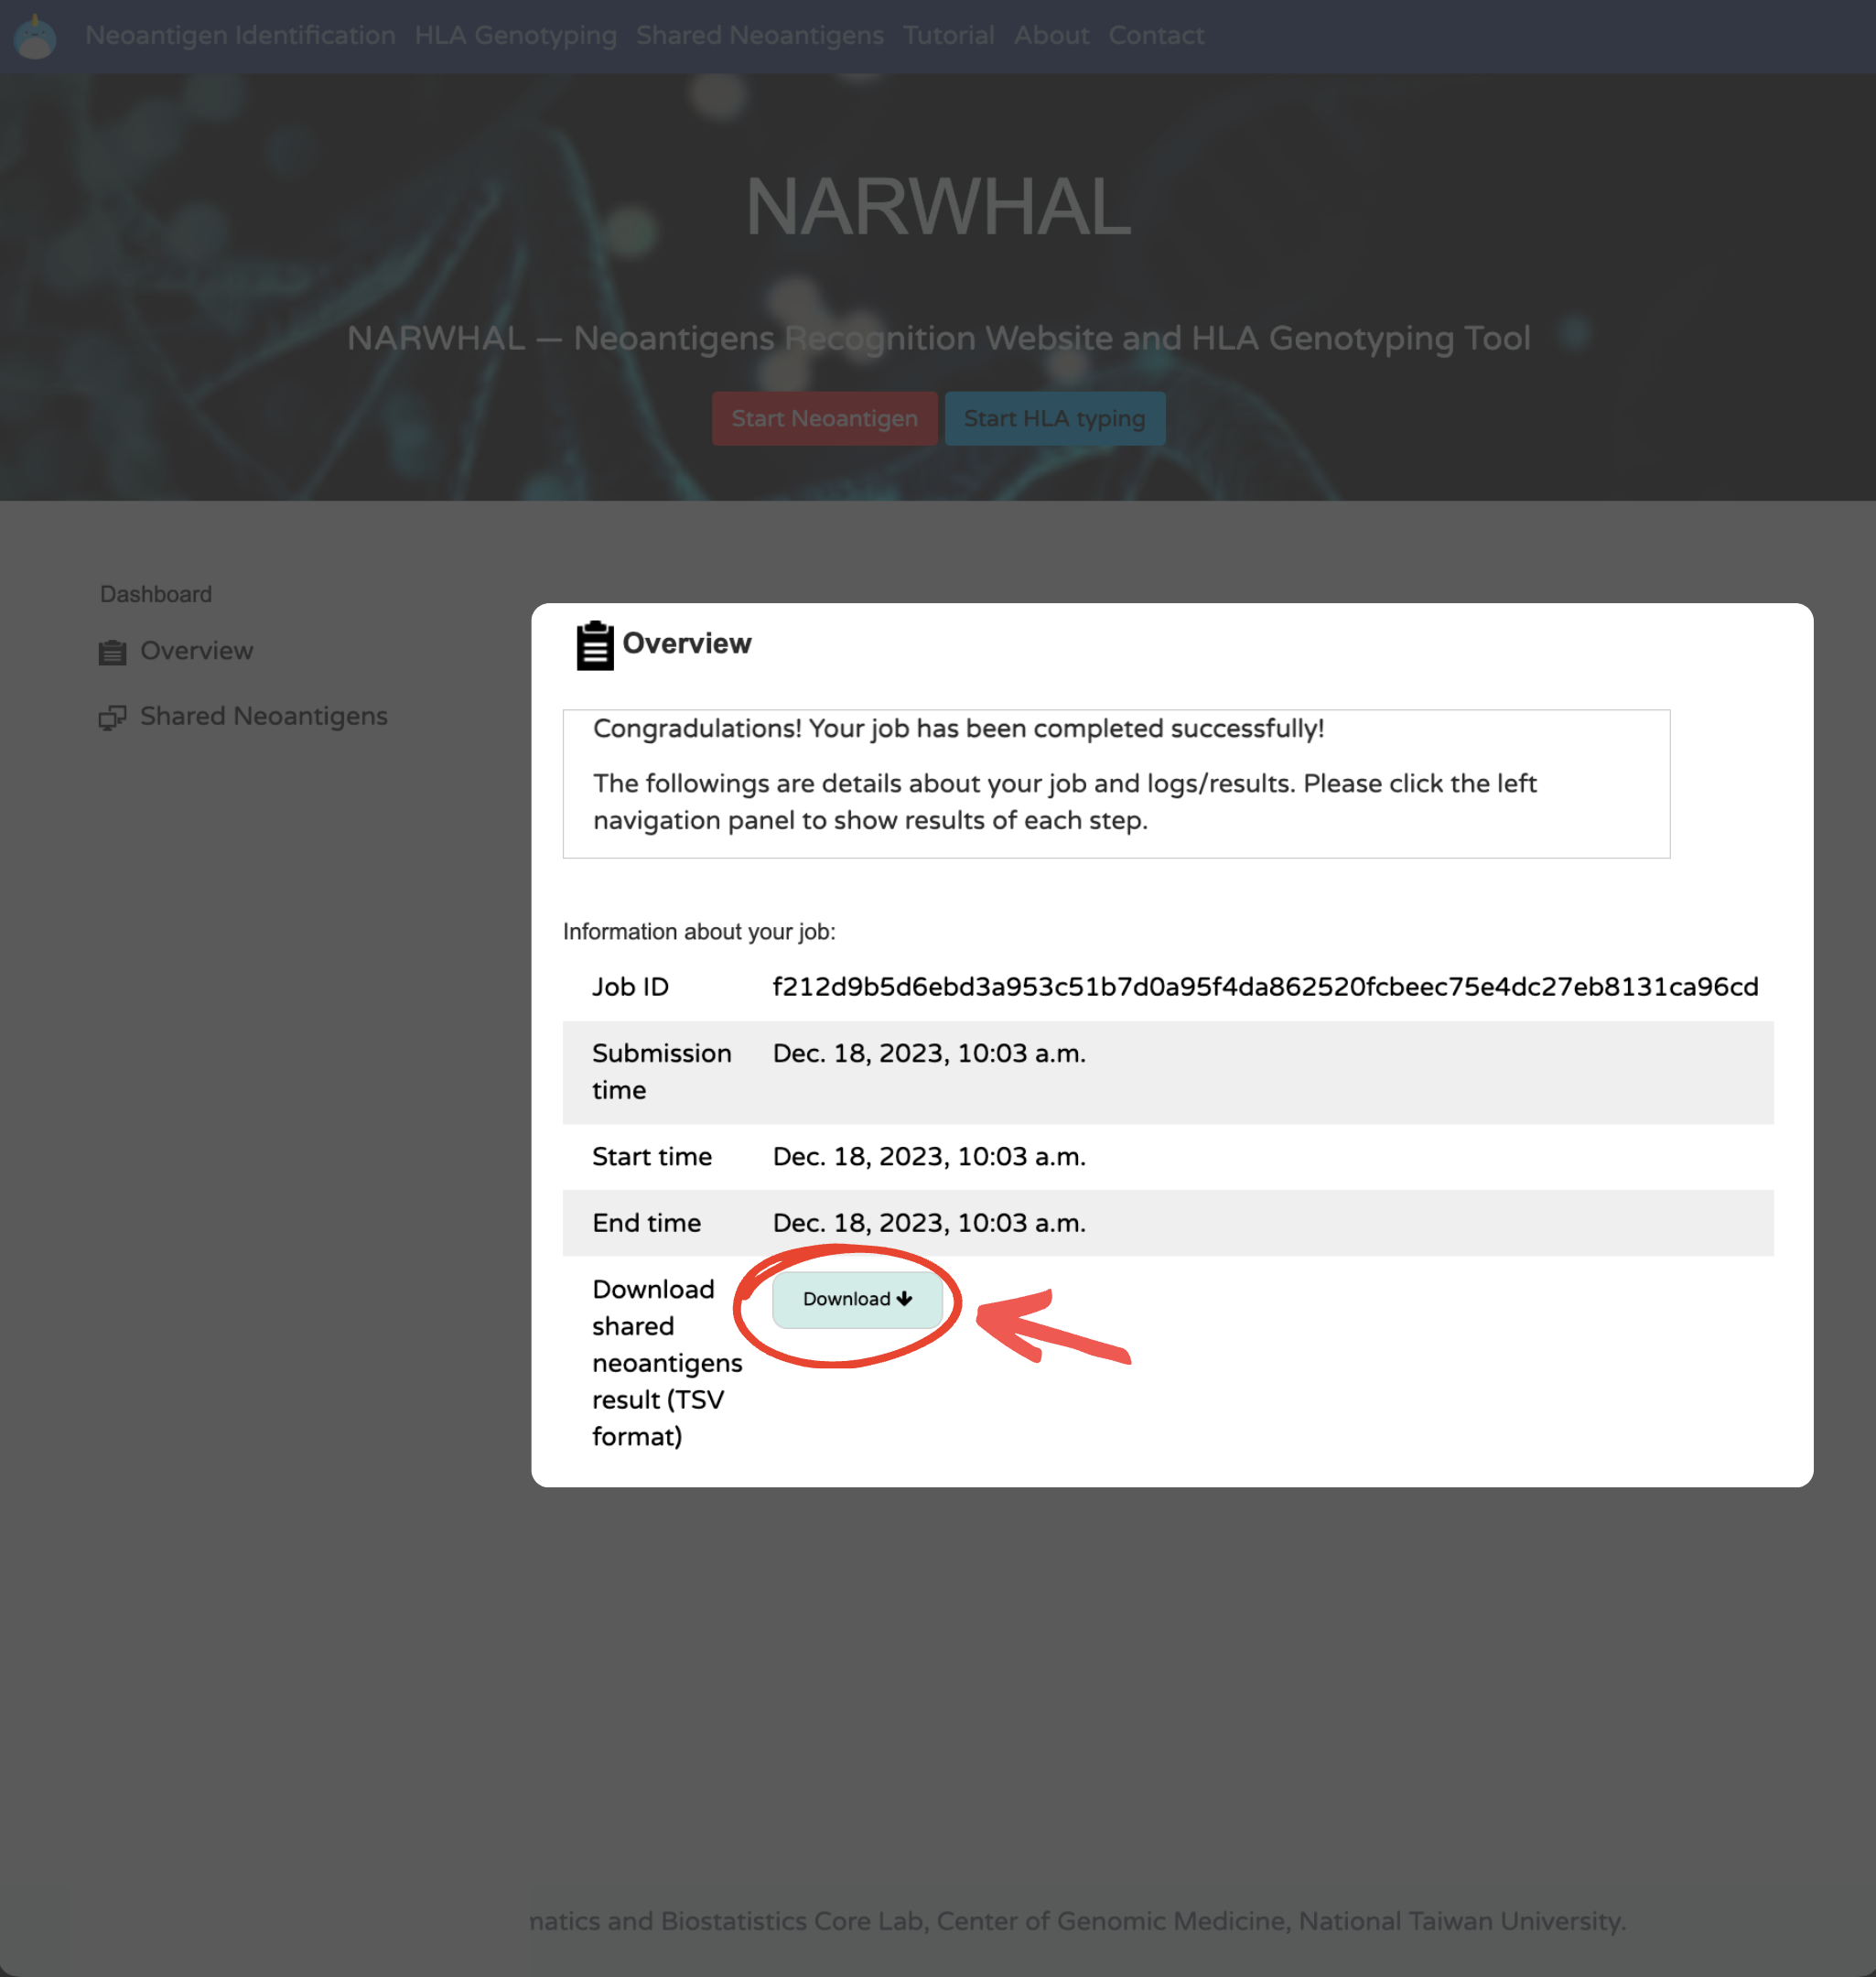
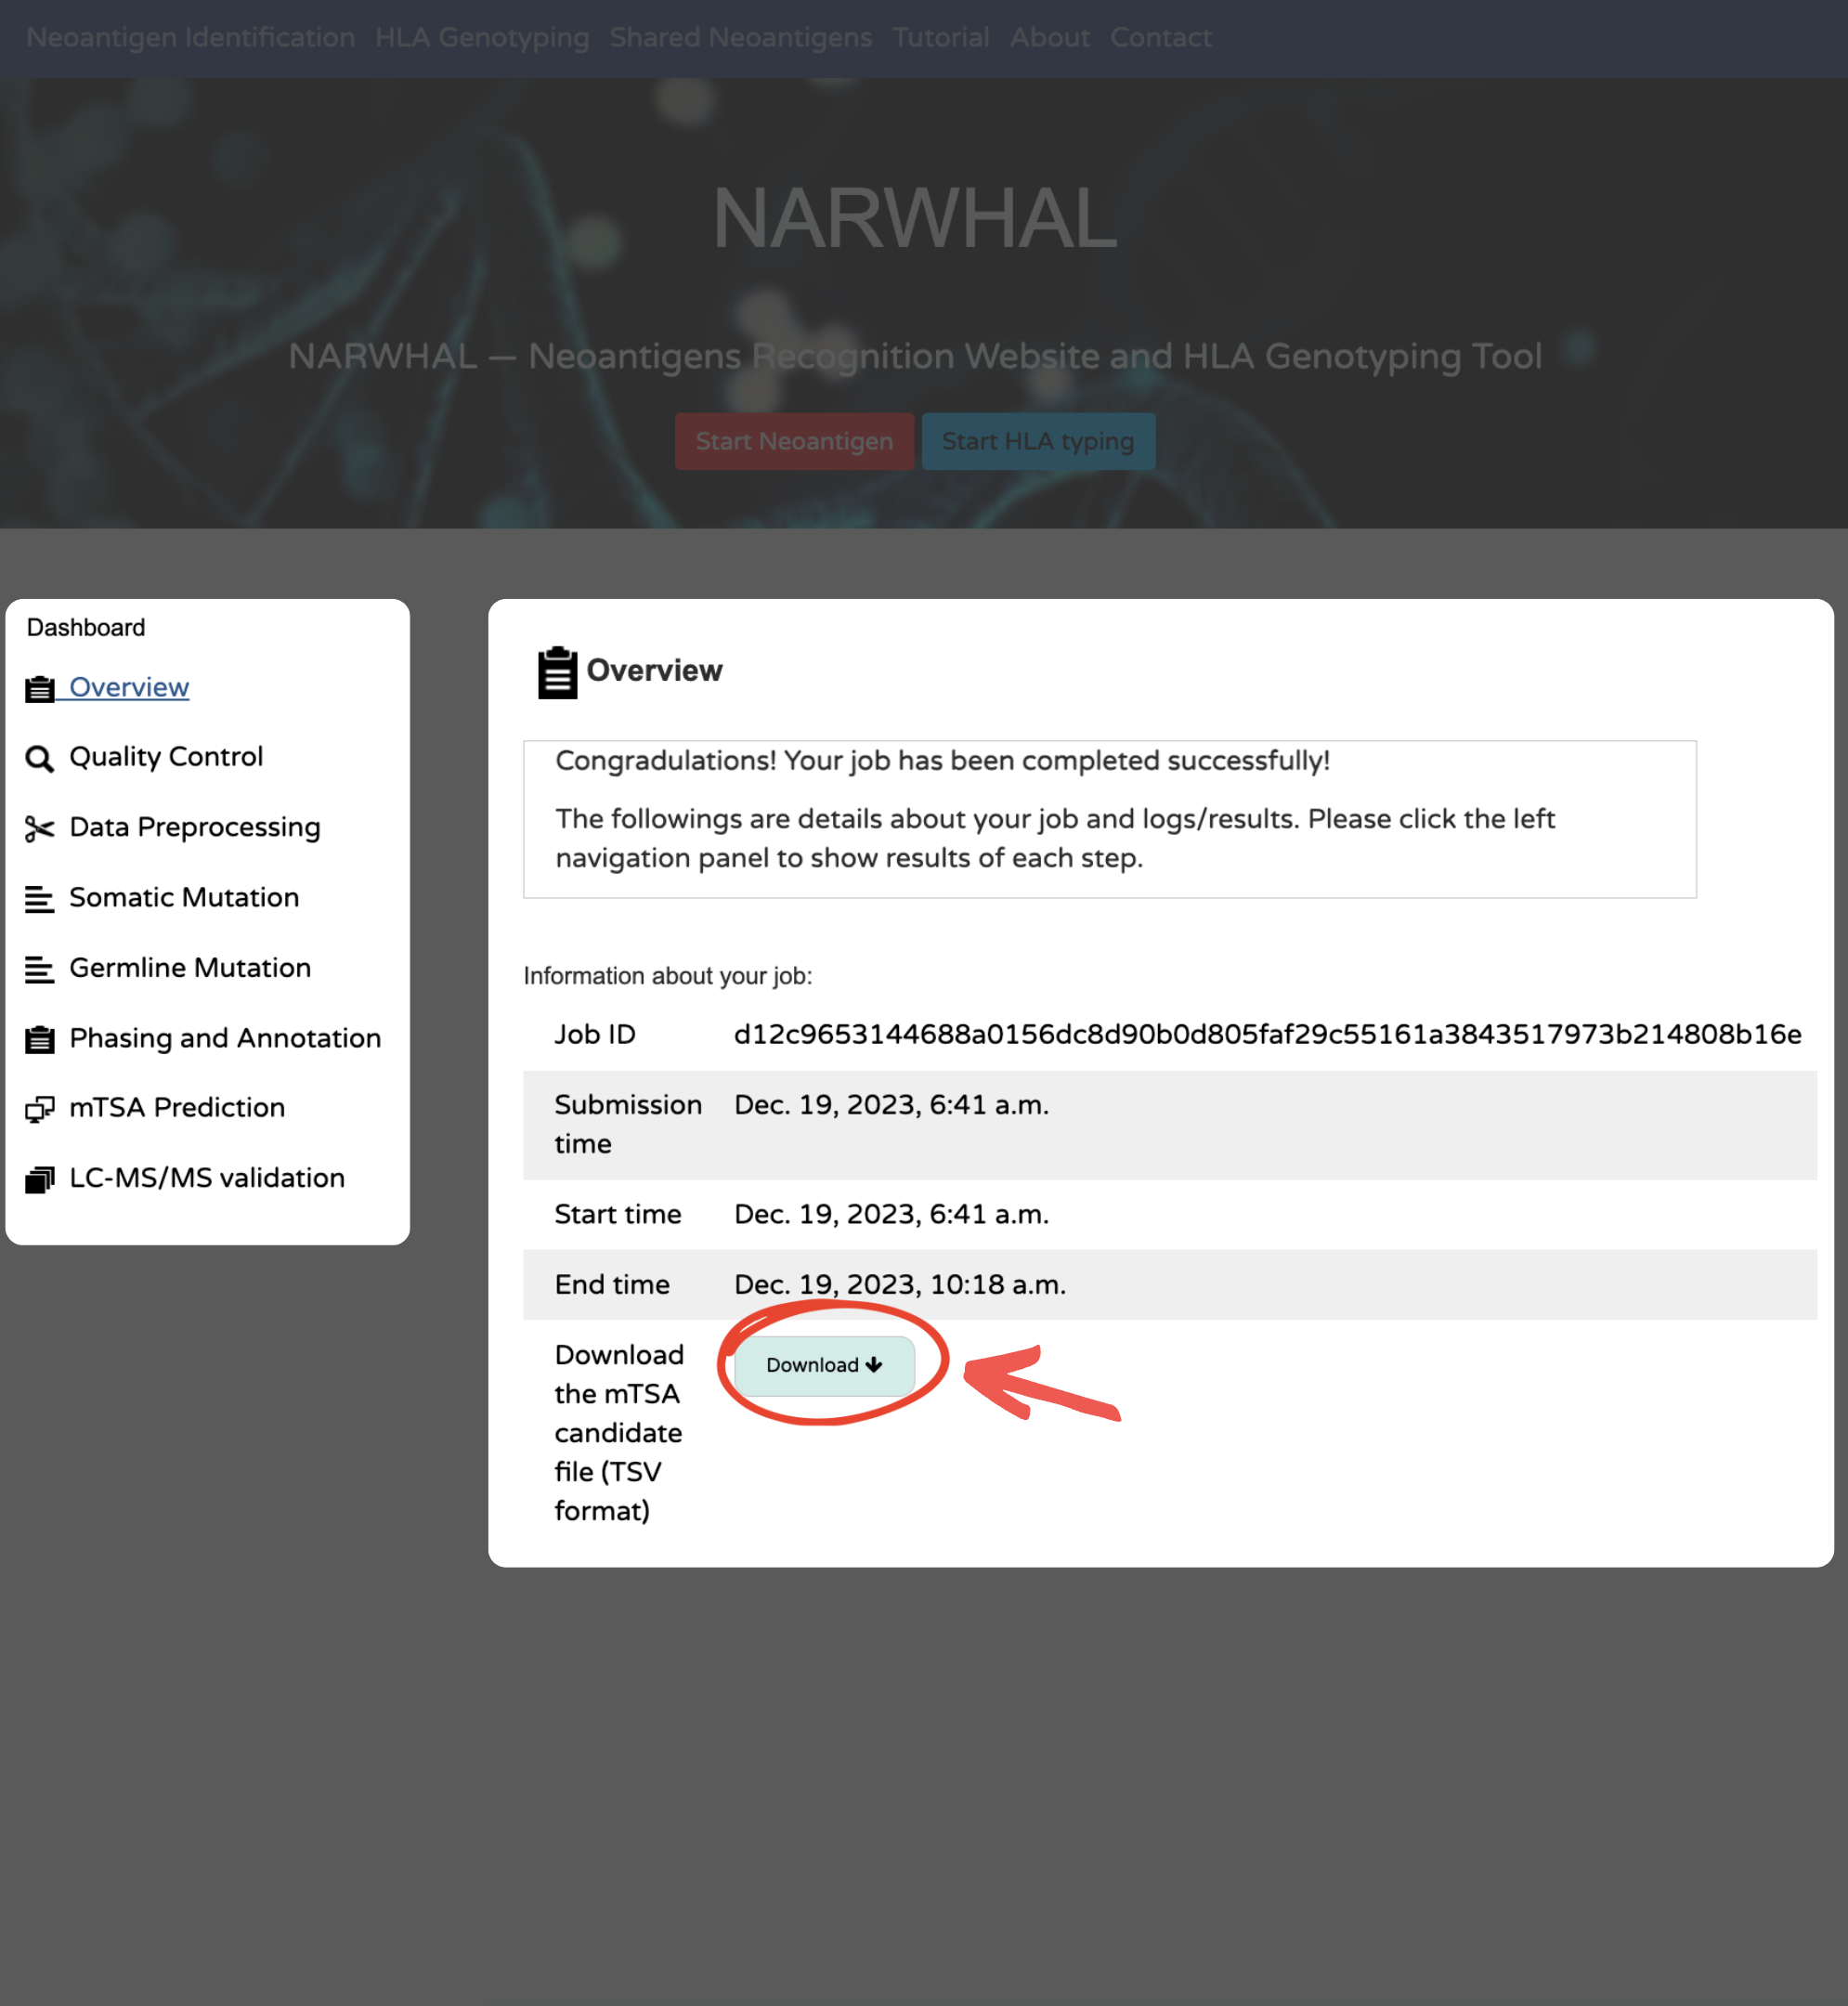
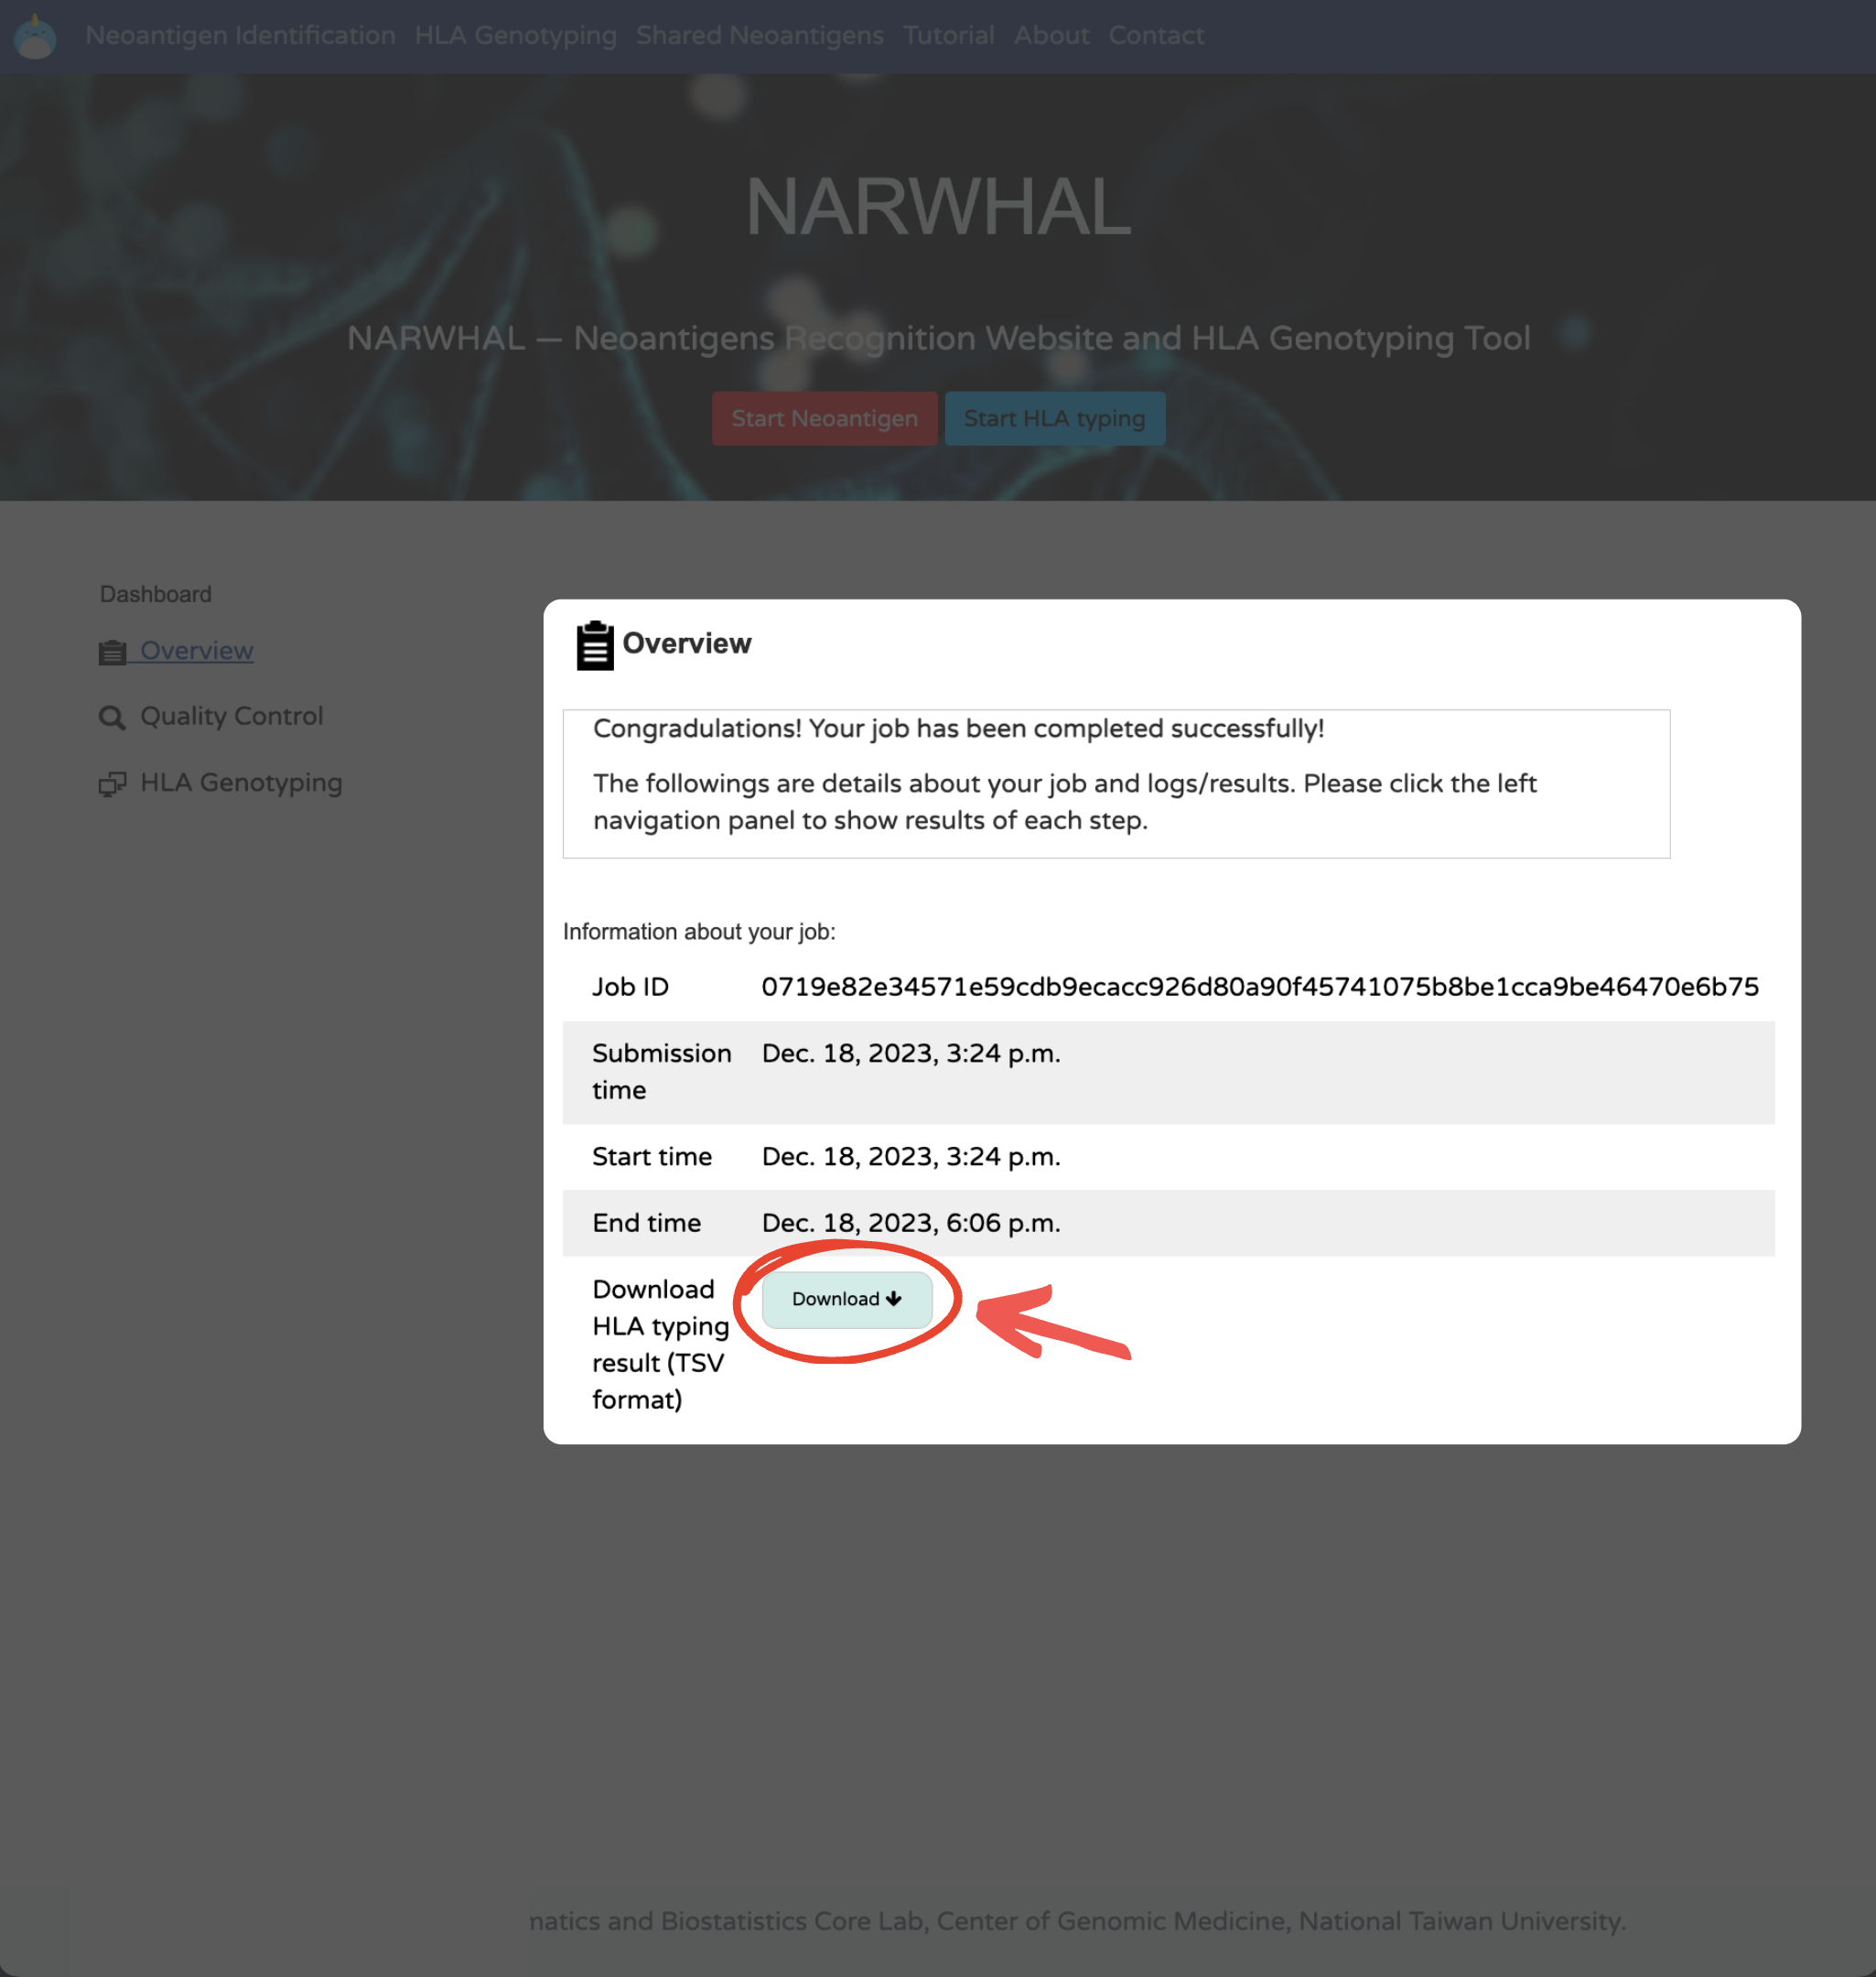
10. Report: Download the final TSV files and intermediate files from the dashboard.
HLA Genotyping
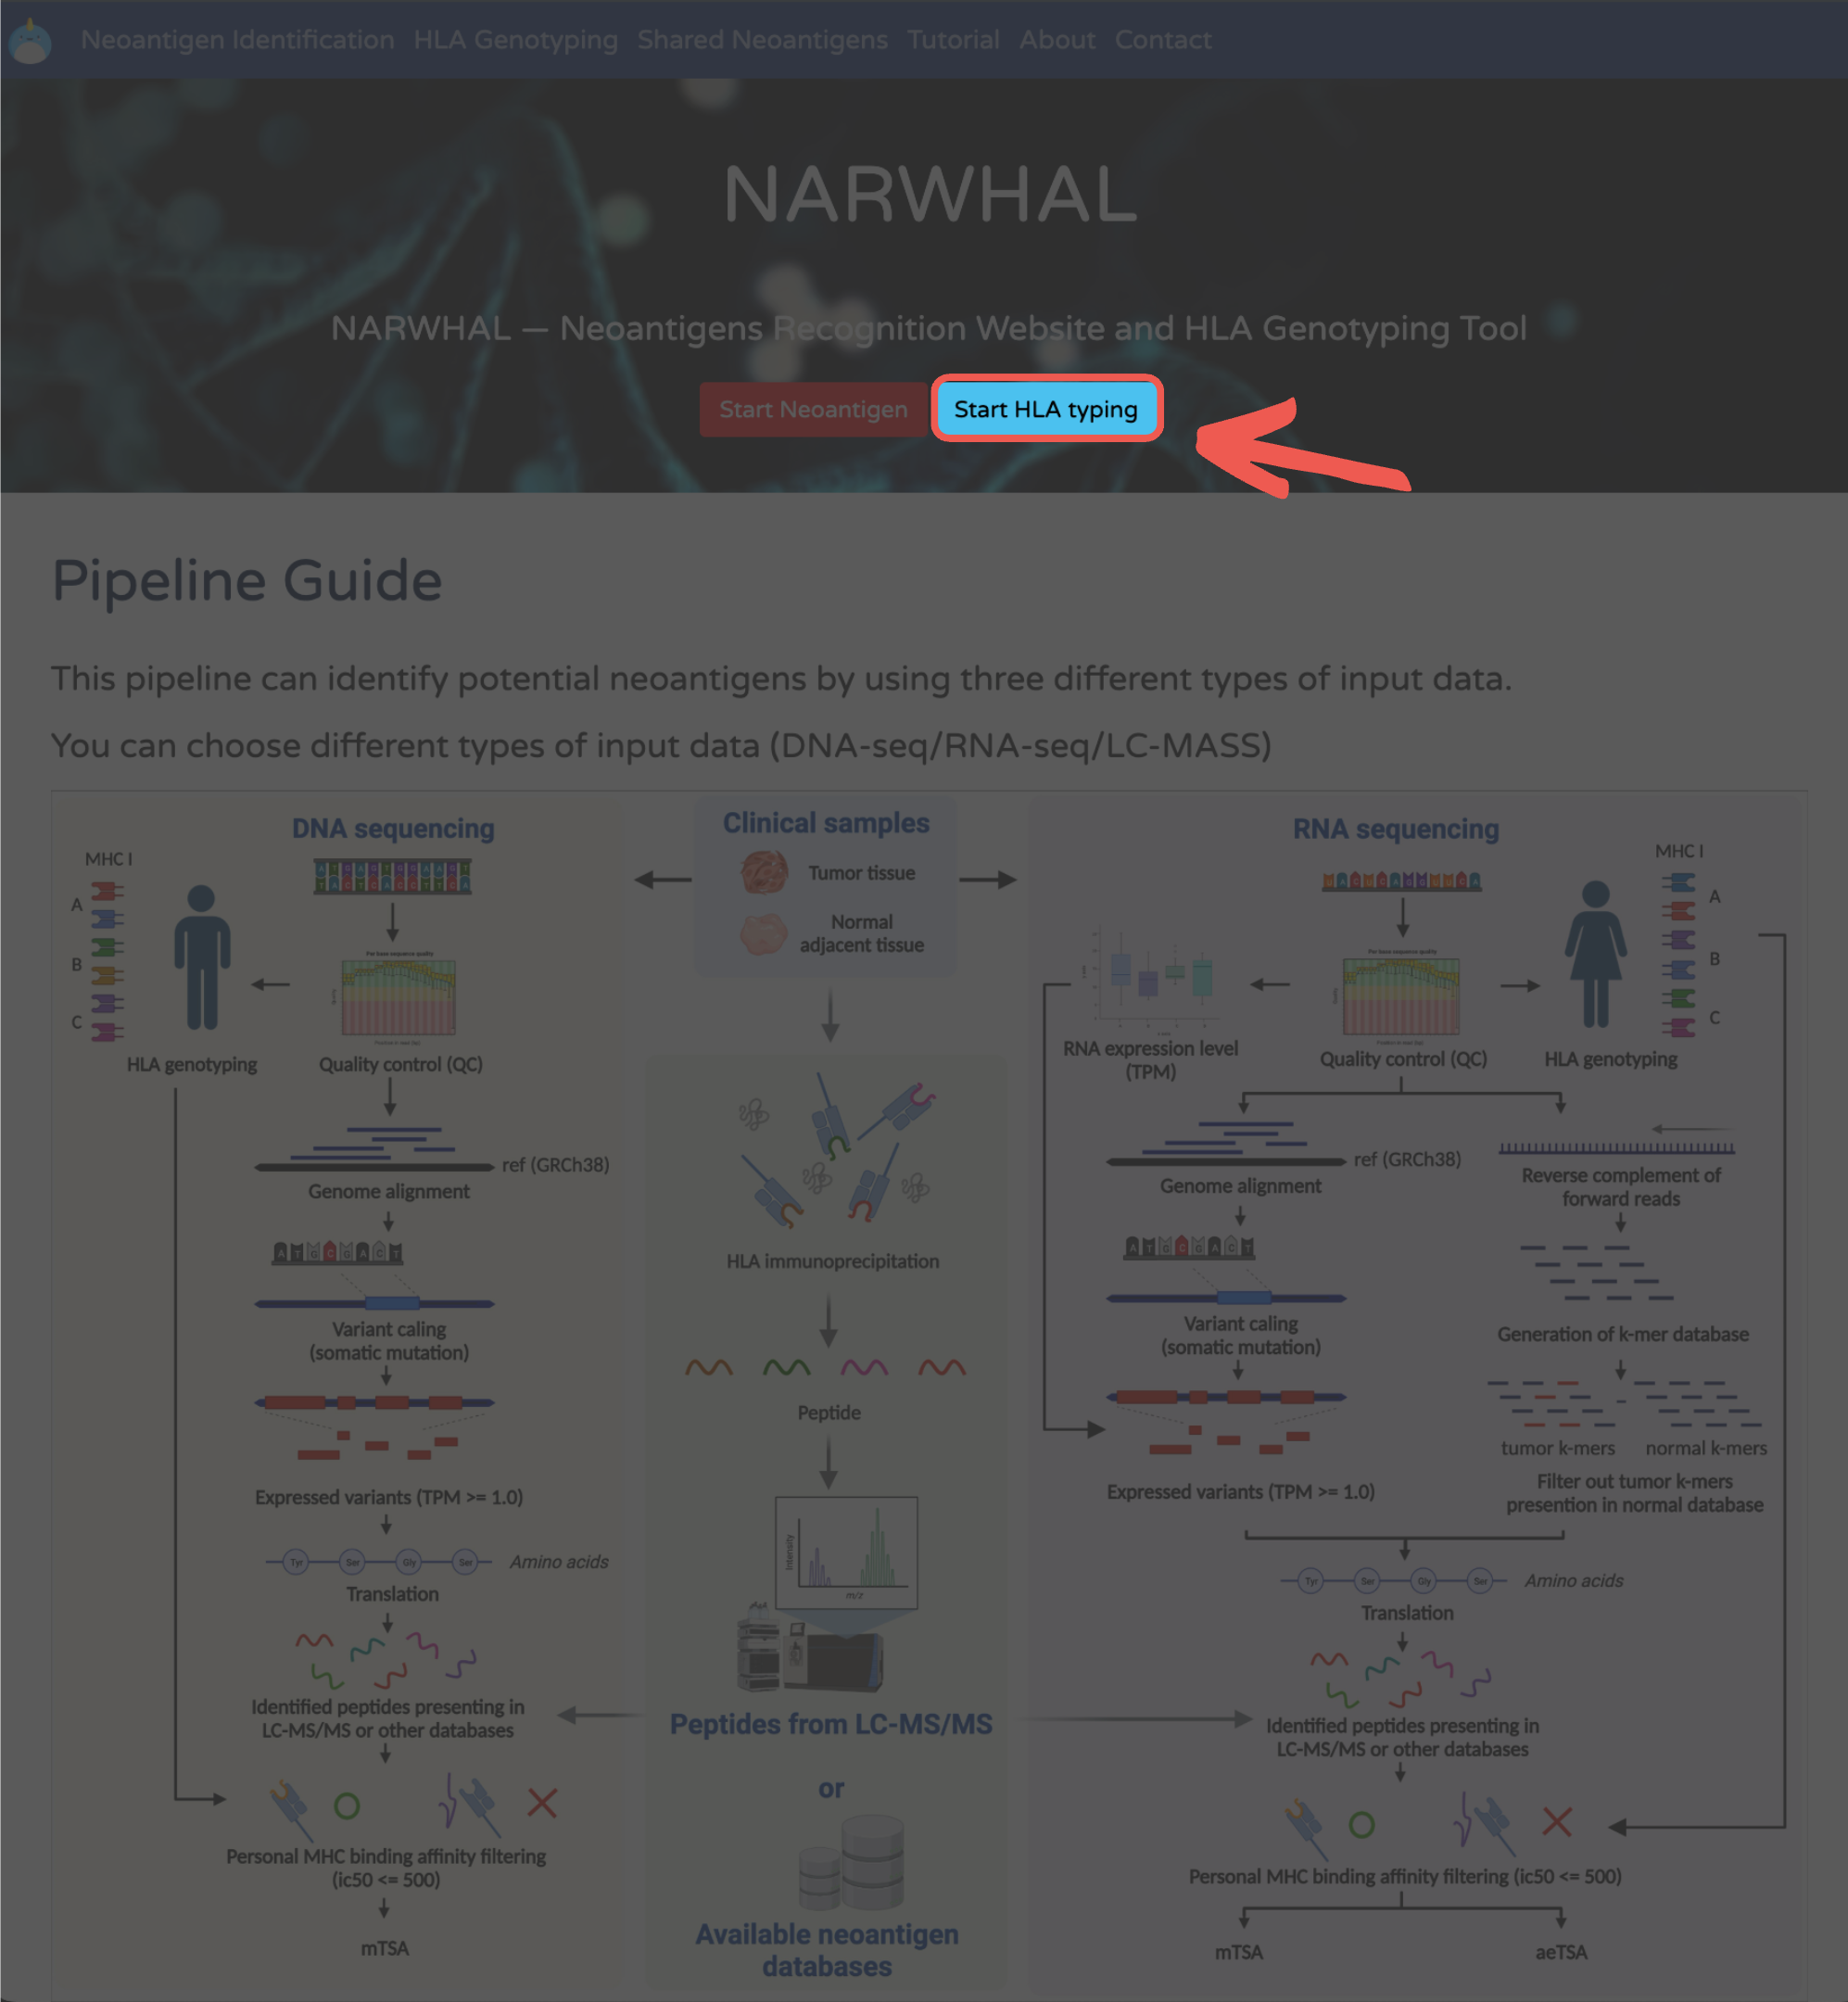
1. Enter HLA Genotyping: Click "Start HLA Genotyping".
2. Enter Email: Provide your email address for notifications.

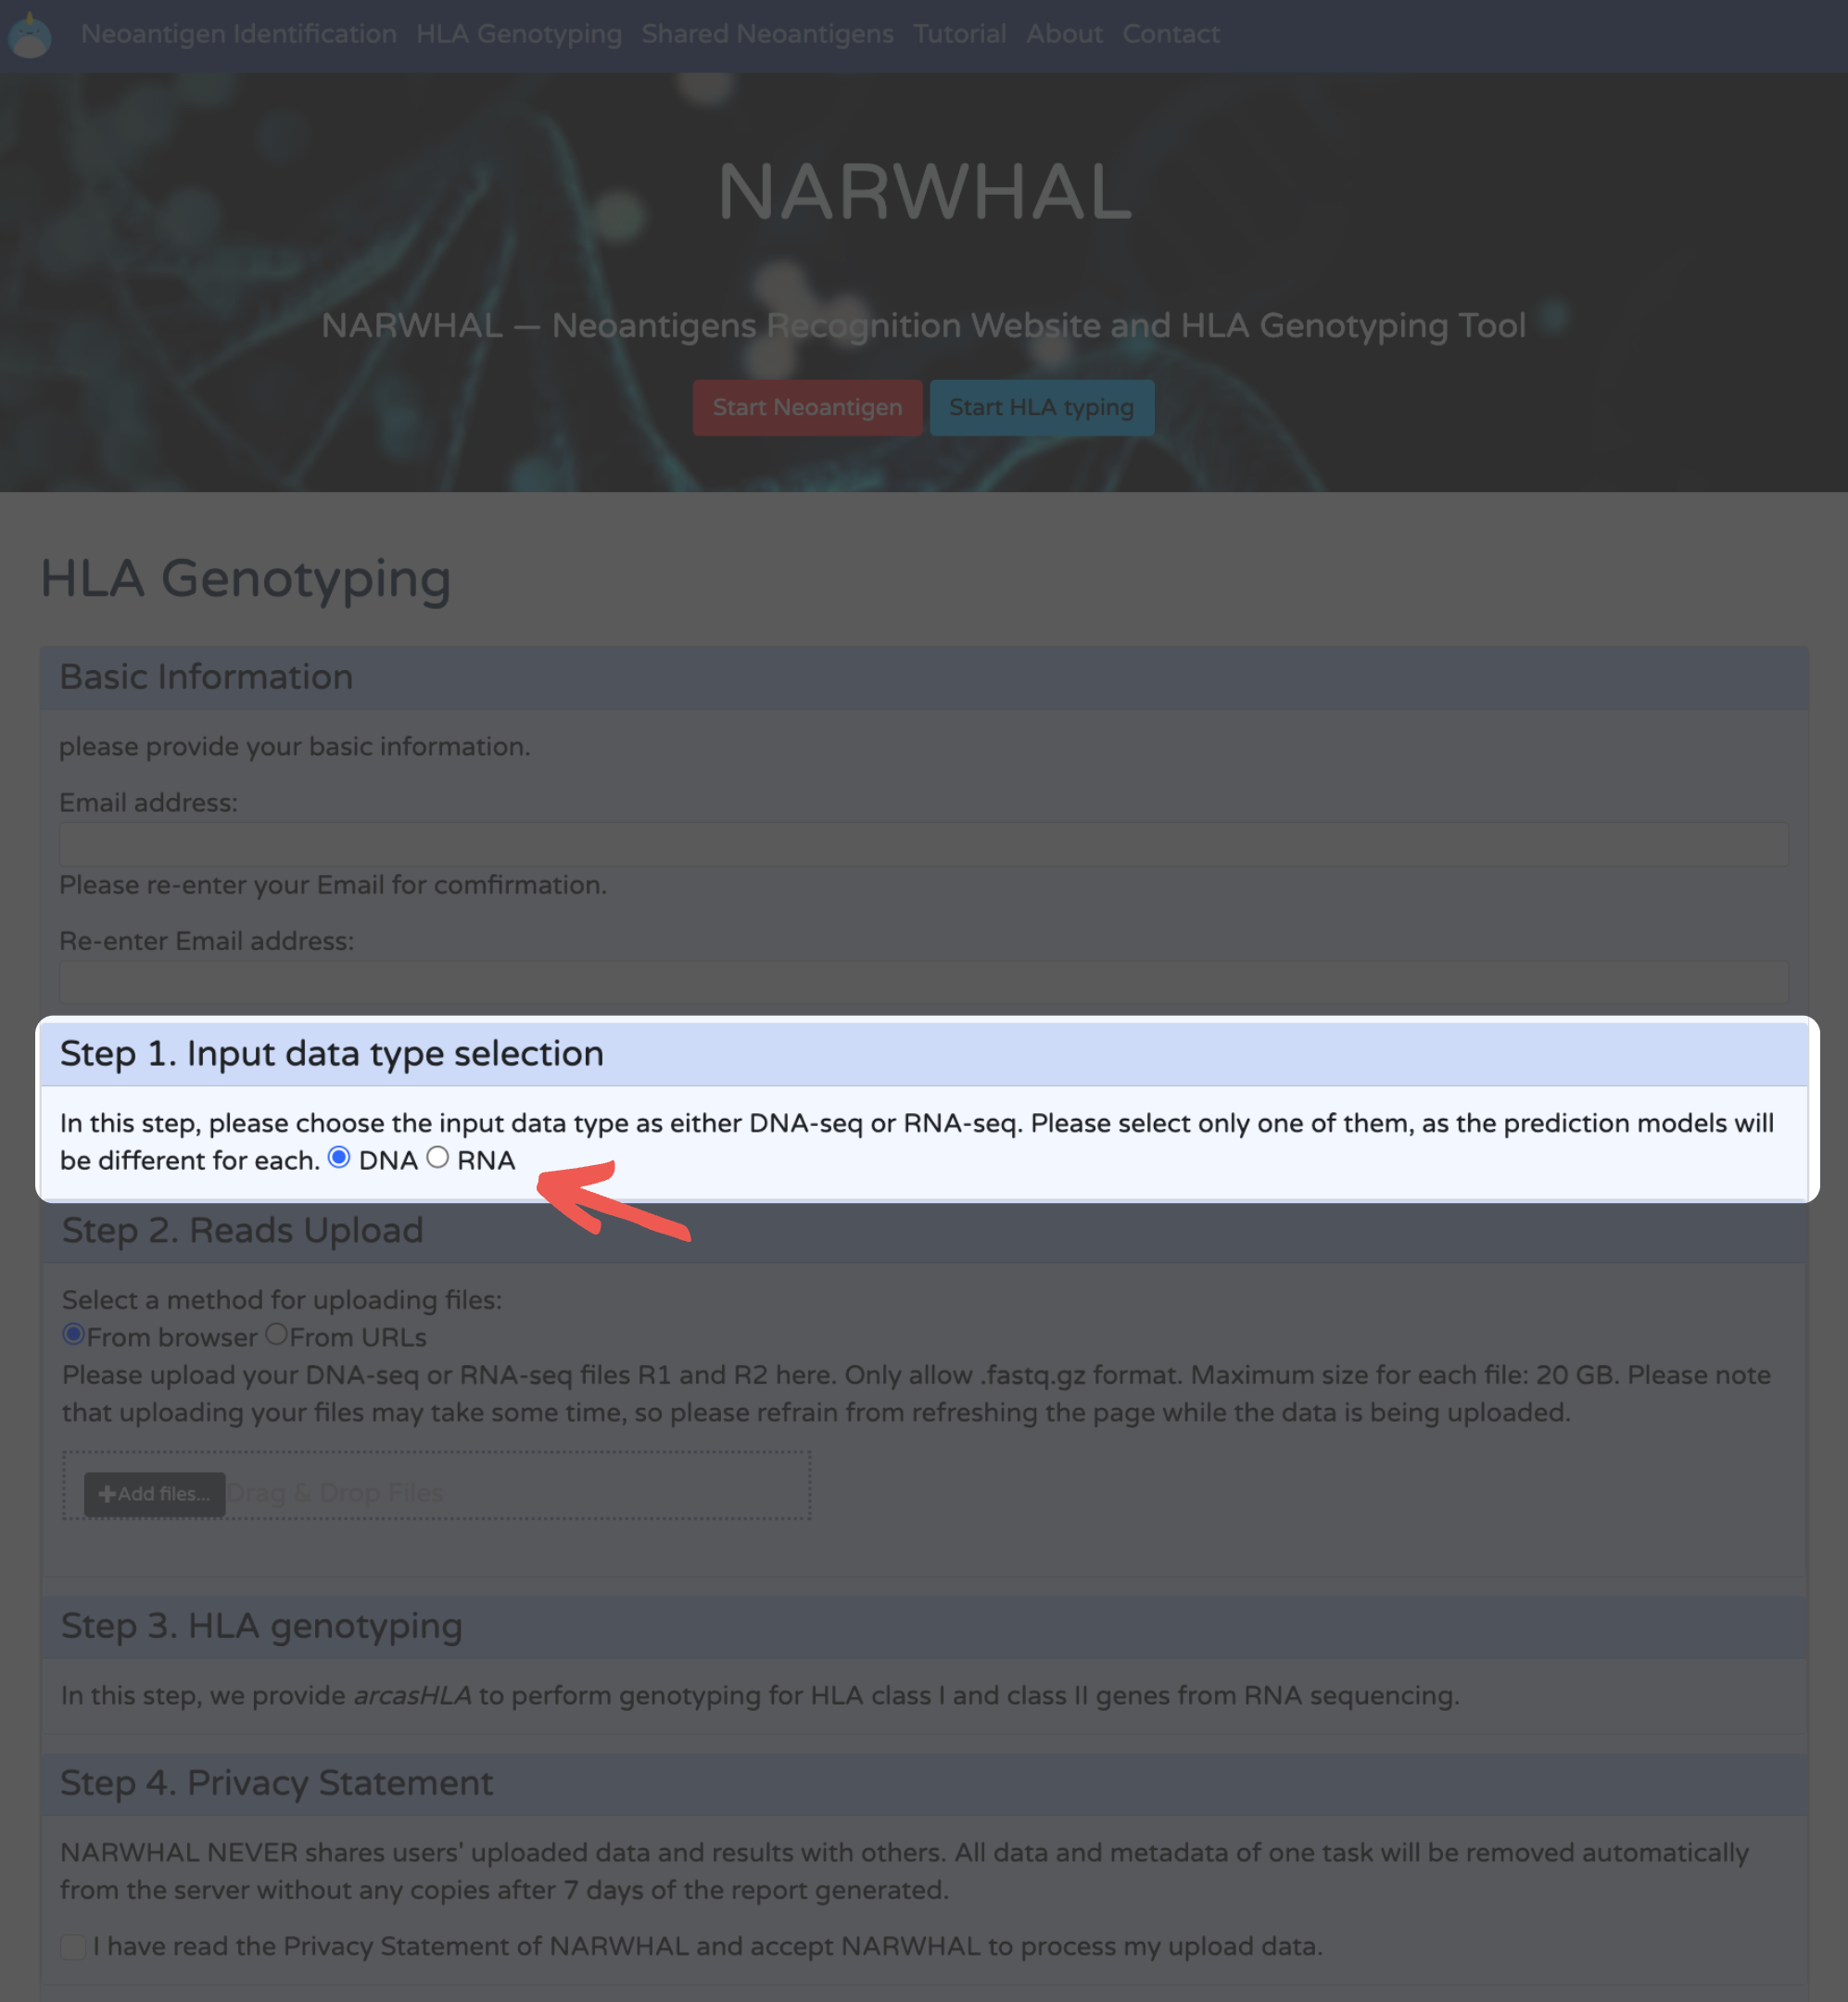
3. Choose Data Types: Select DNA-seq or RNA-seq.
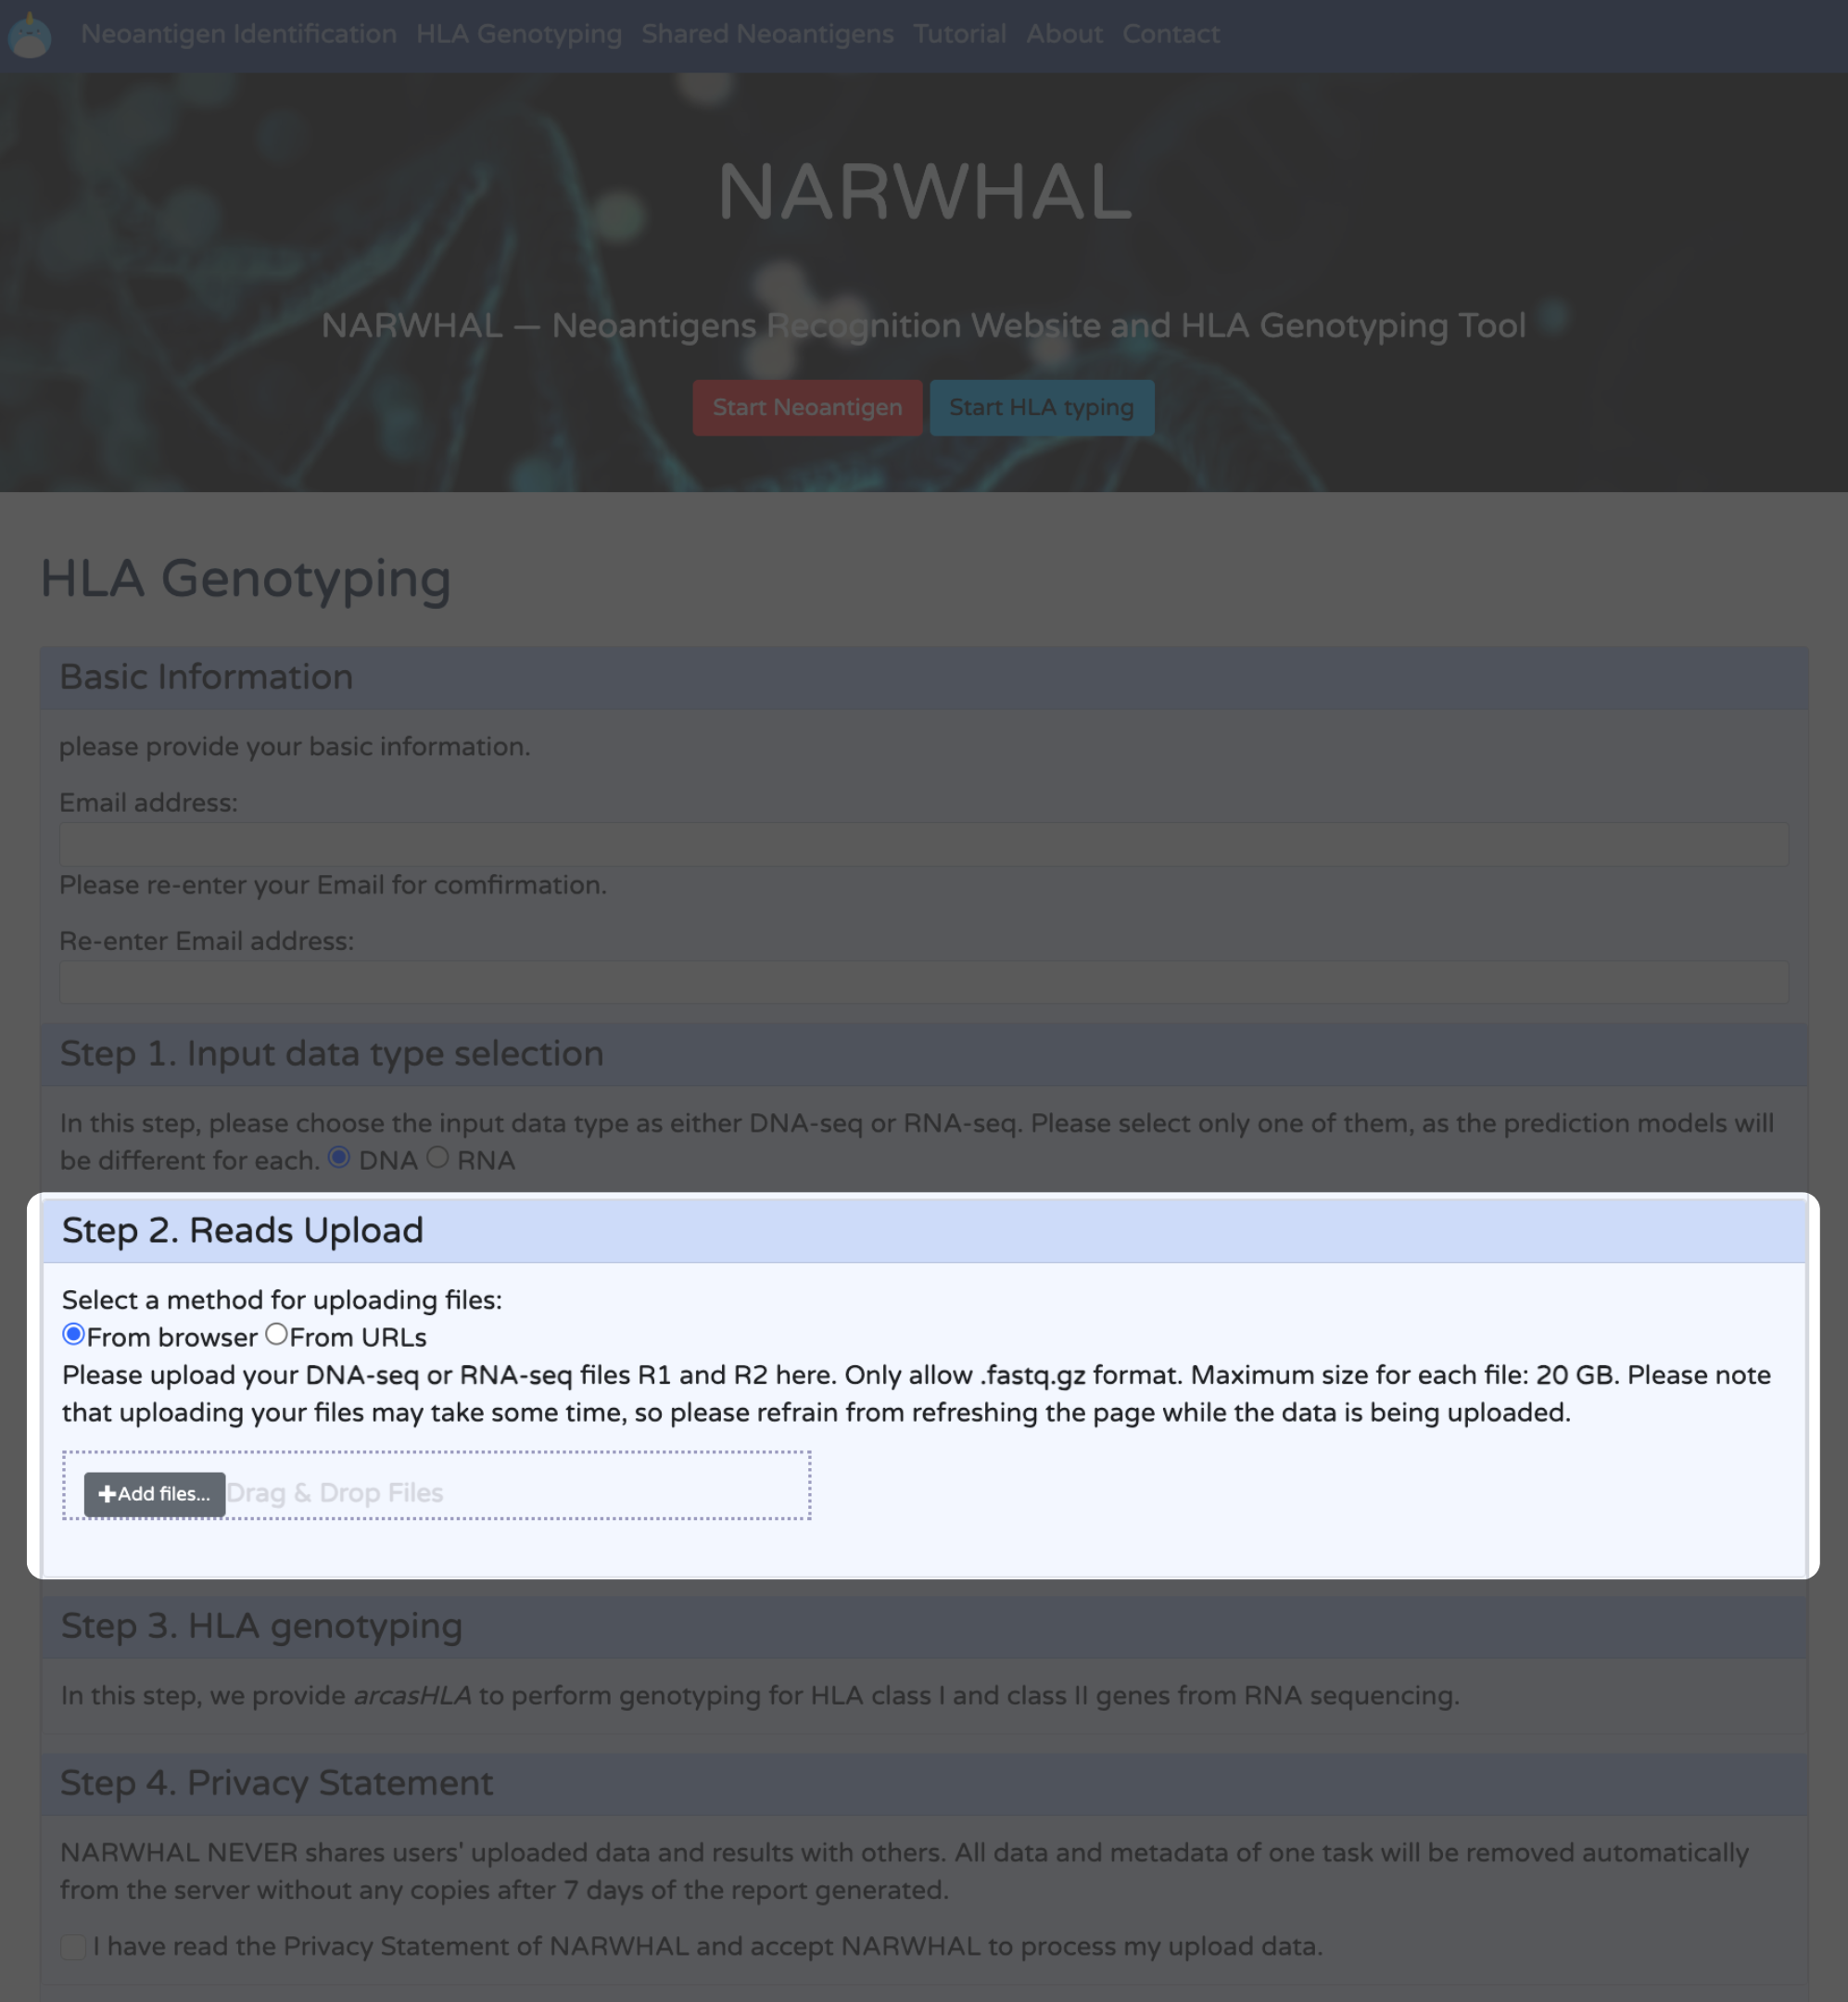
4. Upload Data: Upload all sequence data you would like to analyze.
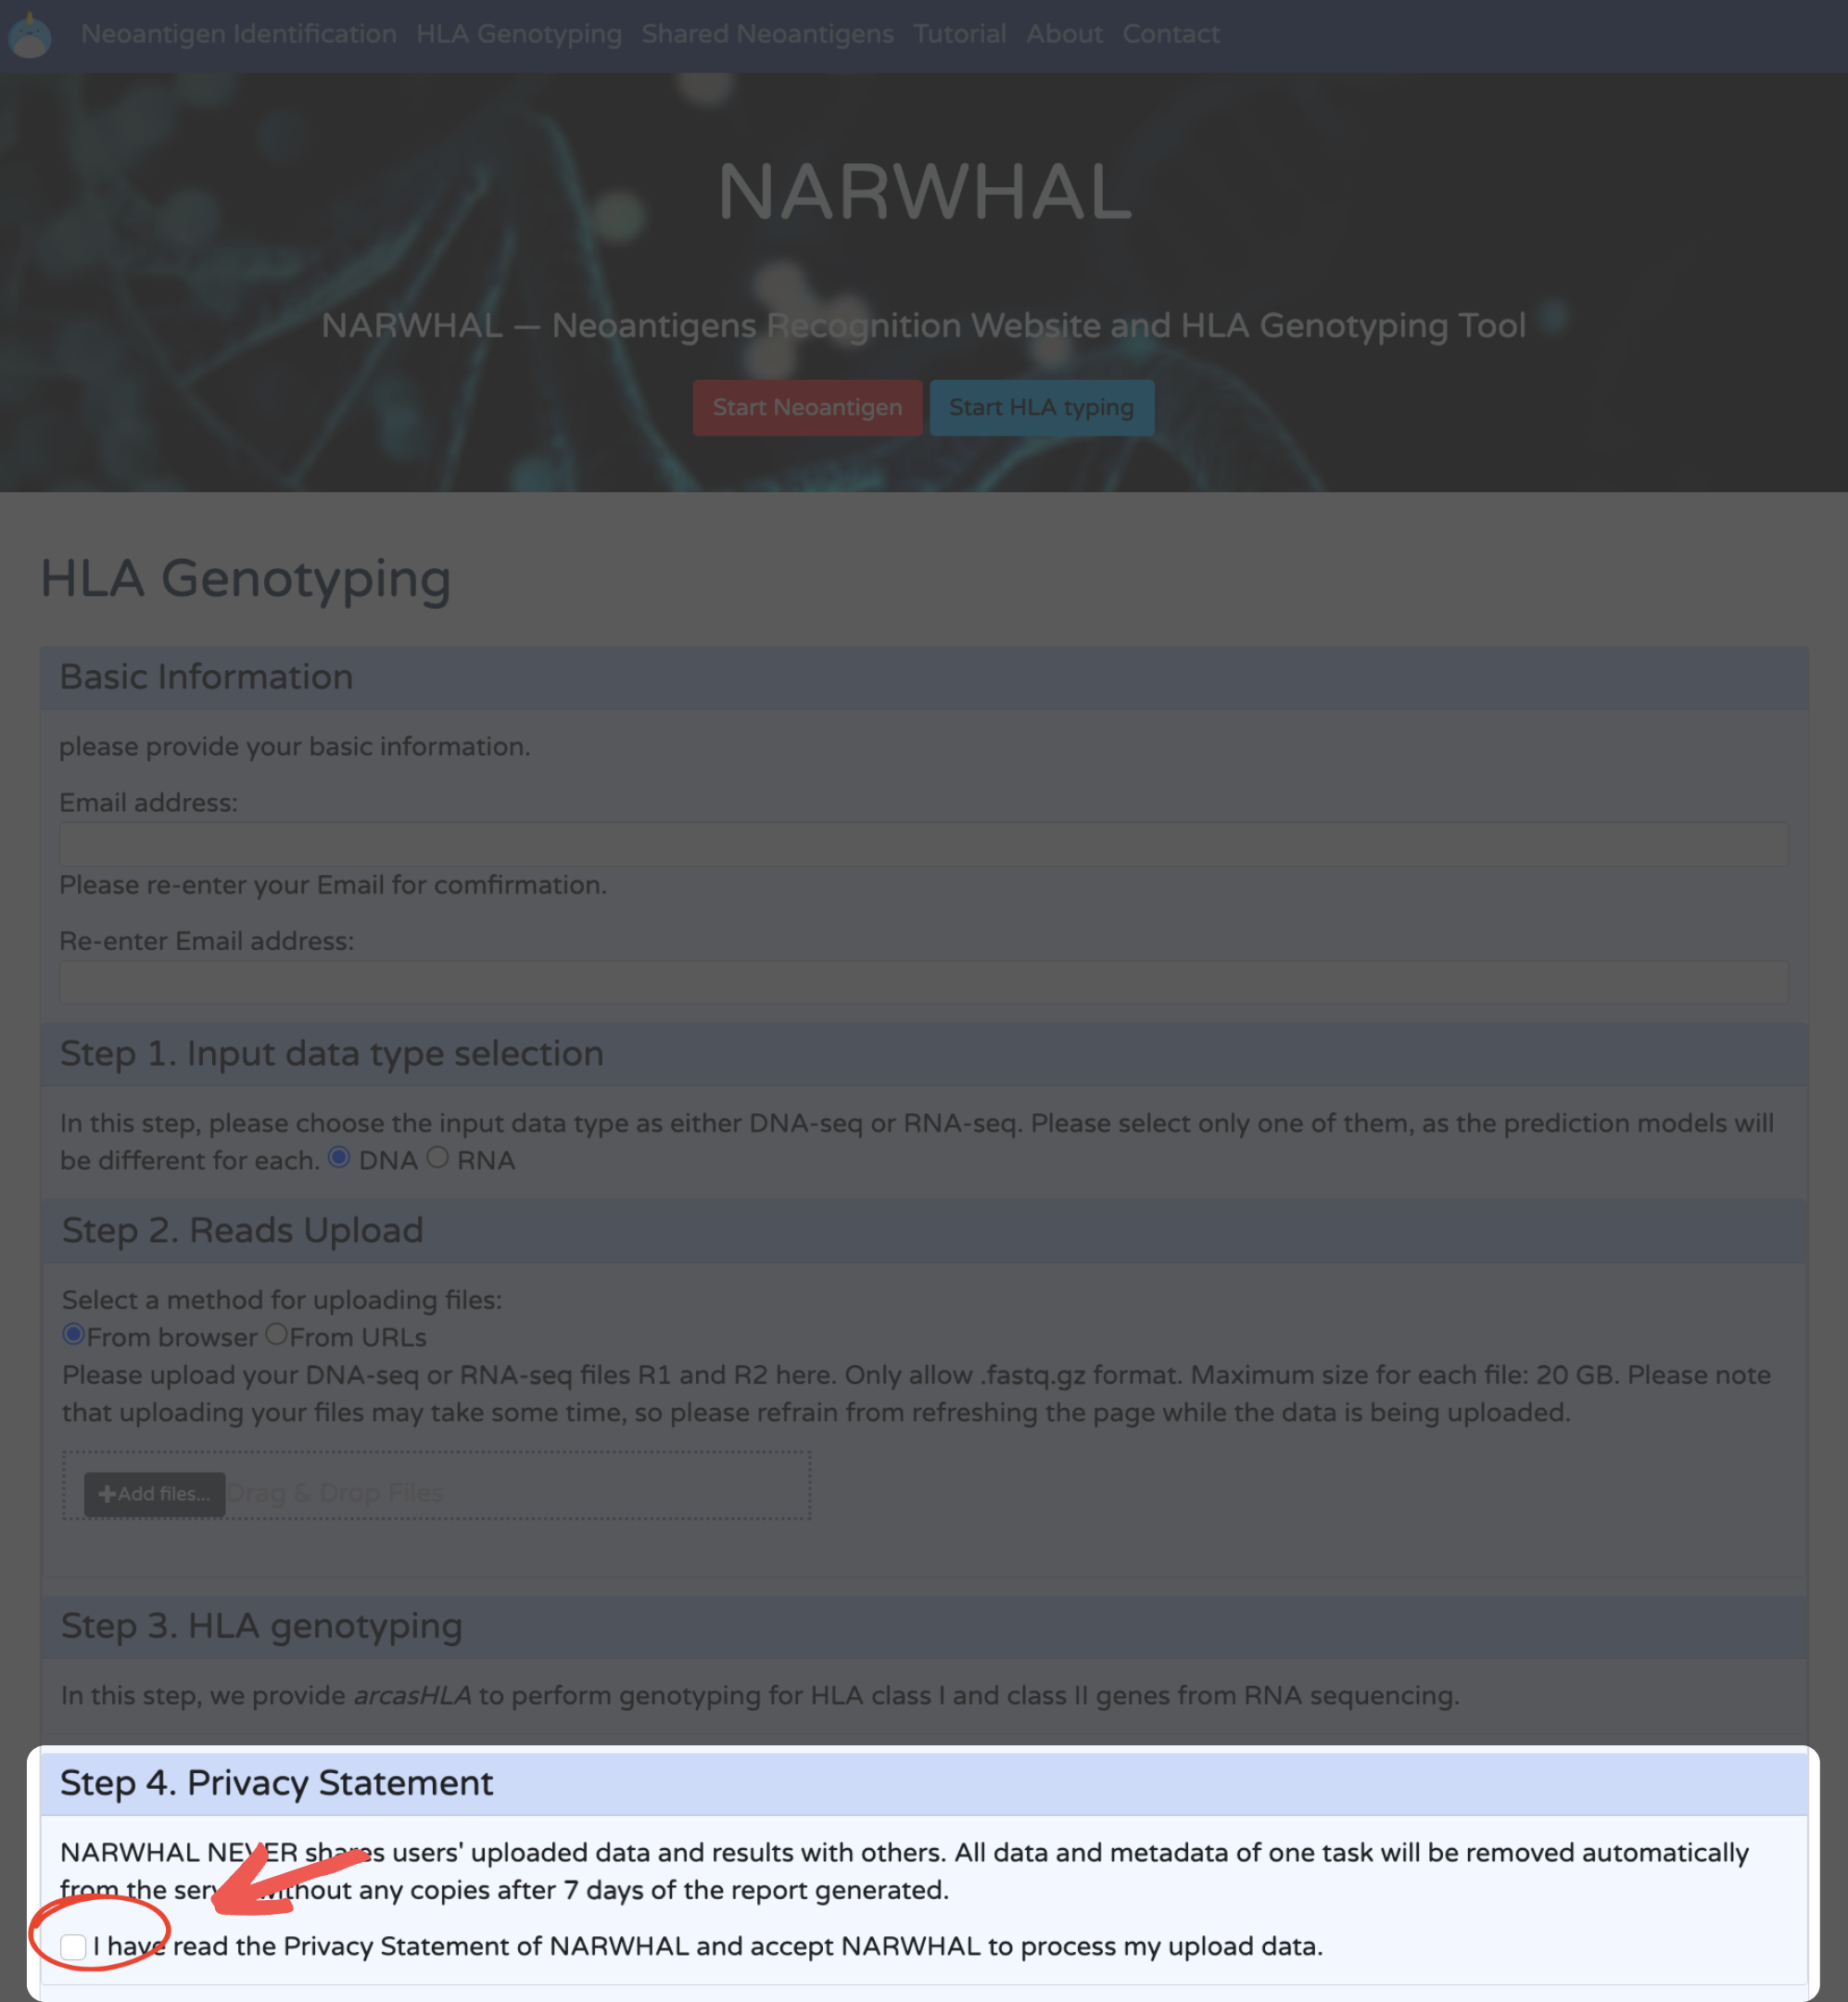
5. Agree to Privacy Statement and Submit the Task: Click "Submit" to start the analysis.
6. Task Submitted Successfully: Your task has been submitted.
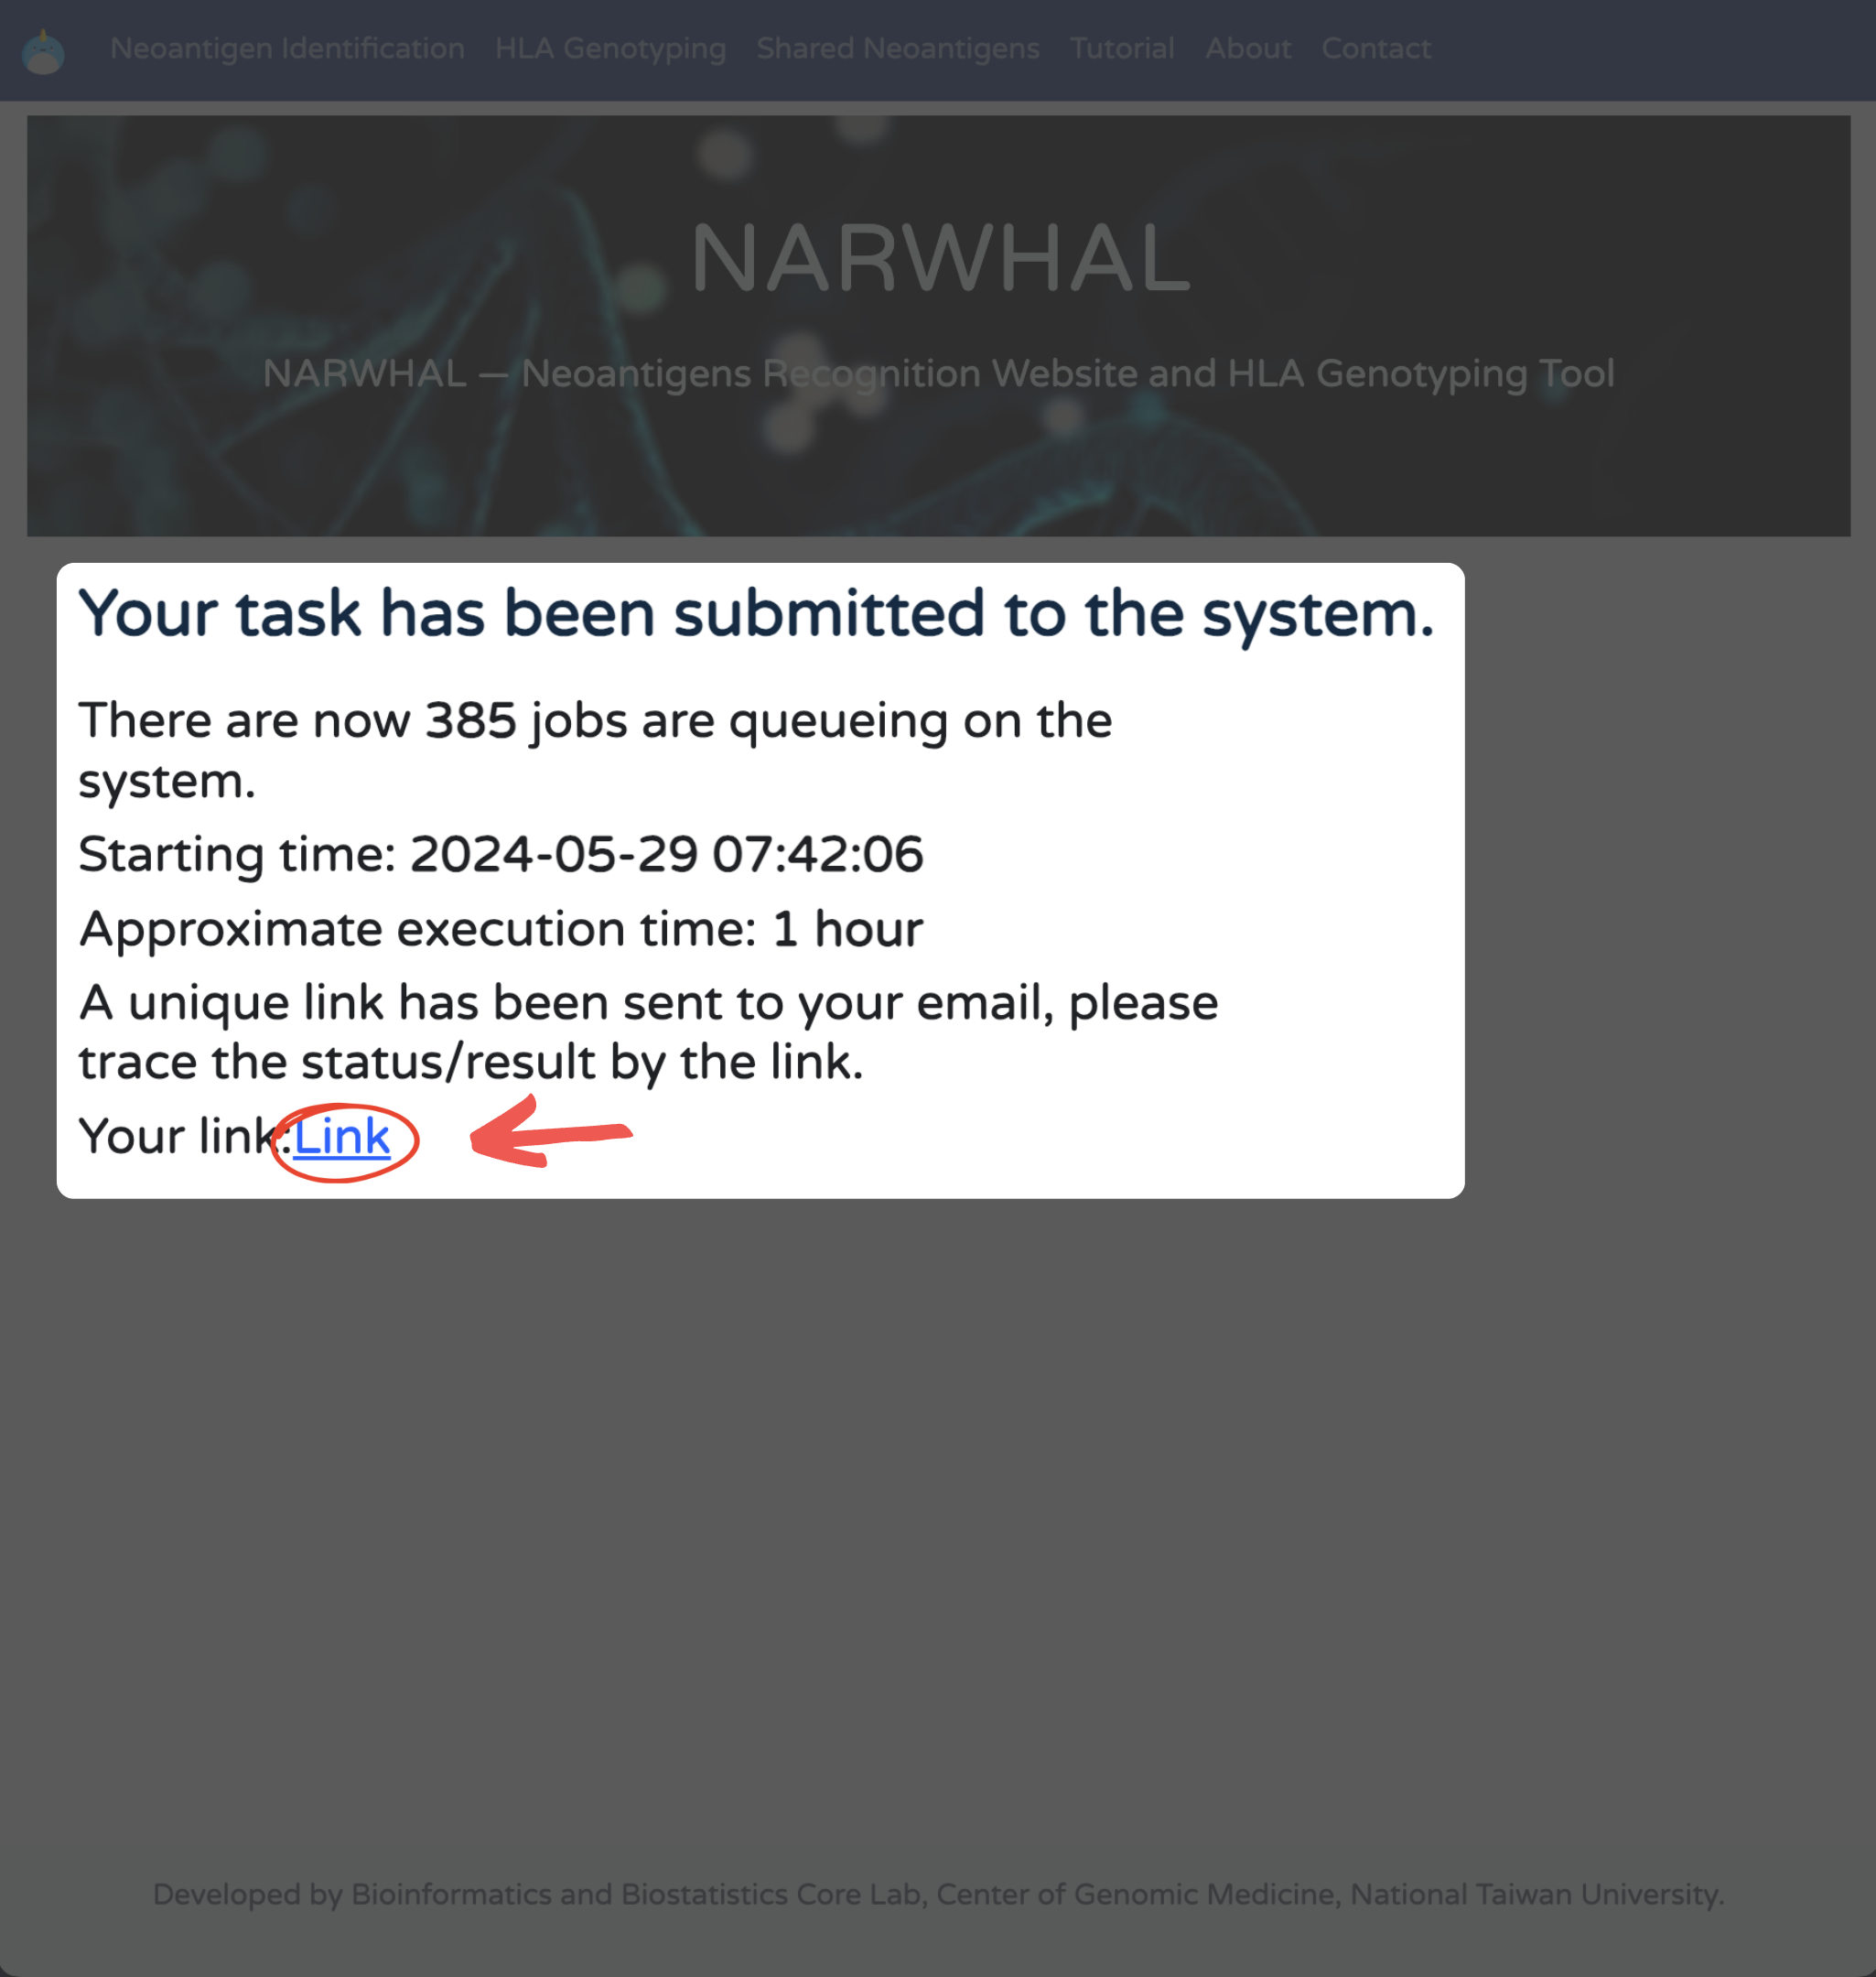
7. Progress Tracking: Monitor the progress of your task.
8. Report: Download the final TSV files and QC files from the dashboard.
Shared Neoantigen Discovery
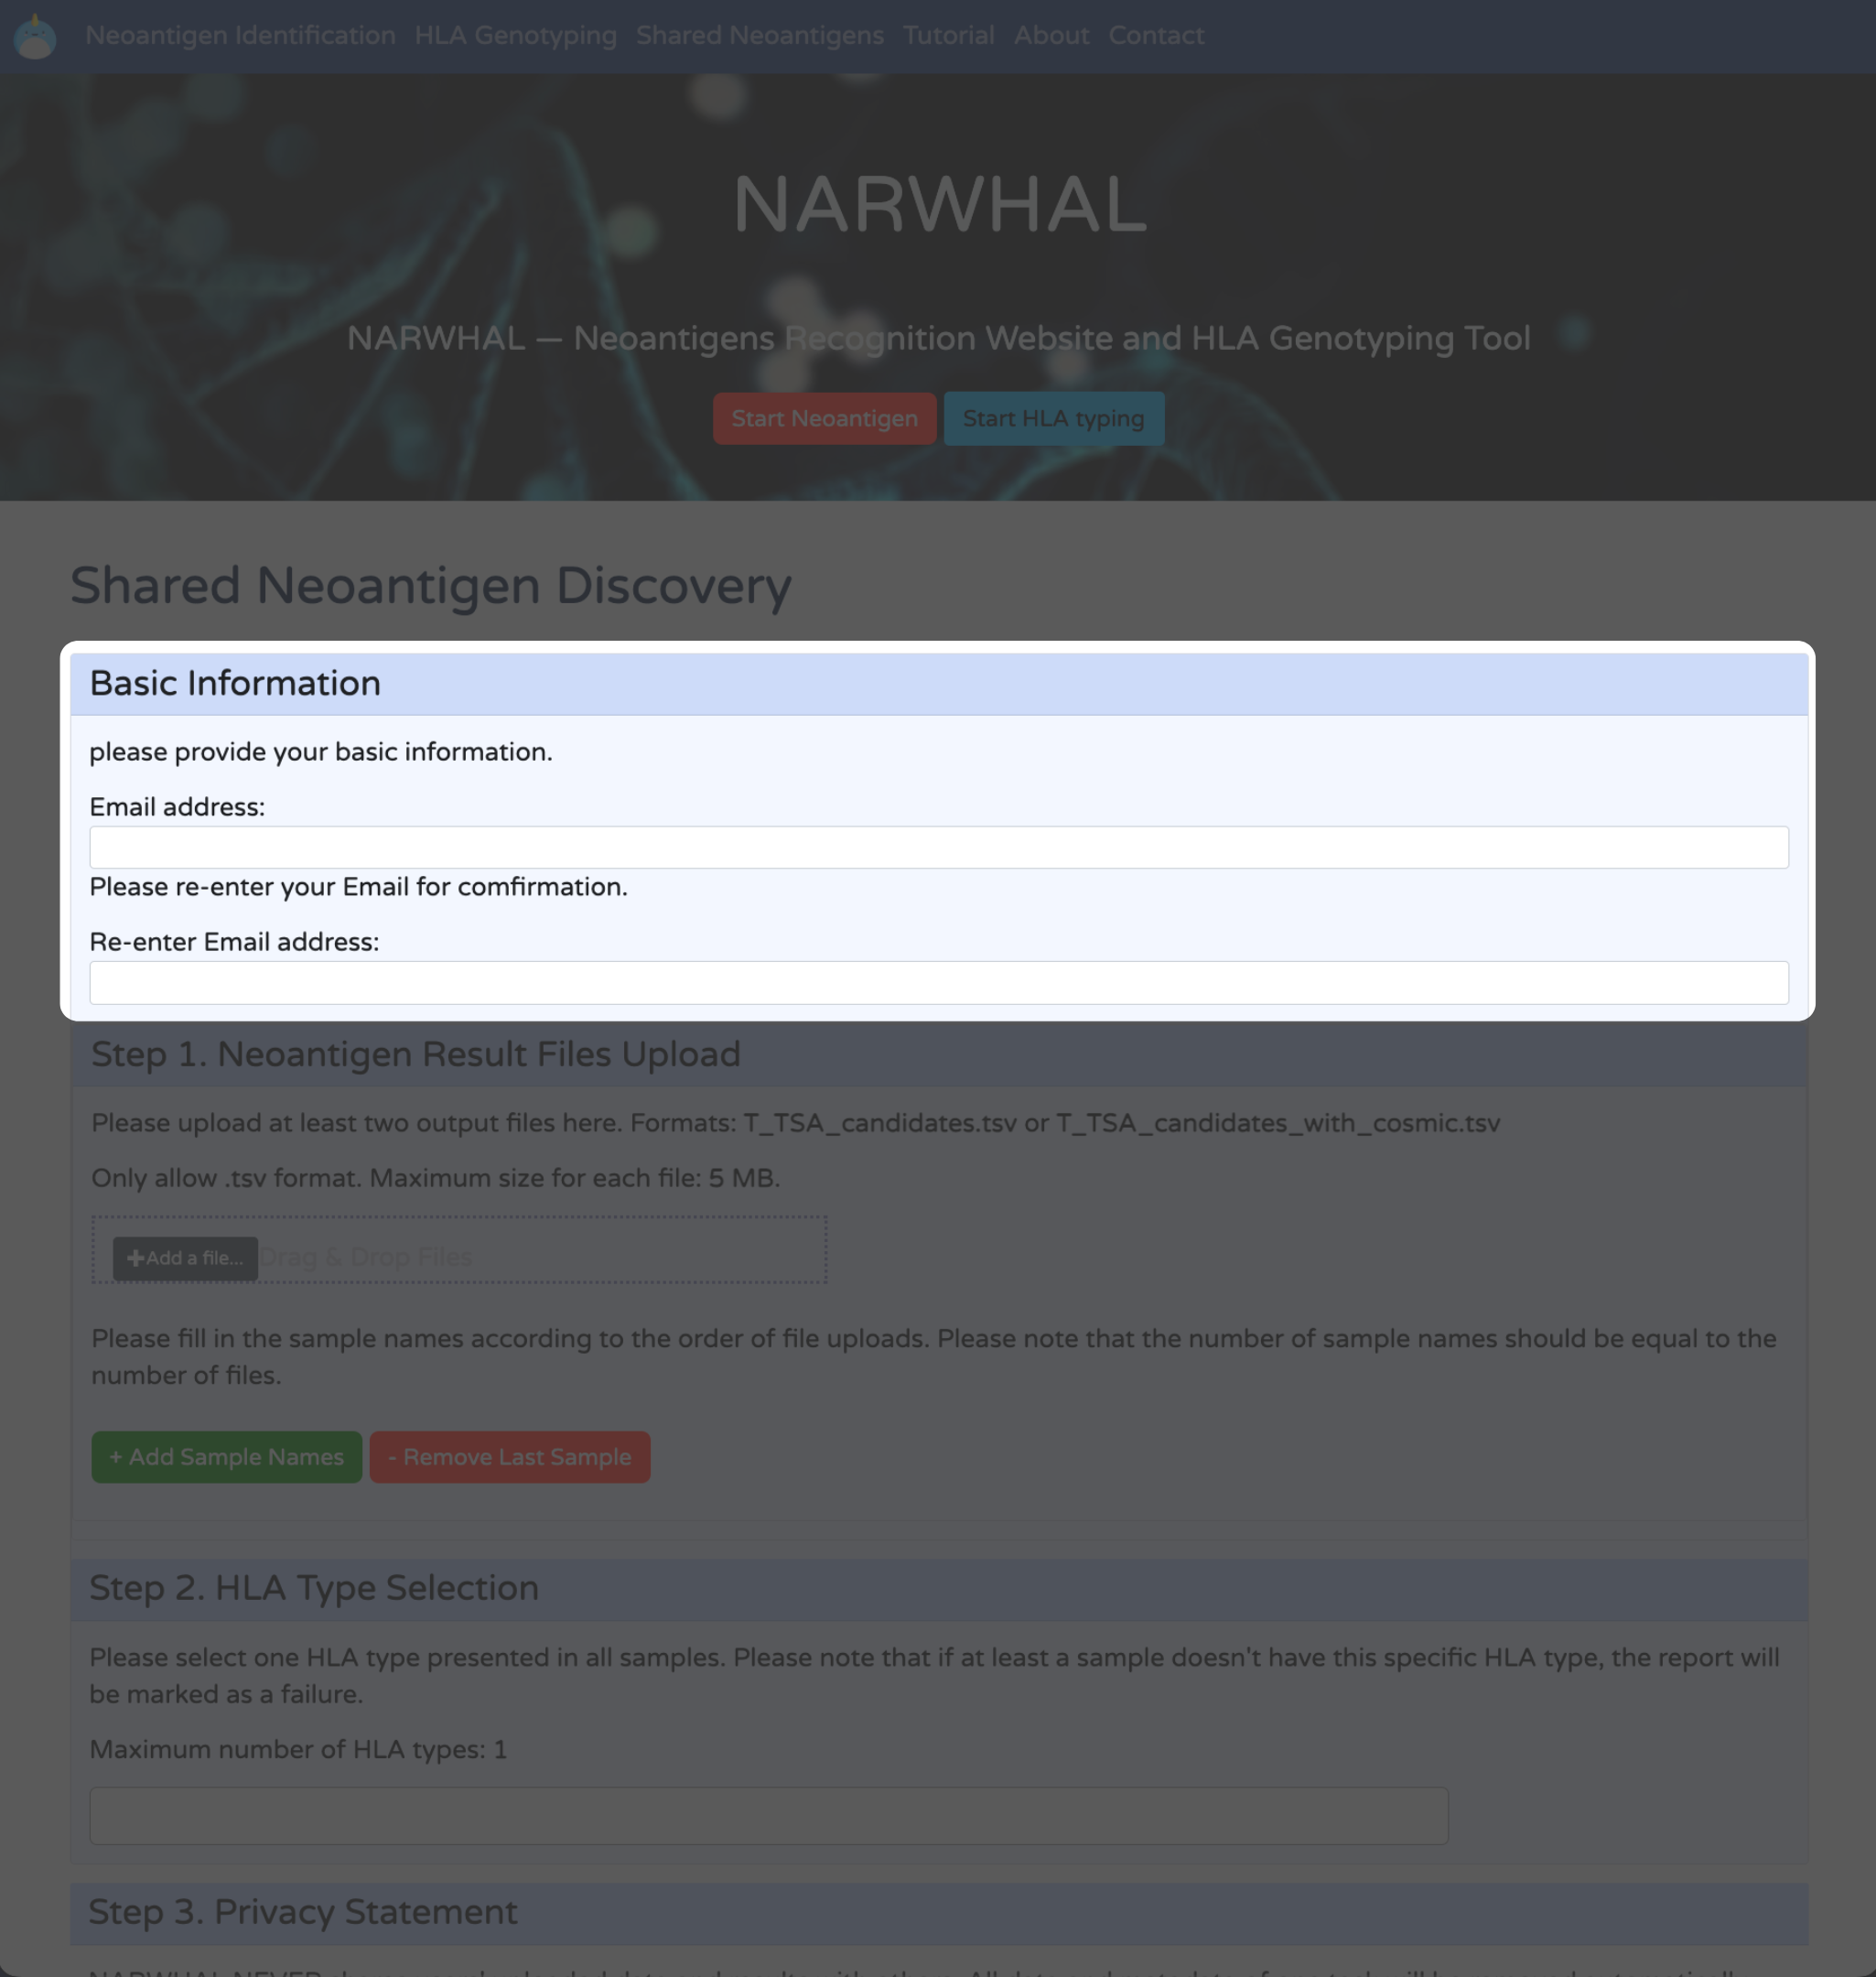
1. Enter Shared Neoantigen Discovery and Enter Email: Provide your email address for notifications.
2. Upload Data: Upload TSA TSV files from different samples.
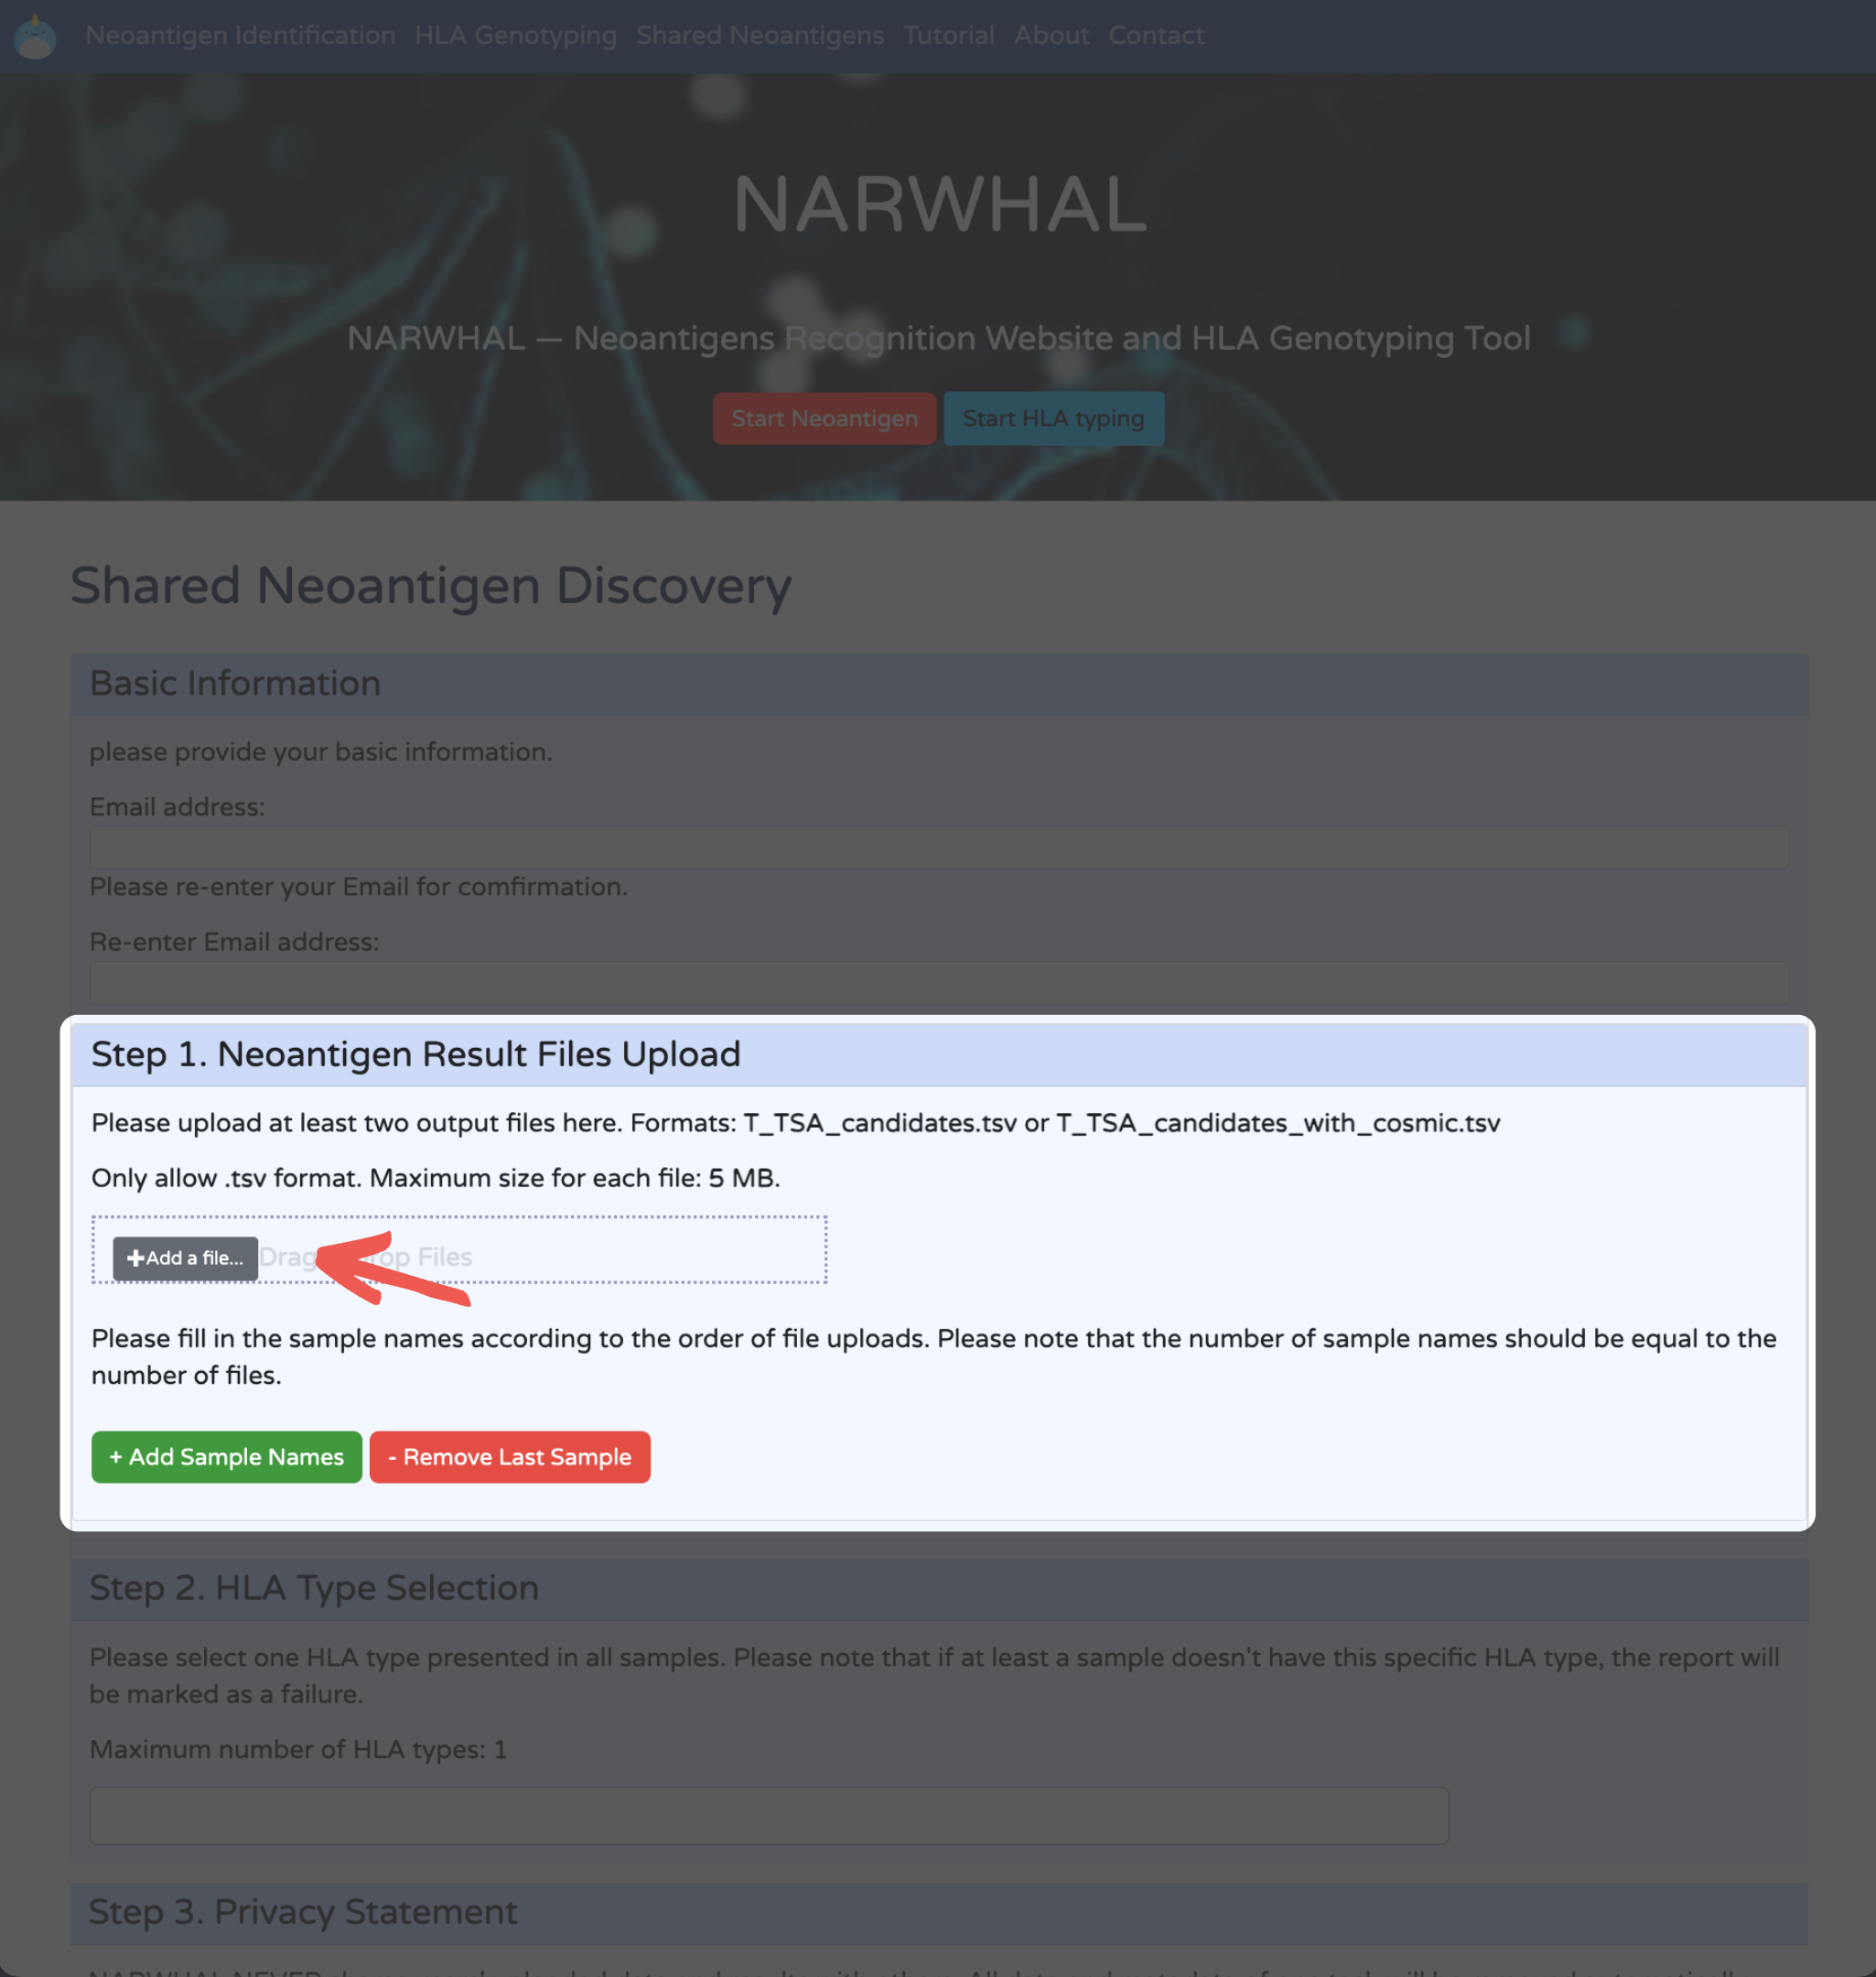
You may delete and re-upload data if necessary.
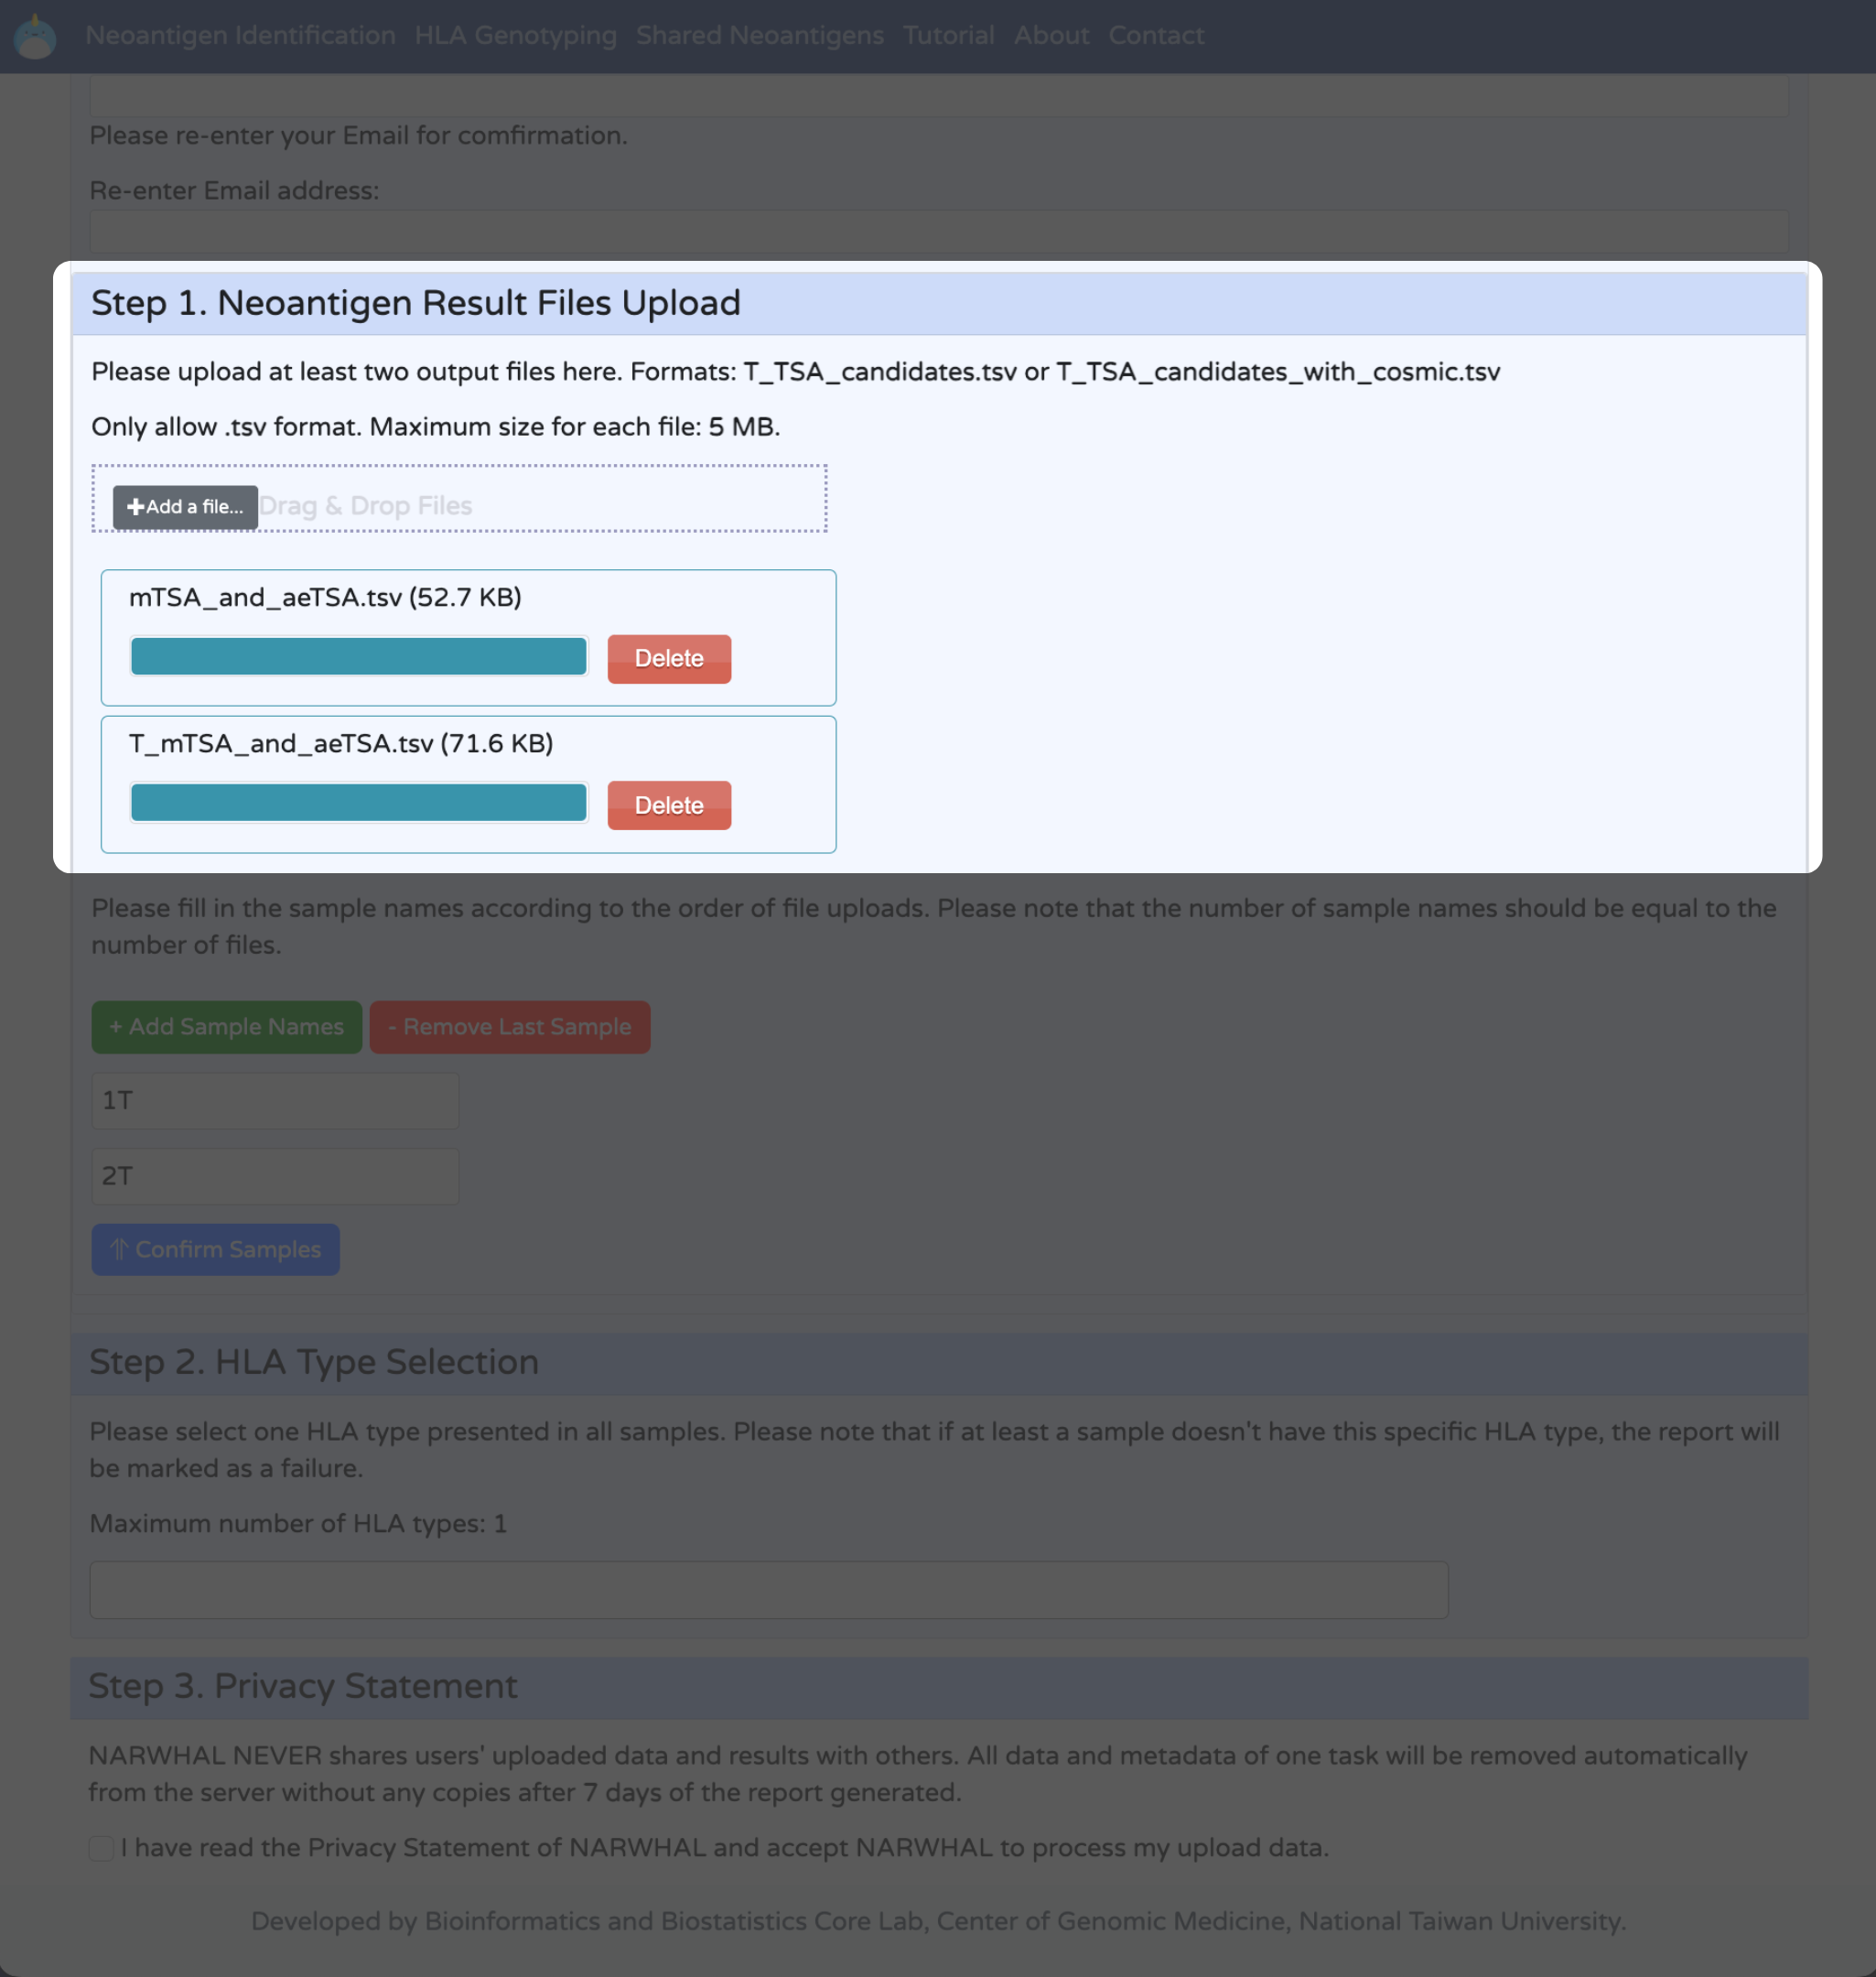
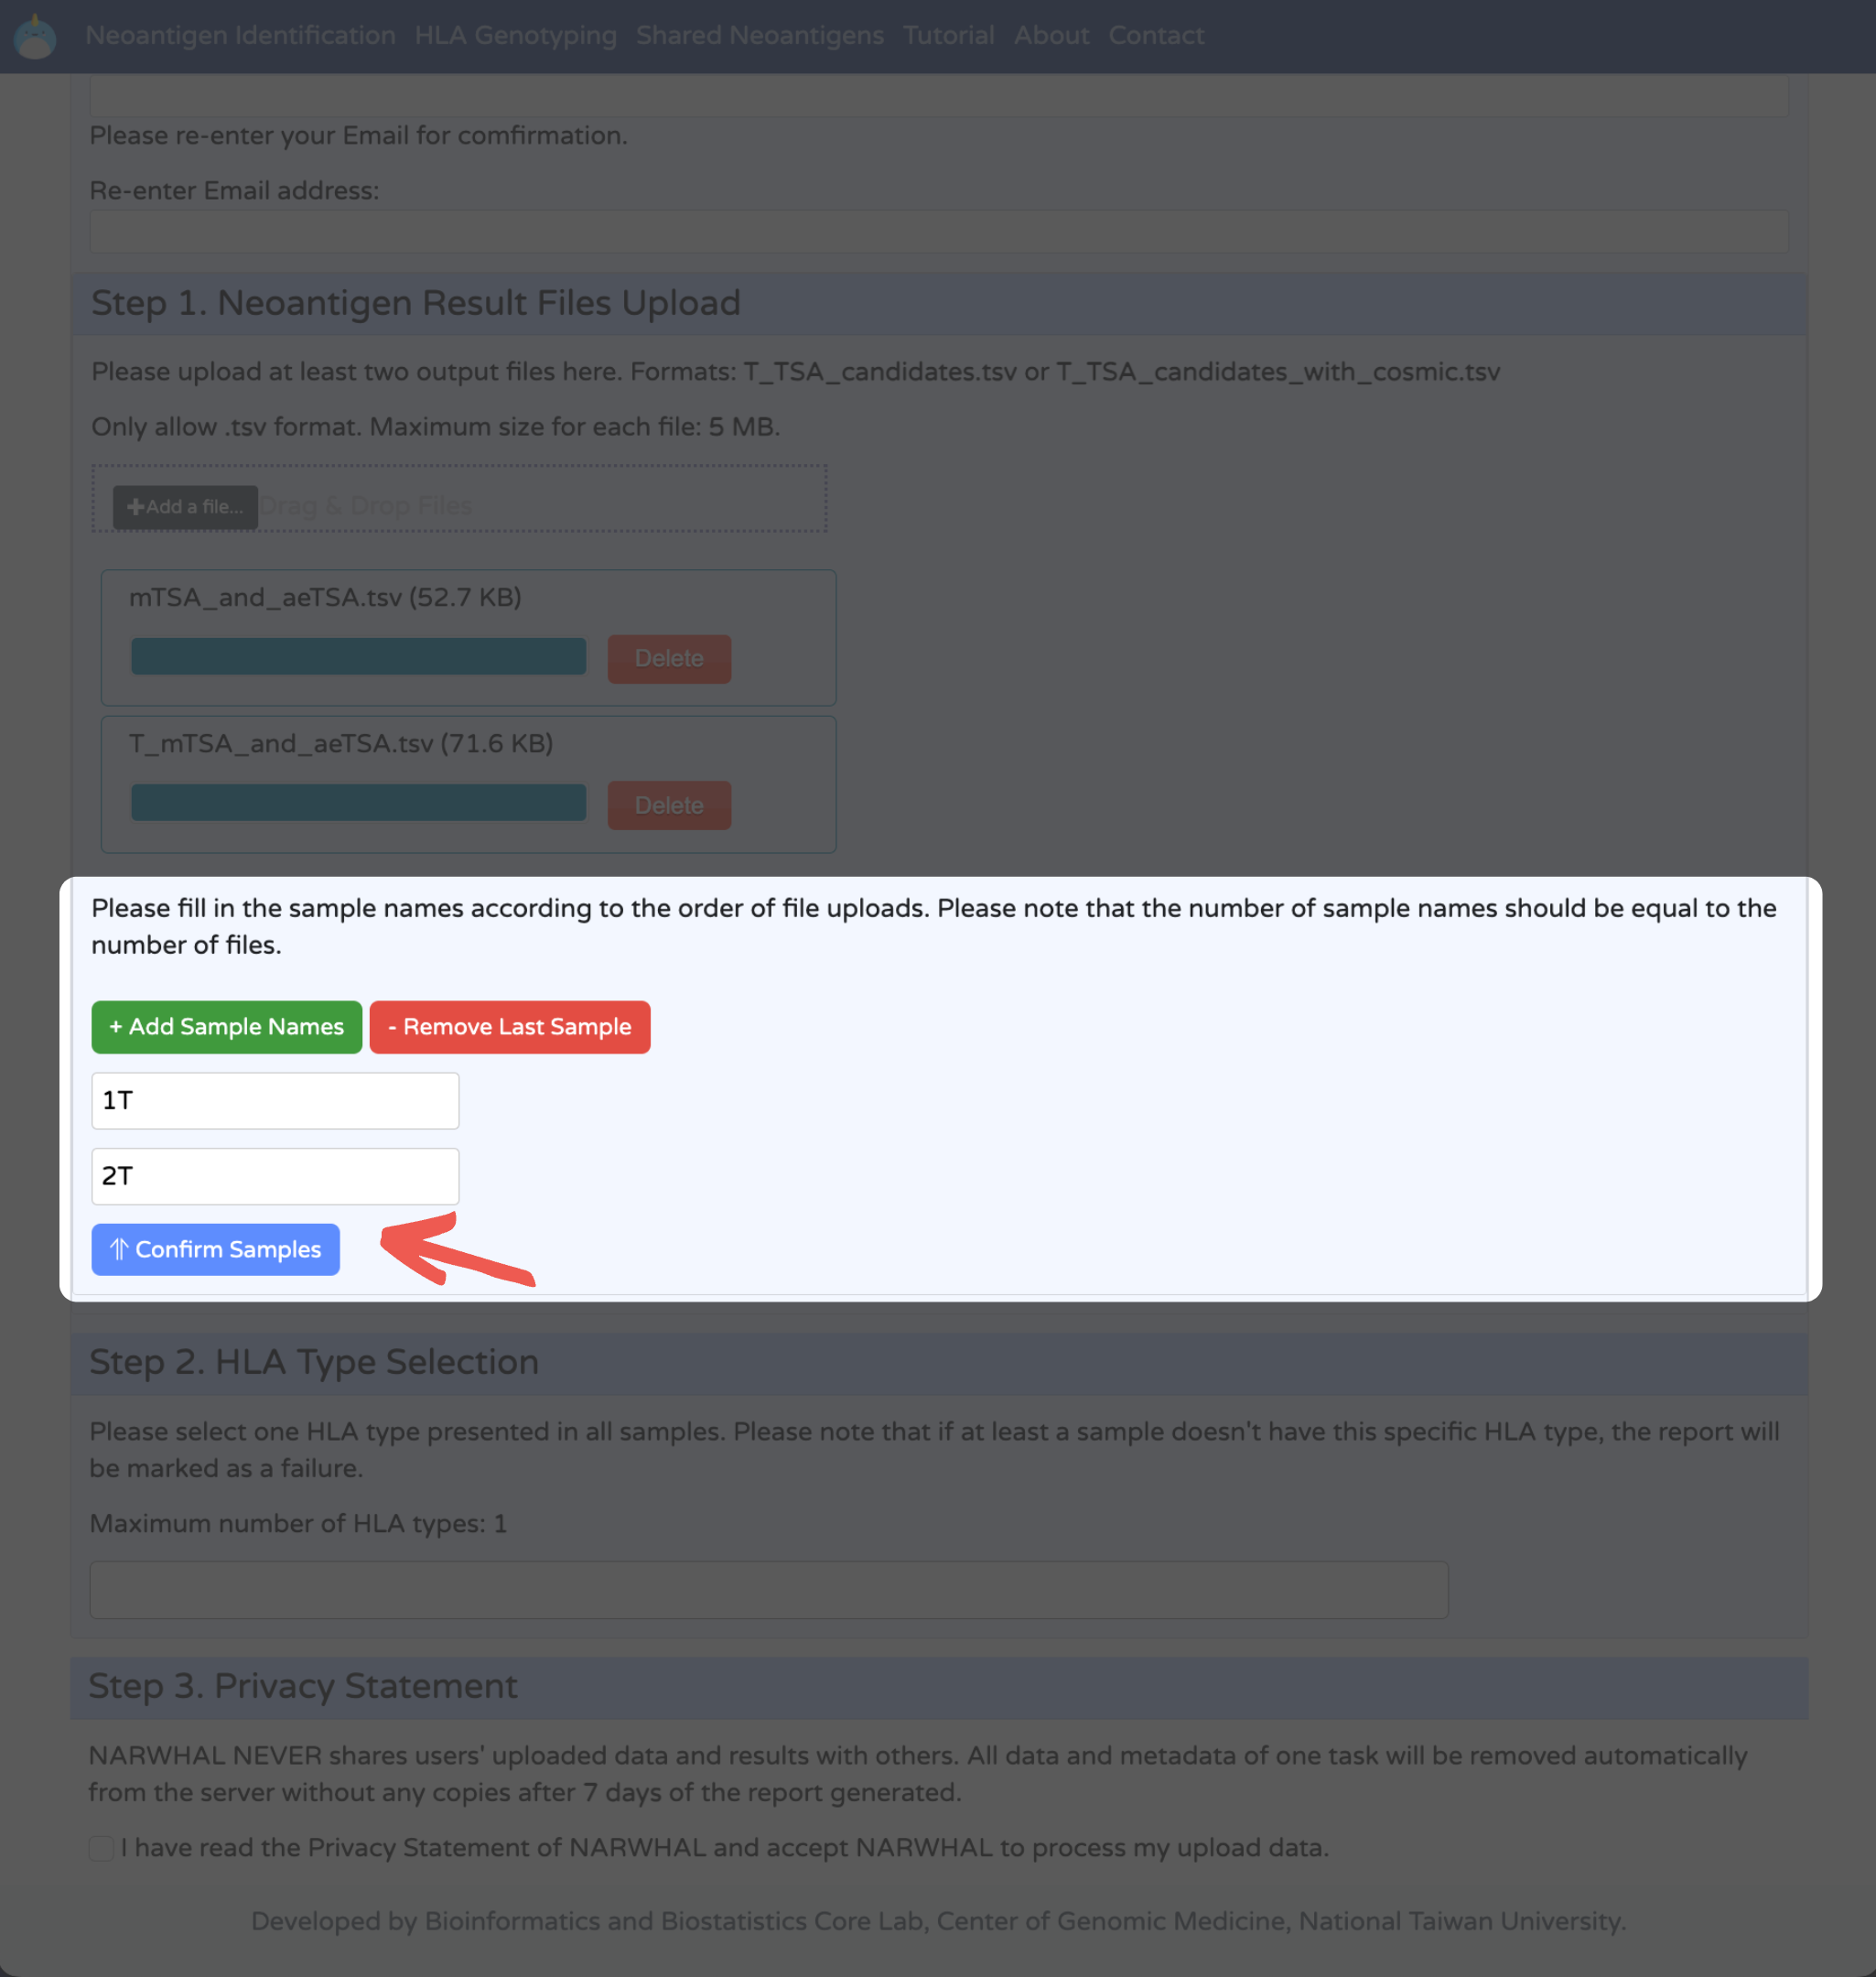
Fill in each file's sample names and confirm them. Please ensure that the number of samples matches the number of sample names.
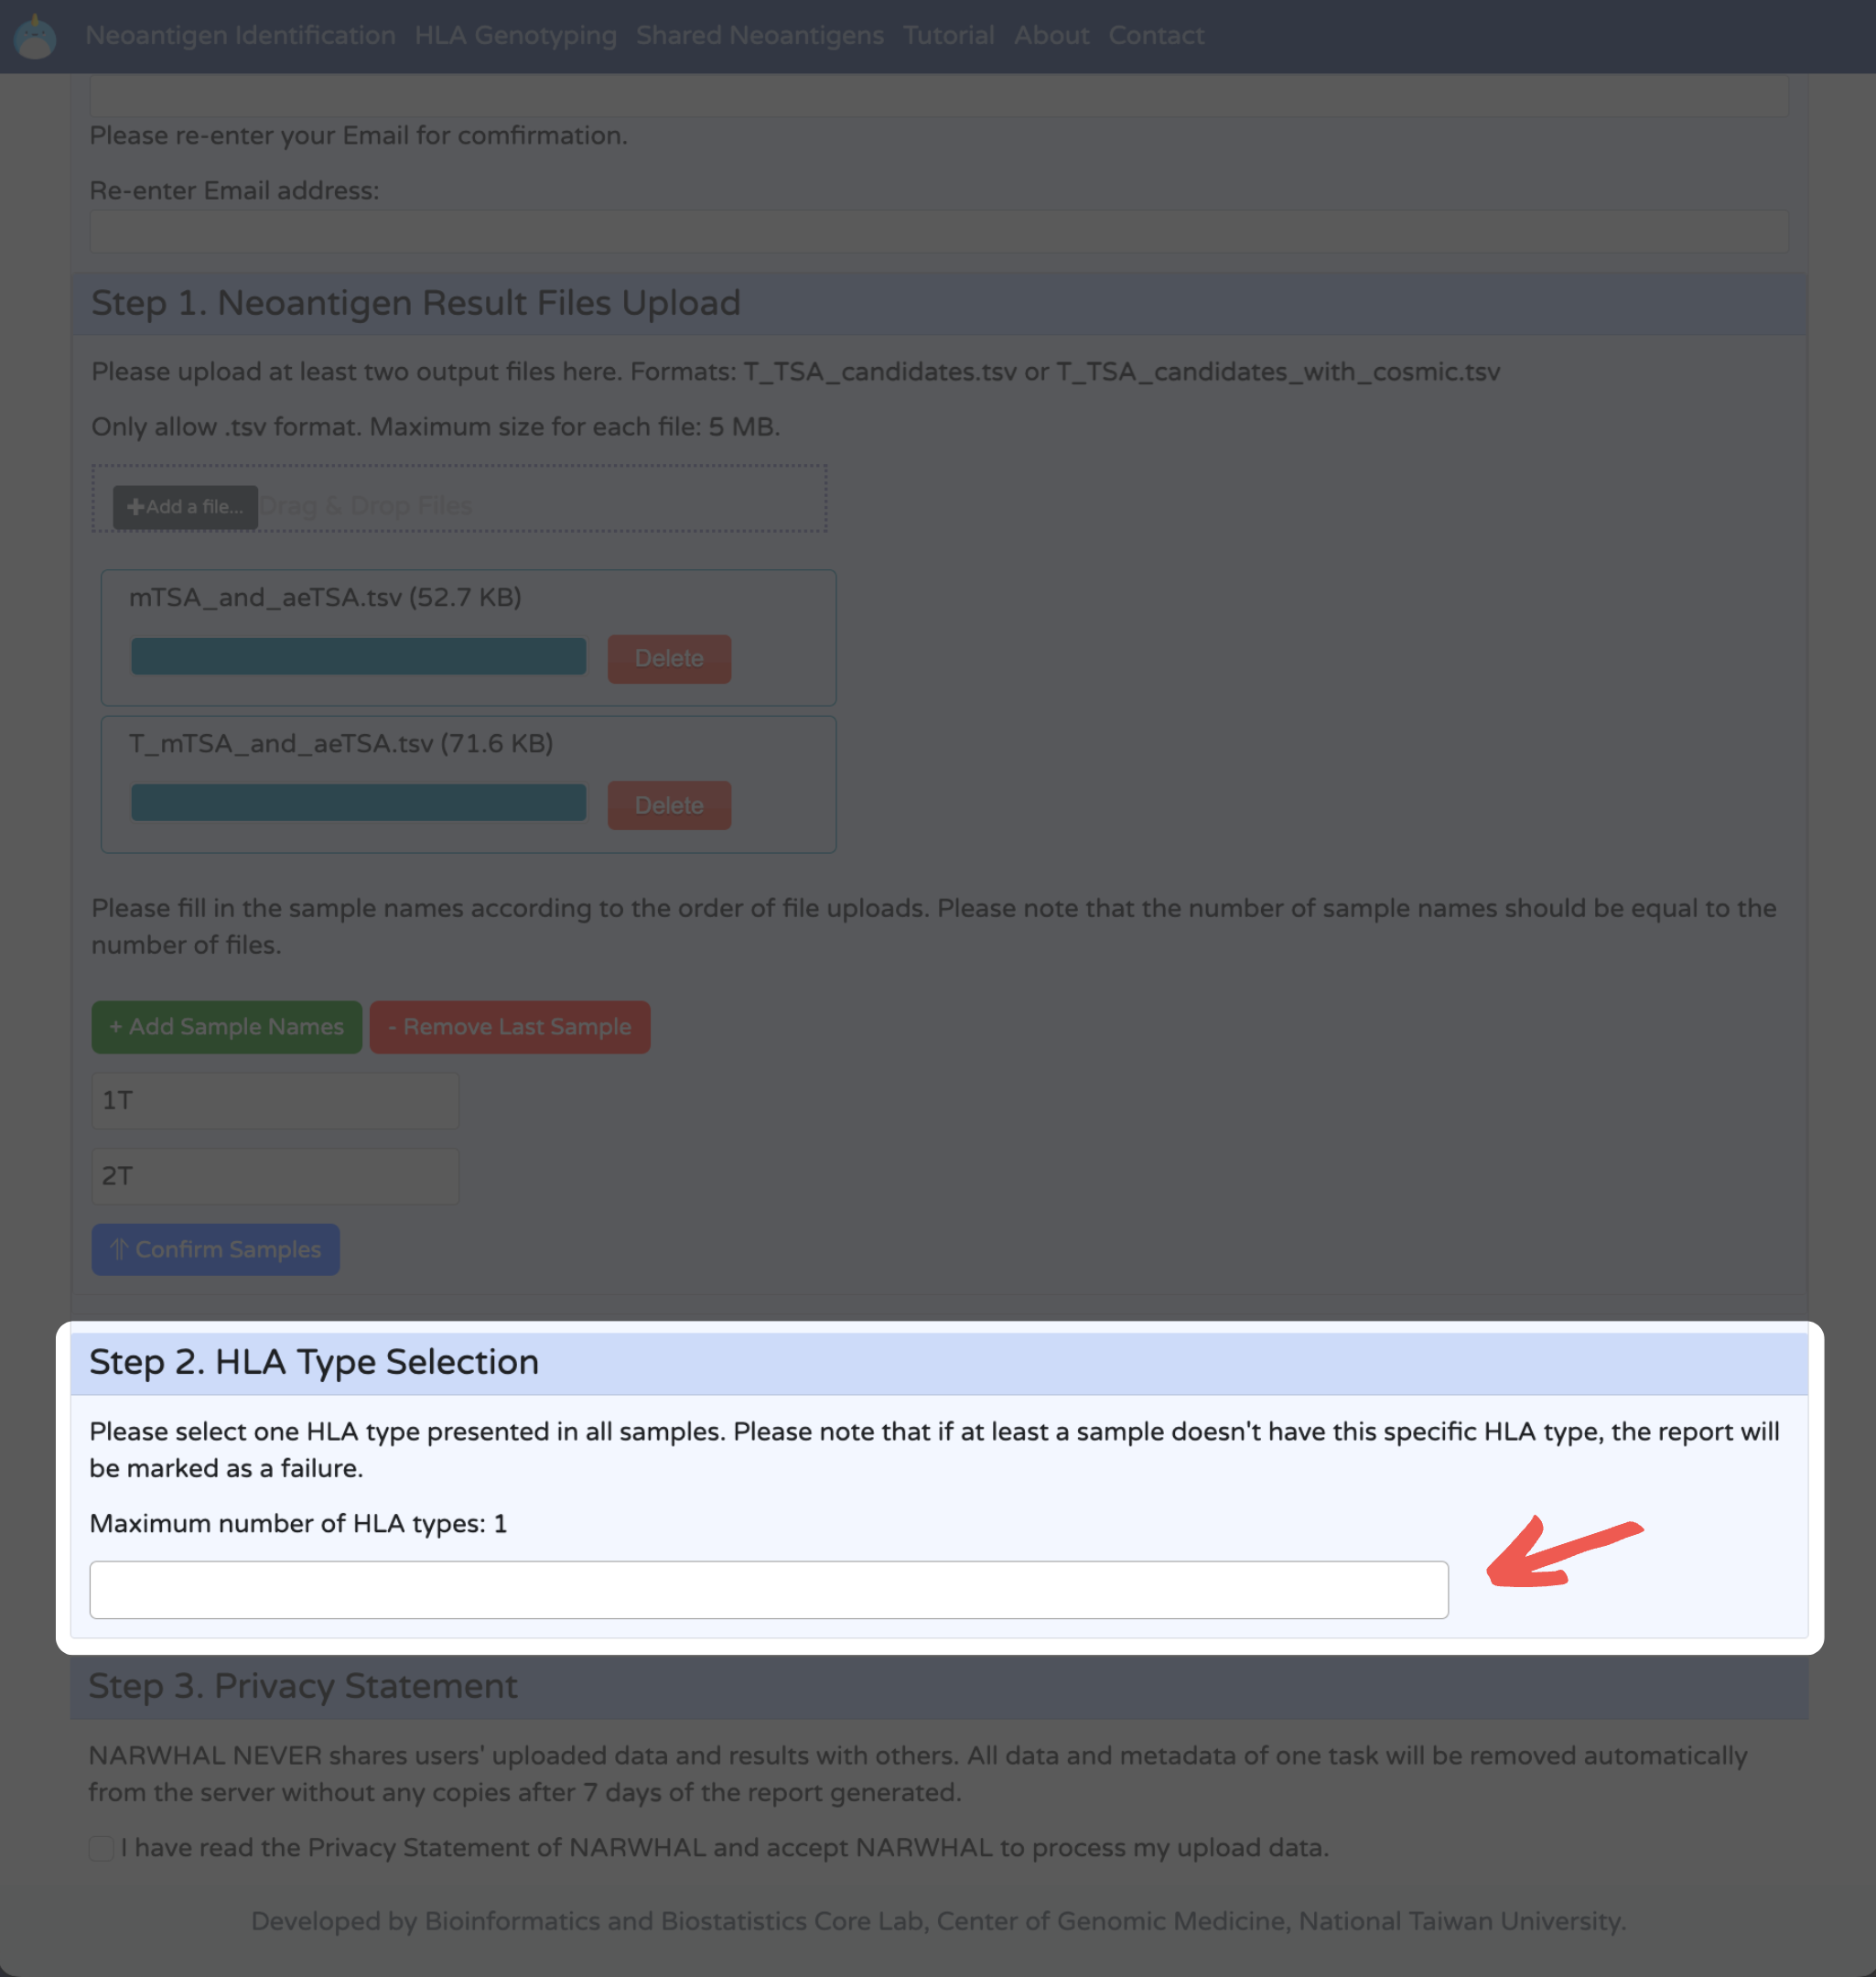
3. Select a Specific HLA Type: Select one HLA type presented in all samples.
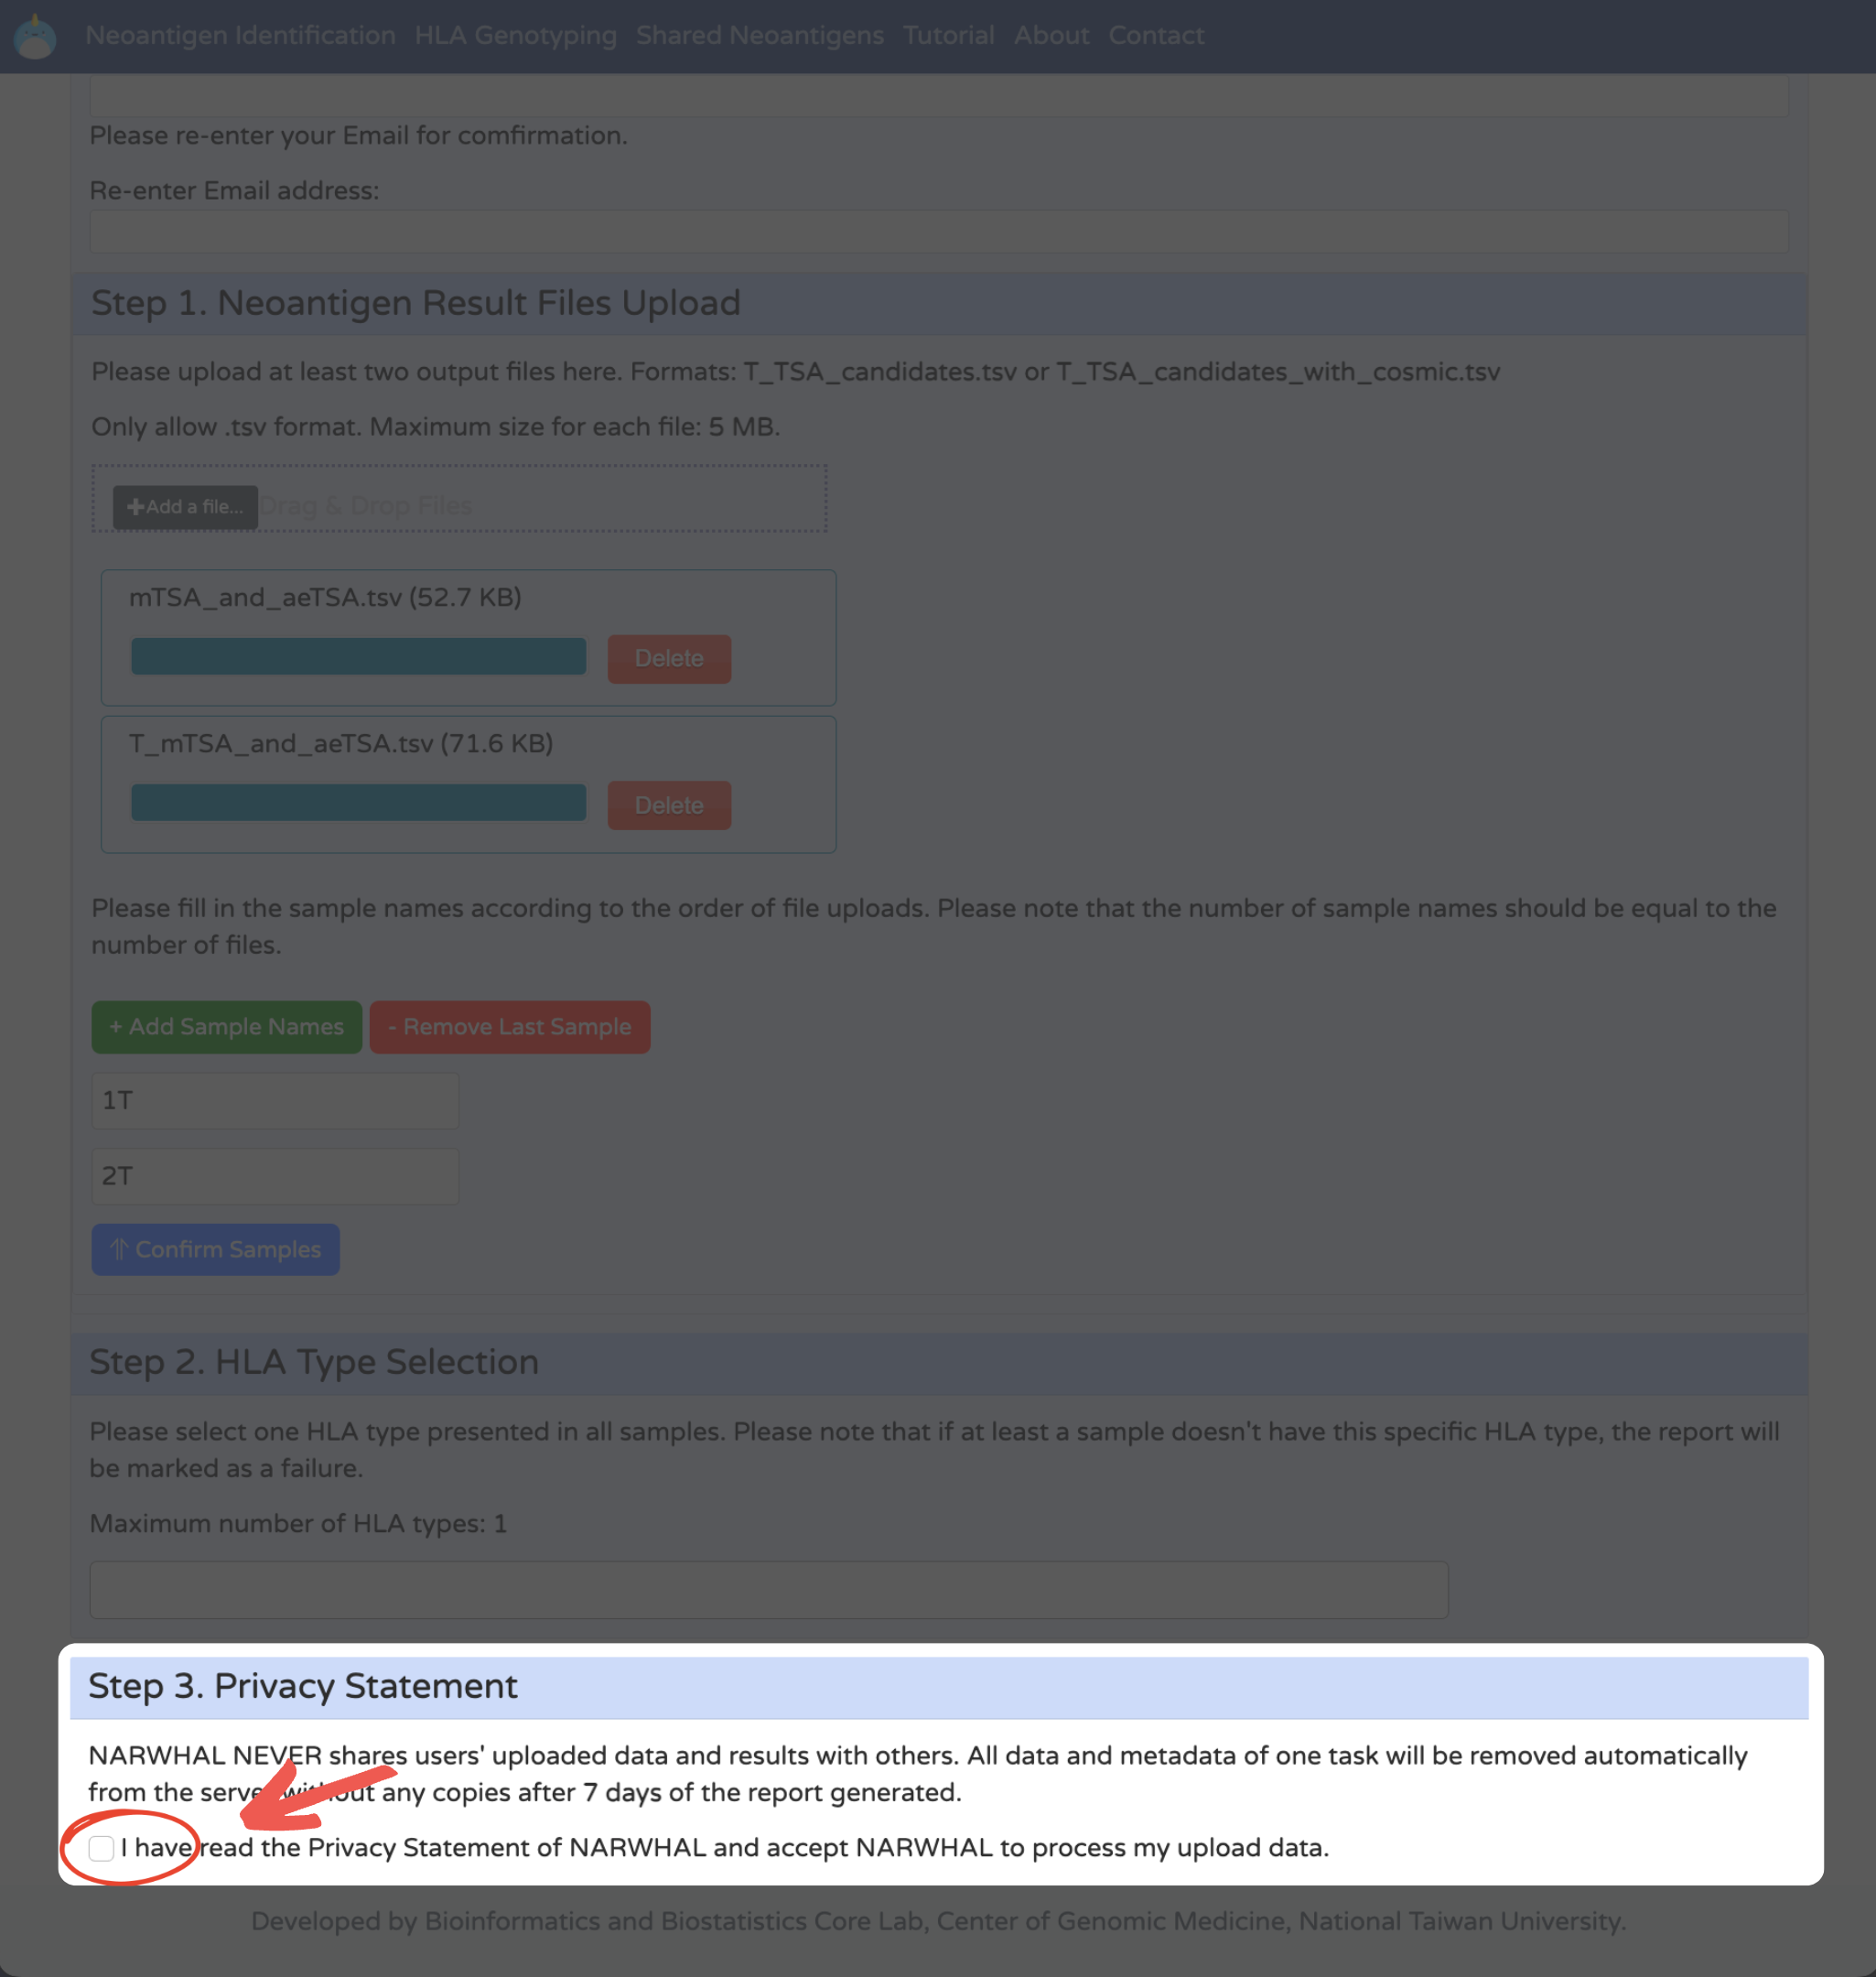
4. Agree to Privacy Statement and Submit the Task: Click "Submit" to start the analysis.
5. Report: Download the final TSV files and figures from the dashboard.